Using Spaces
1. Personal Space Operations
1.1 Creating New Applications in Personal Space
1.1.1 Creating a Blank Application
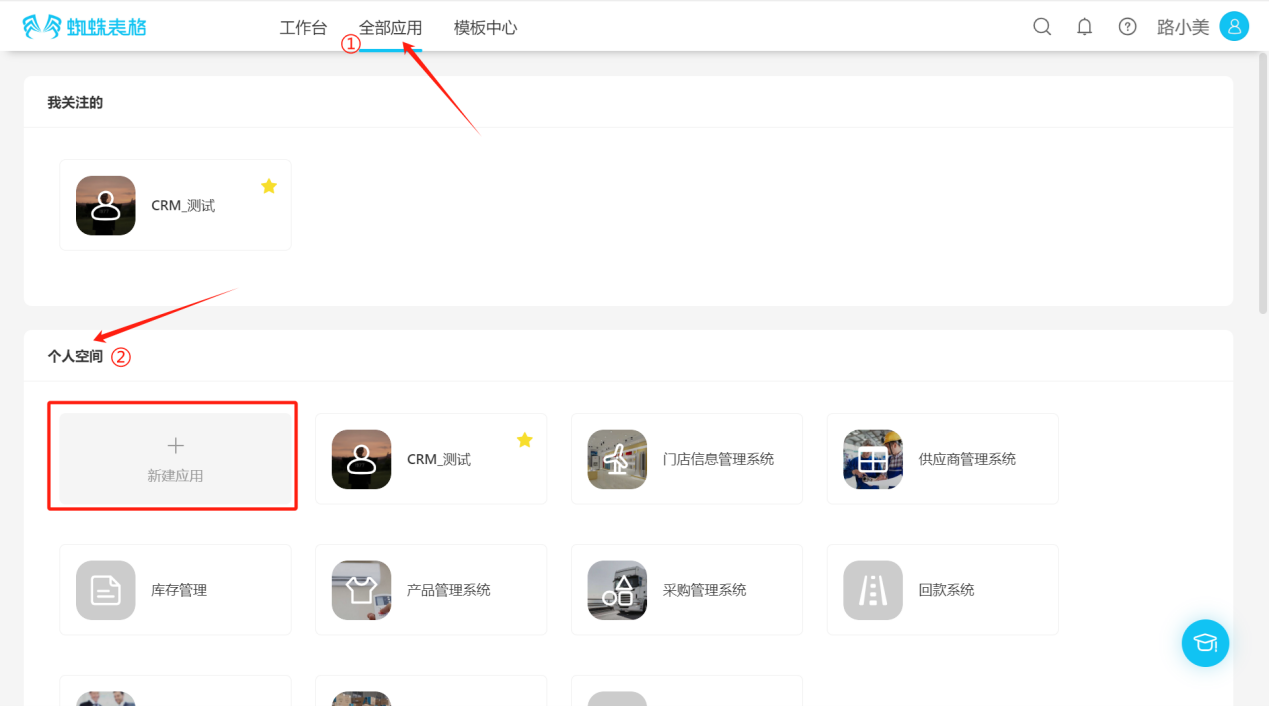
Step 1: Choose any of the following entry points to open the "Create Application" popup
- Workspace → Left Menu → Create Application
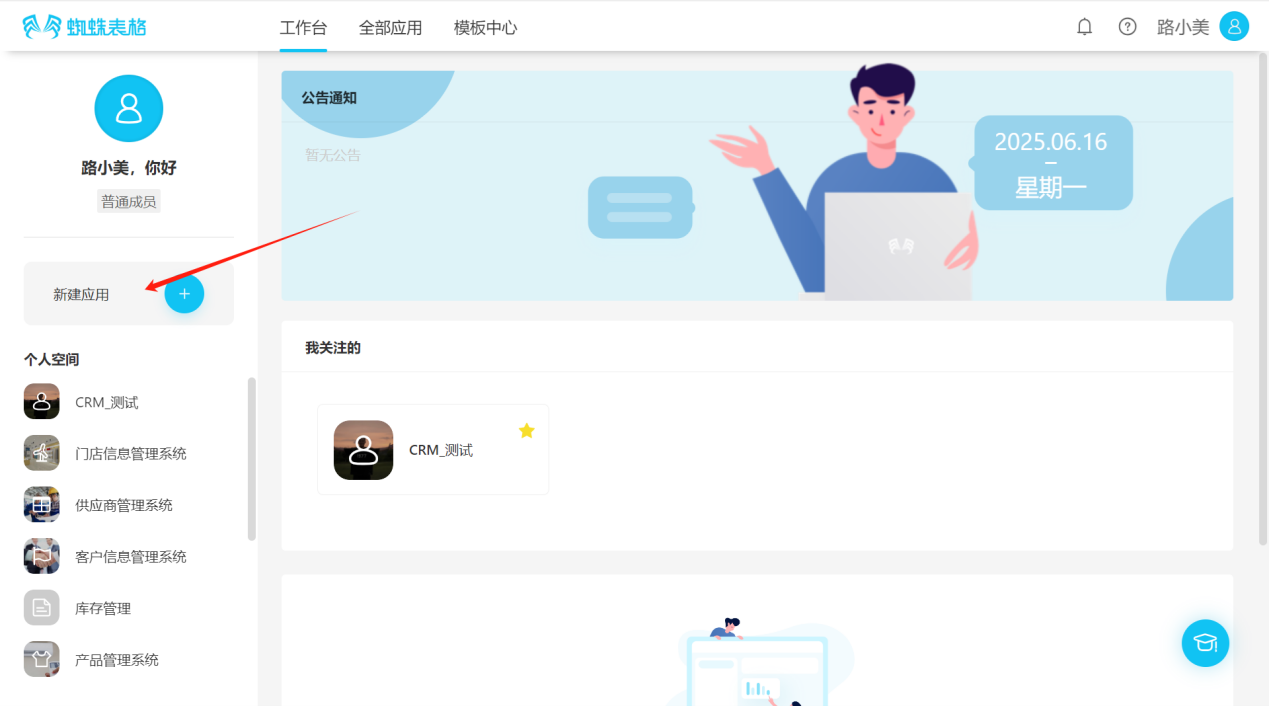
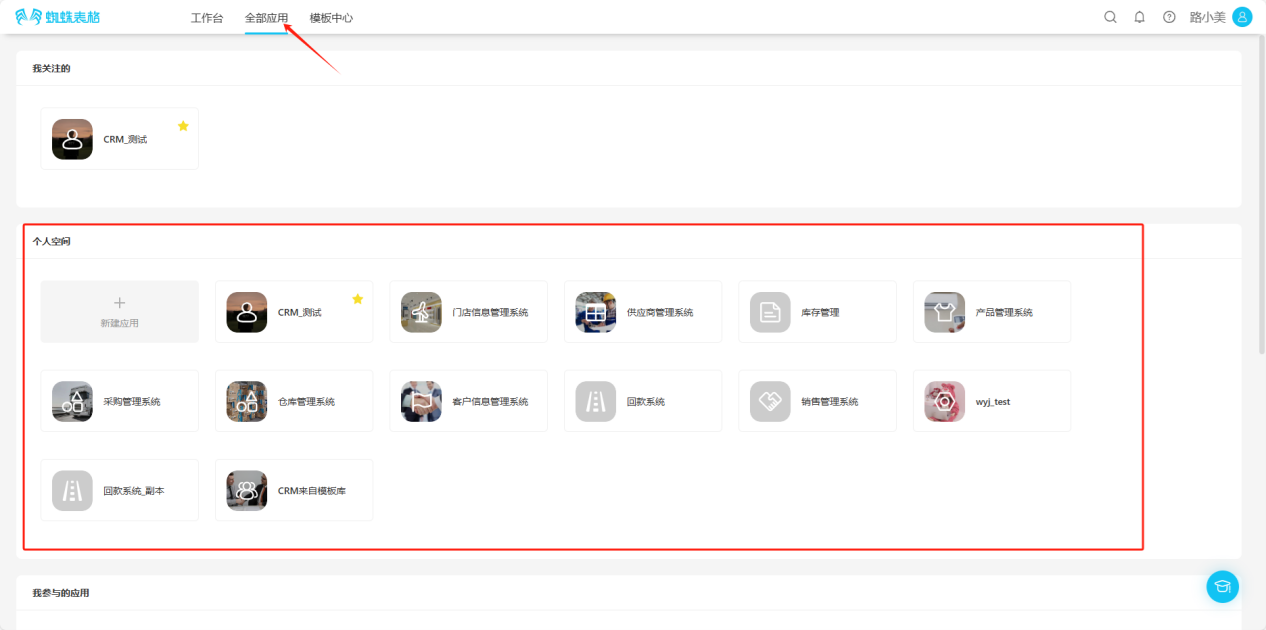
- All Applications → Personal Space → Create Application
Step 2: In the "Create Application" popup page, select "Create Blank Application" to enter the "Application Settings" popup.

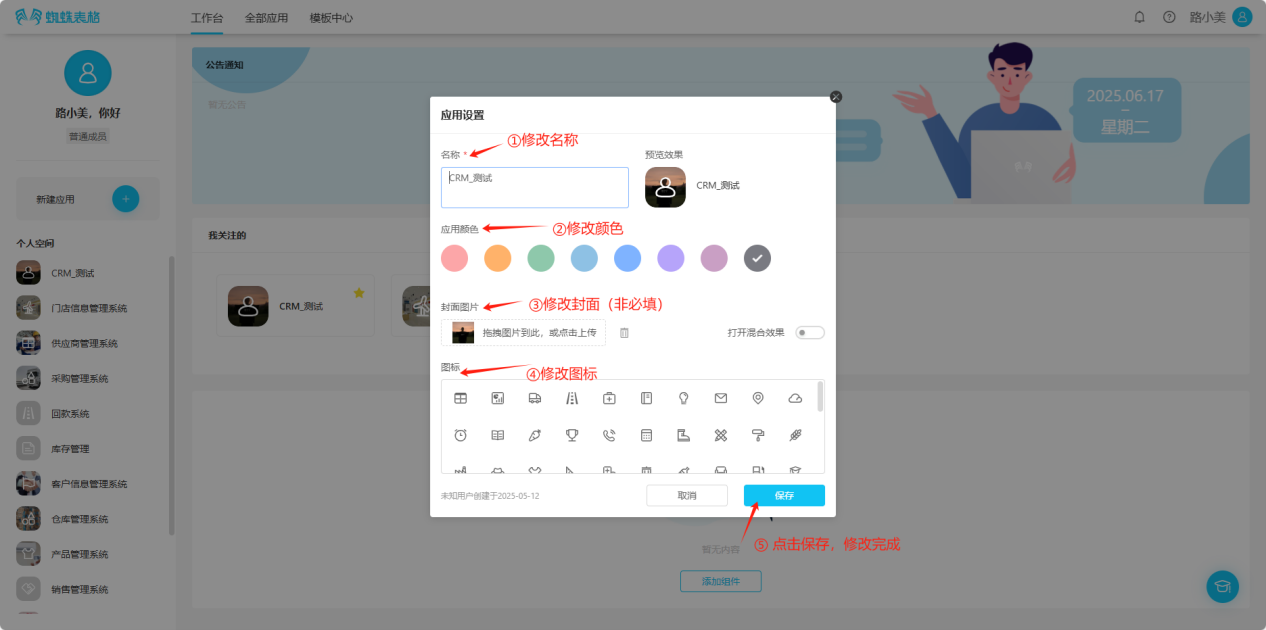
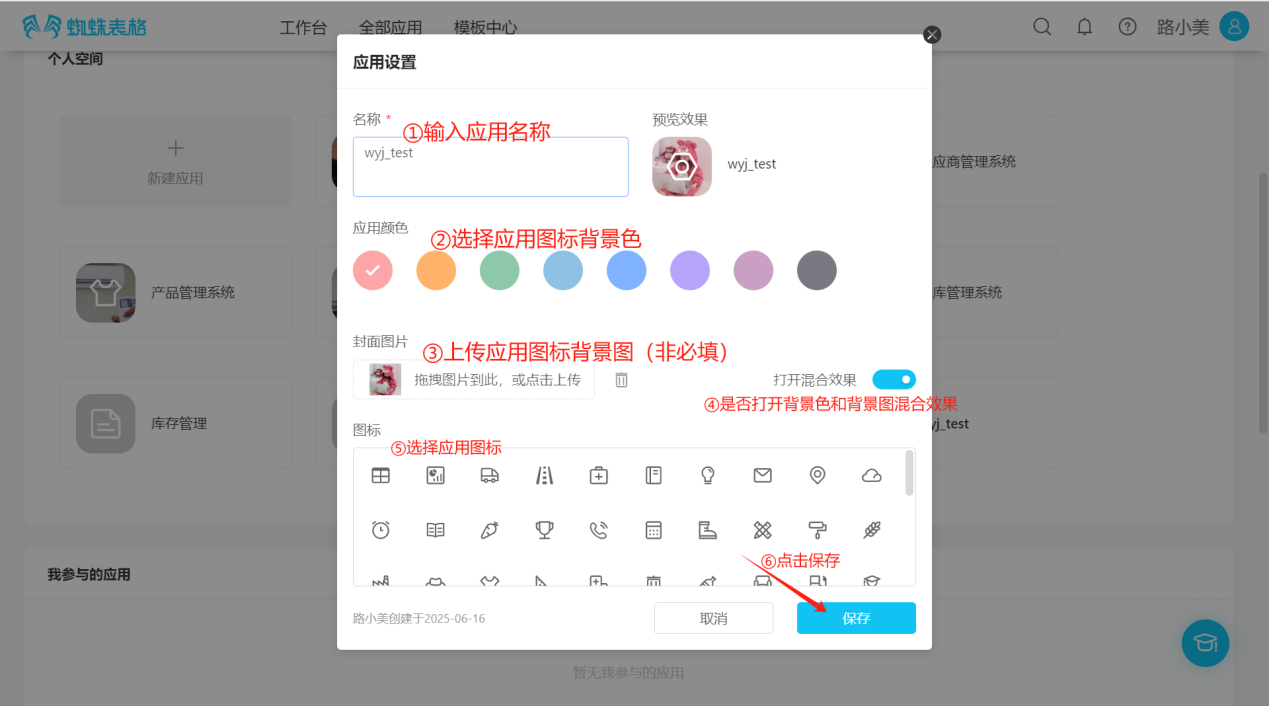
Step 3: In the "Application Settings" popup page, enter or select the application's name, color, icon, etc., and select "Save" to successfully create the application.

1.1.2 Creating Applications Using Templates
Step 1: Follow the "SpiderSheet" official account, reply "template" to get activation codes and templates.
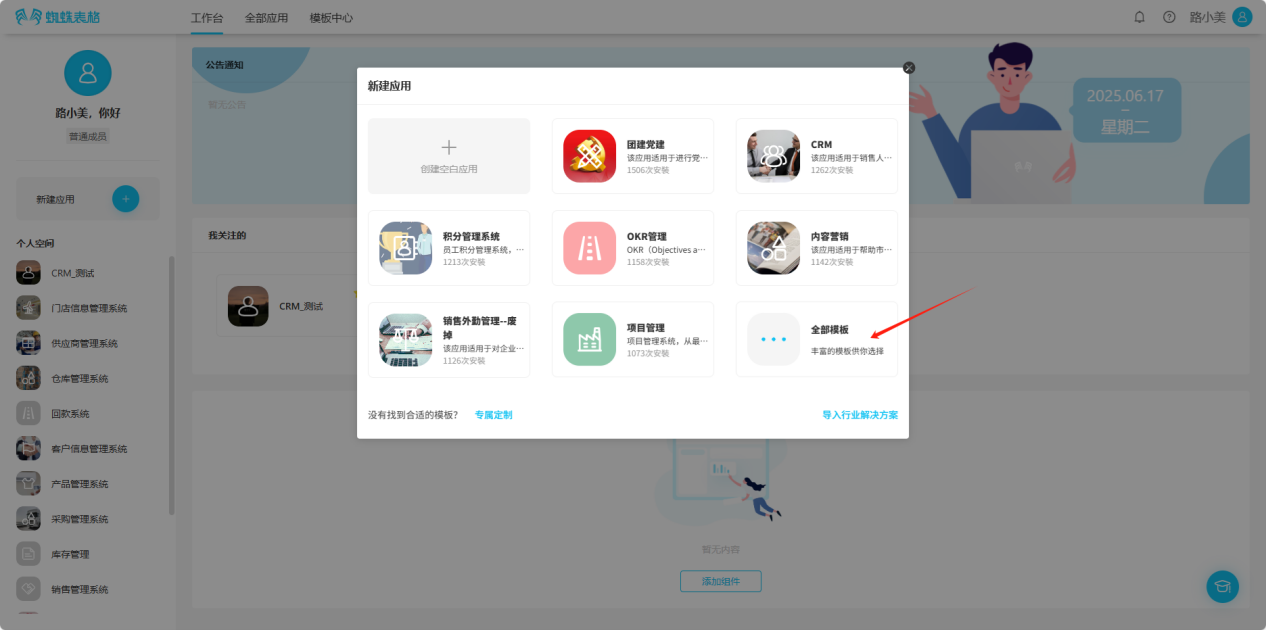
Step 2: Enter the "Create Application" popup or directly click Template Center, select an appropriate template, click "Install Now", click "All Templates" to view more templates.
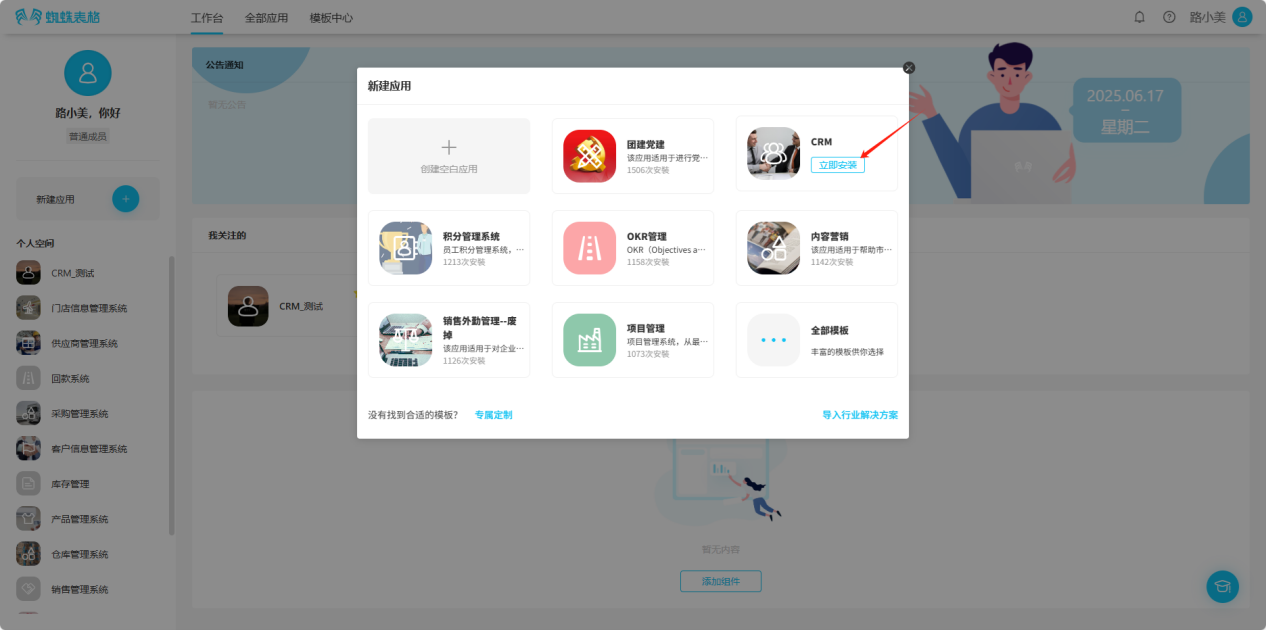
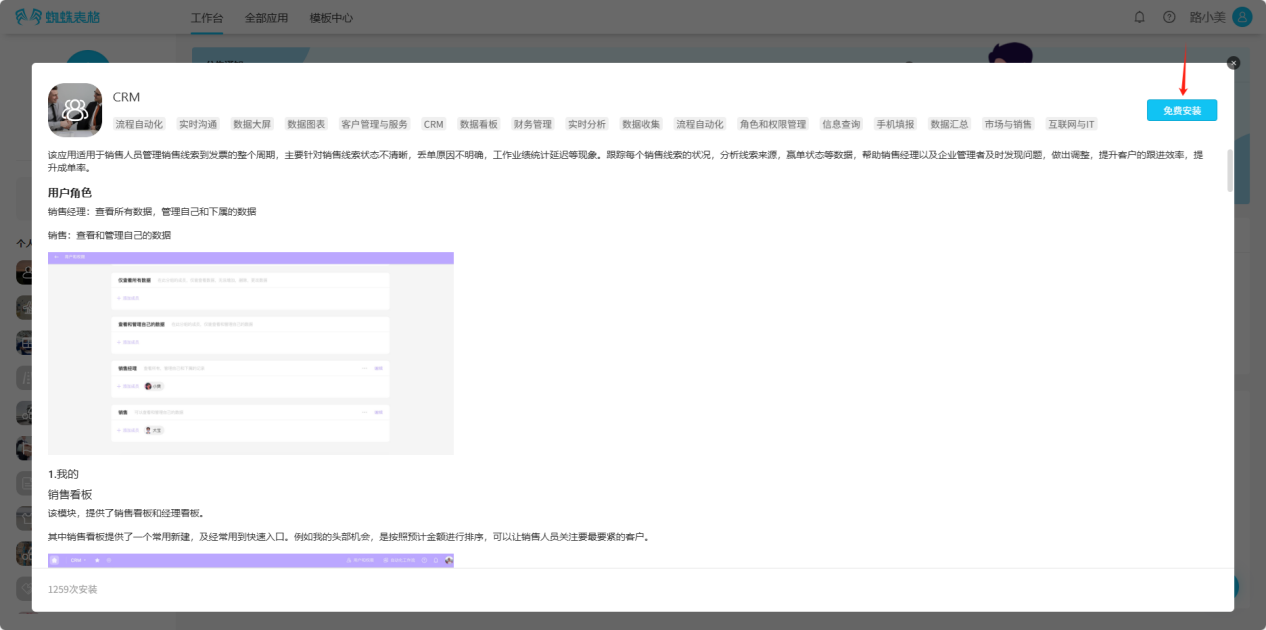
Step 3: In the popup window, view the detailed introduction and illustrations of the template, confirm whether it matches your needs, and then select "Free Install".

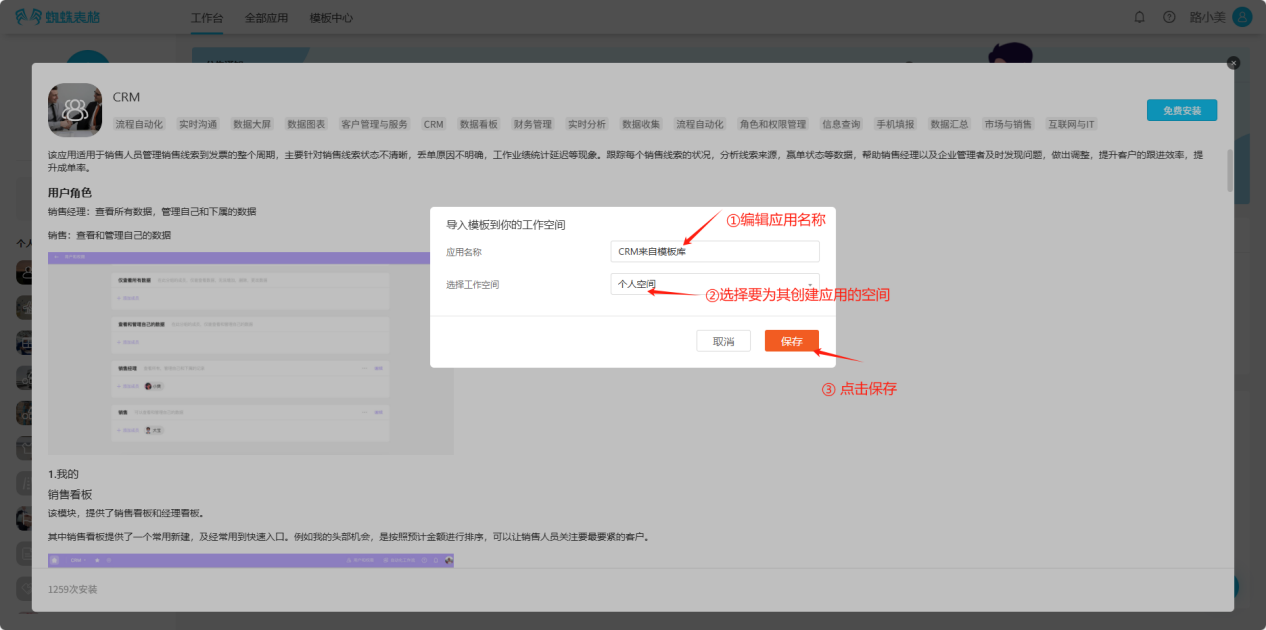
Step 4: In the popup window, edit the application name and space, choose whether to copy data, click "Copy", and wait for installation. The installed template will appear in the corresponding space application list.
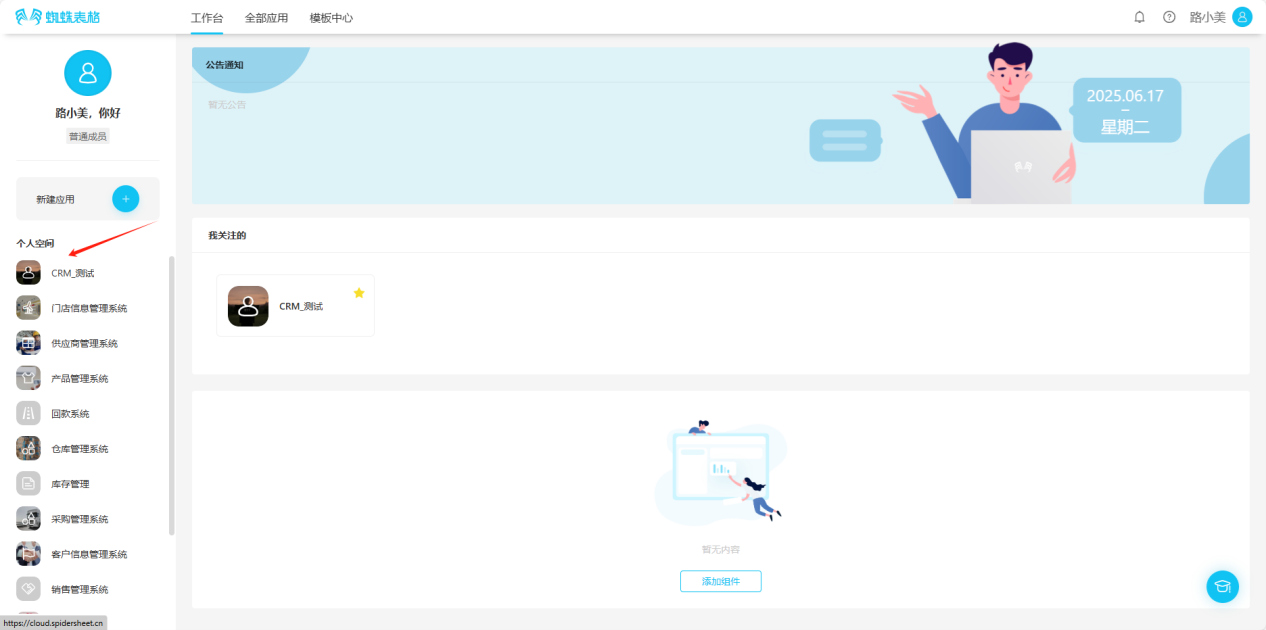
1.2 Viewing Personal Space Applications
【Includes custom-created applications and applications installed using templates. Choose any of the following ways to view all applications】
- Workspace → Left Personal Space
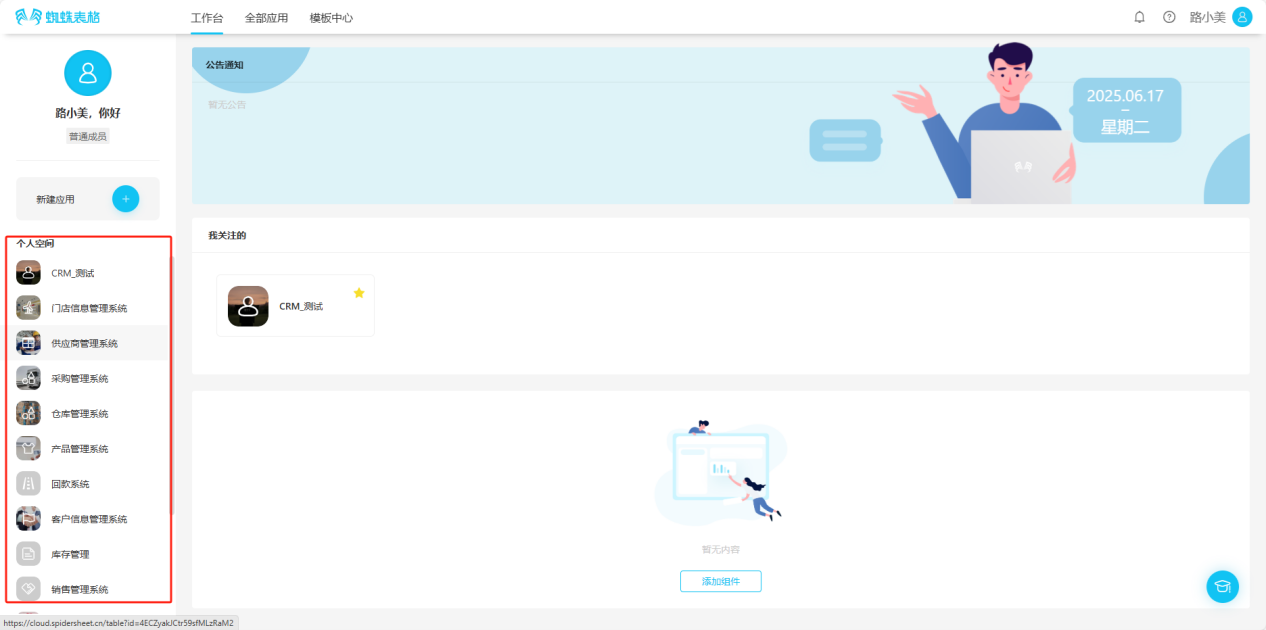
- All Applications → Personal Space
1.3 Editing Personal Space Applications
1.3.1 Rename/Color/Icon
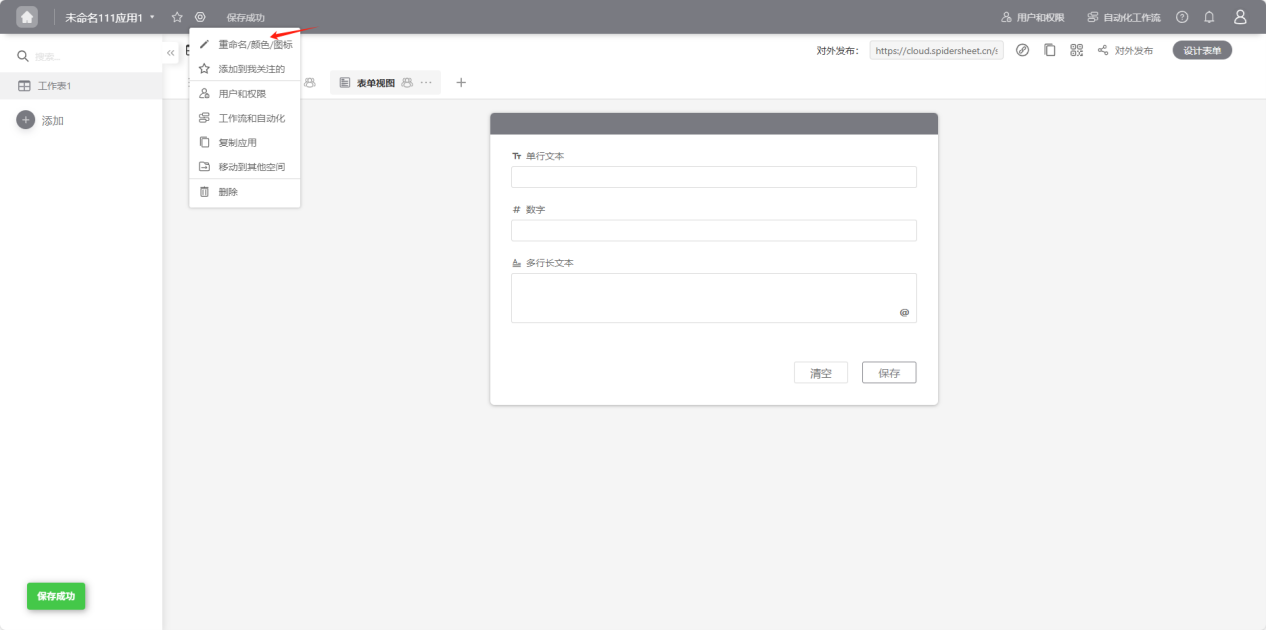
Step 1: Open the "Edit Operation Selection" dropdown, select "Rename/Color/Icon", and enter the "Application Settings" popup.
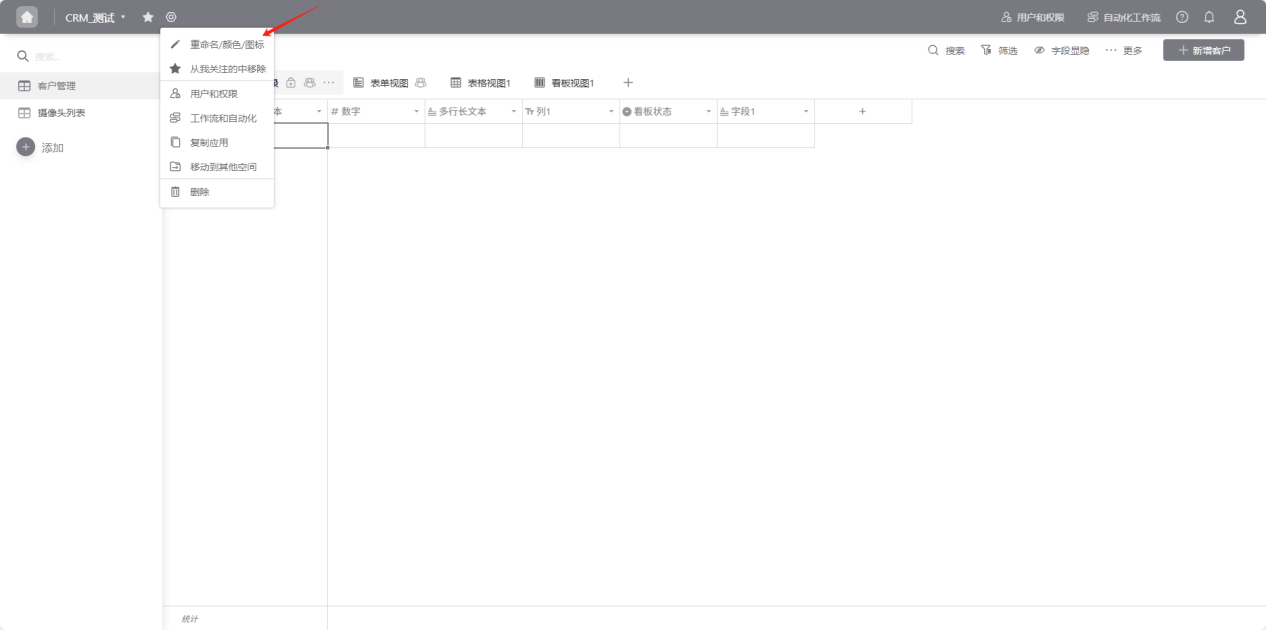

Step 2: Make changes to name, color, icon, etc. in the "Application Settings" popup.
1.3.2 Following Applications and Removing Follows
(1) Following Applications
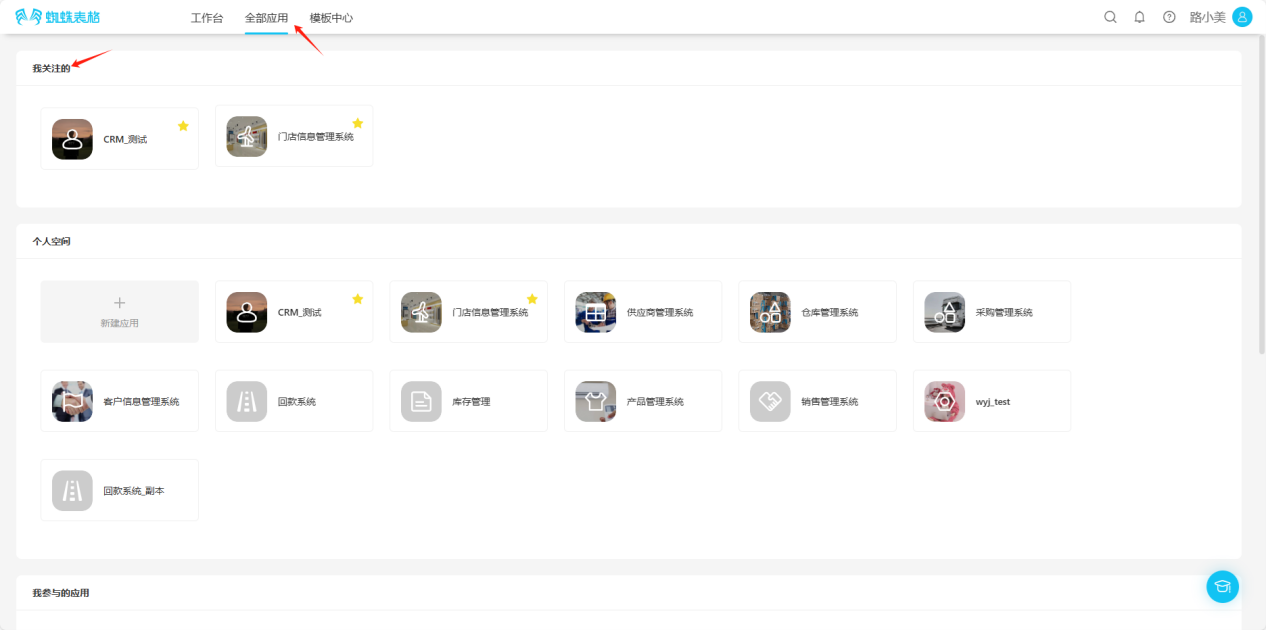
- All Applications → Personal Space → Open the "Edit Operation Selection" dropdown, select "Add to My Favorites", when the edit operation prompt text changes from "☆ Add to My Favorites" to "★ Remove from My Favorites", the follow is successful.

- All Applications → Personal Space → Click the "☆" in the upper right corner of the application you want to follow, the icon changes to "★", indicating successful follow.

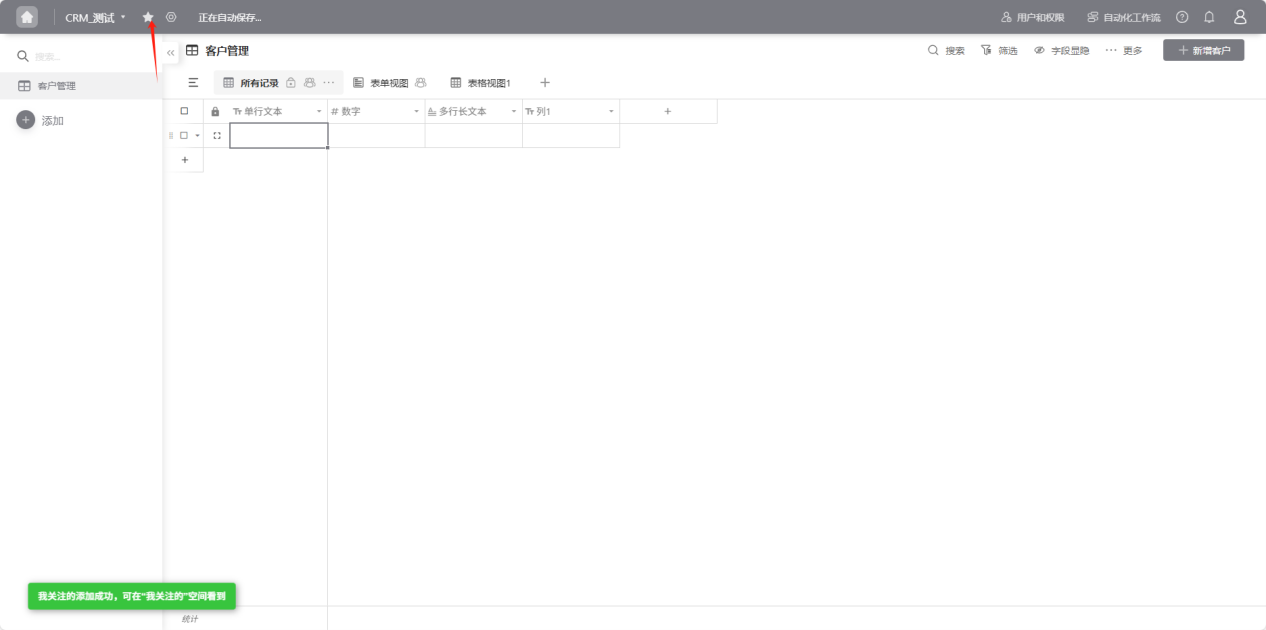
- From the workspace left application list or application cards under all applications, enter the application you want to follow, click the "☆" to the right of the application name, the icon changes to "★", indicating successful follow.

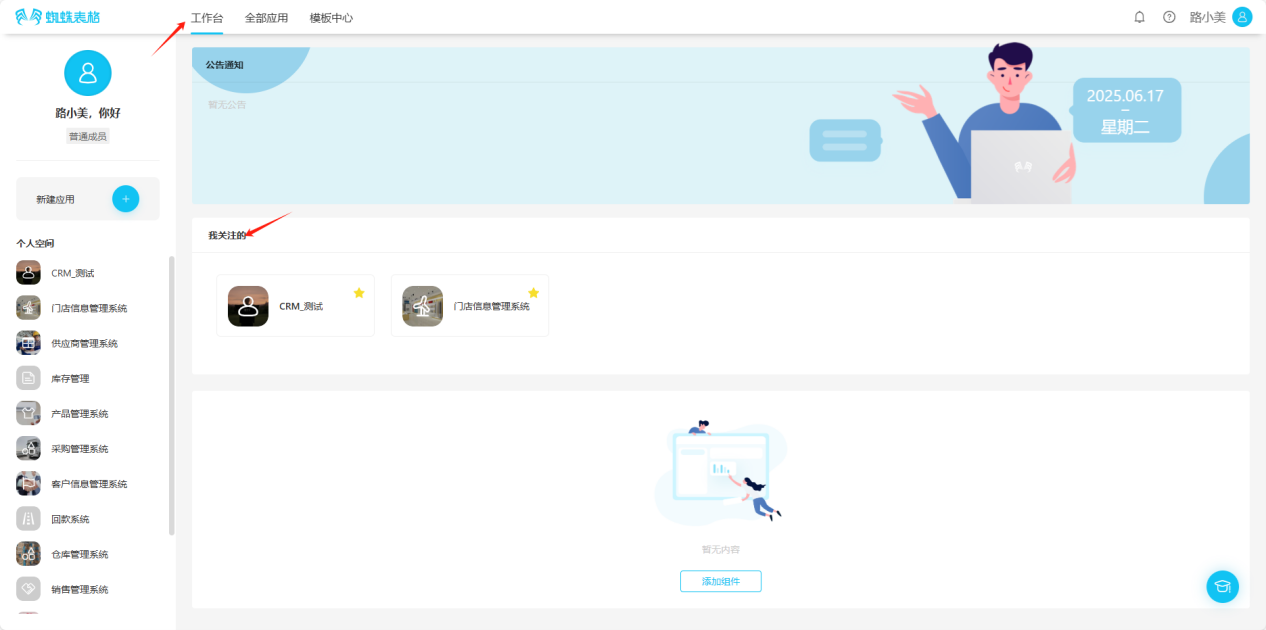
(2) Viewing Followed Applications 【Choose any of the following methods】
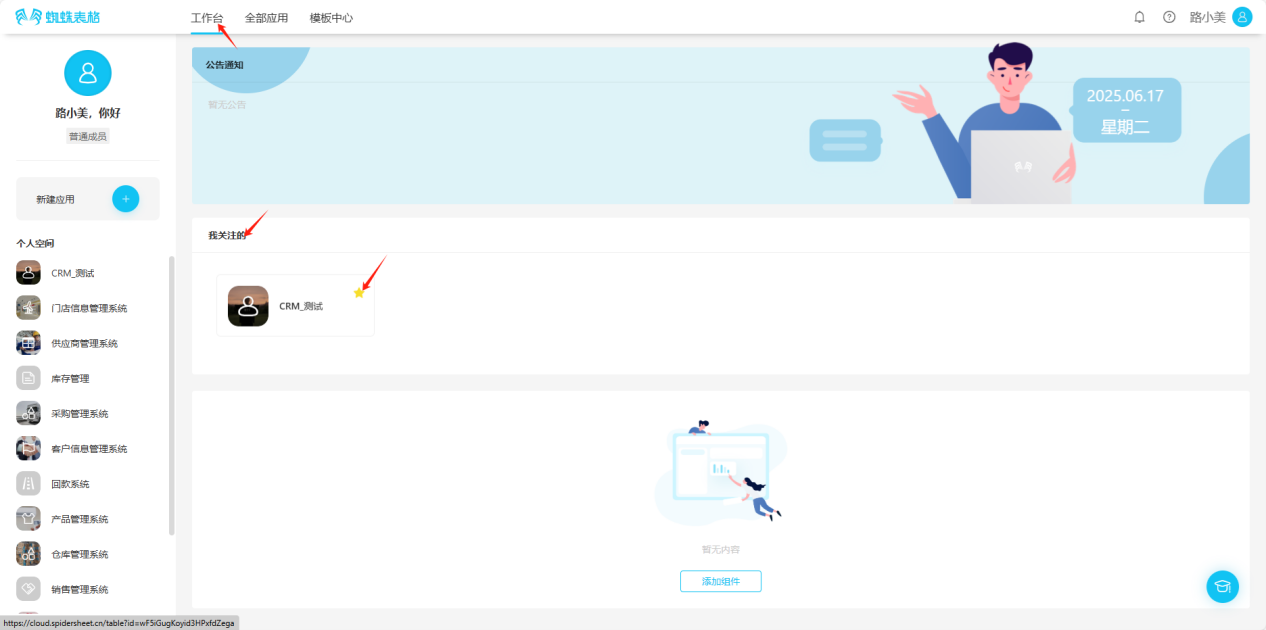
- Workspace → My Favorites

- All Applications → My Favorites
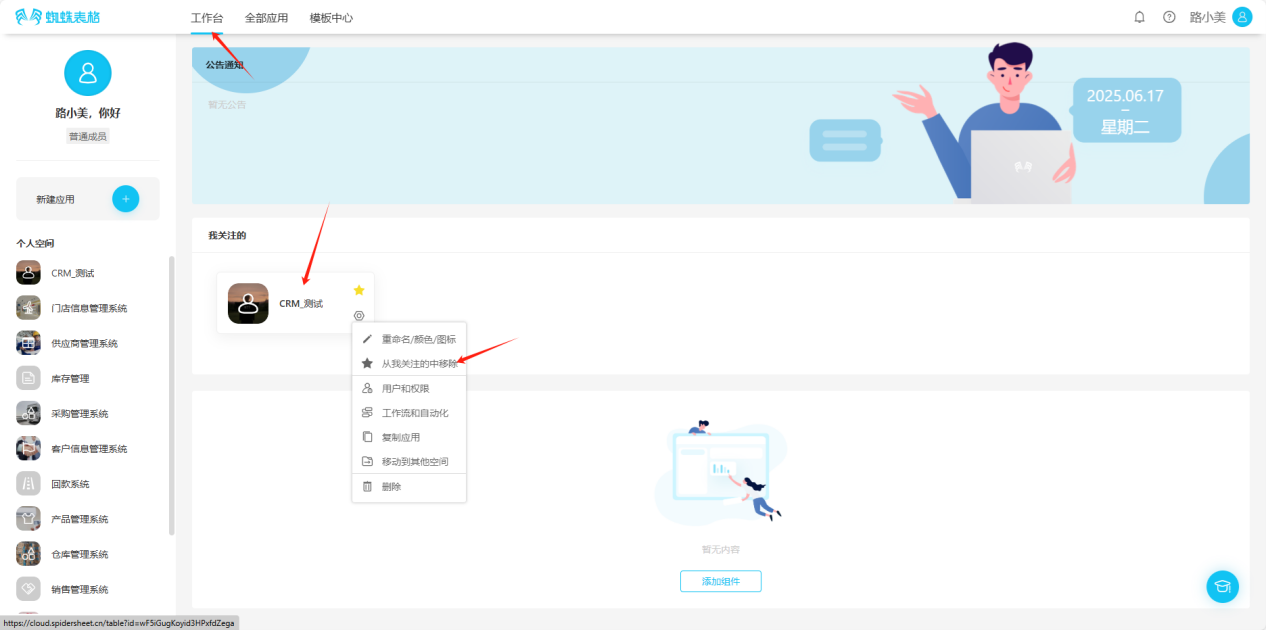
(3) Removing Followed Applications
【Choose any of the following methods】
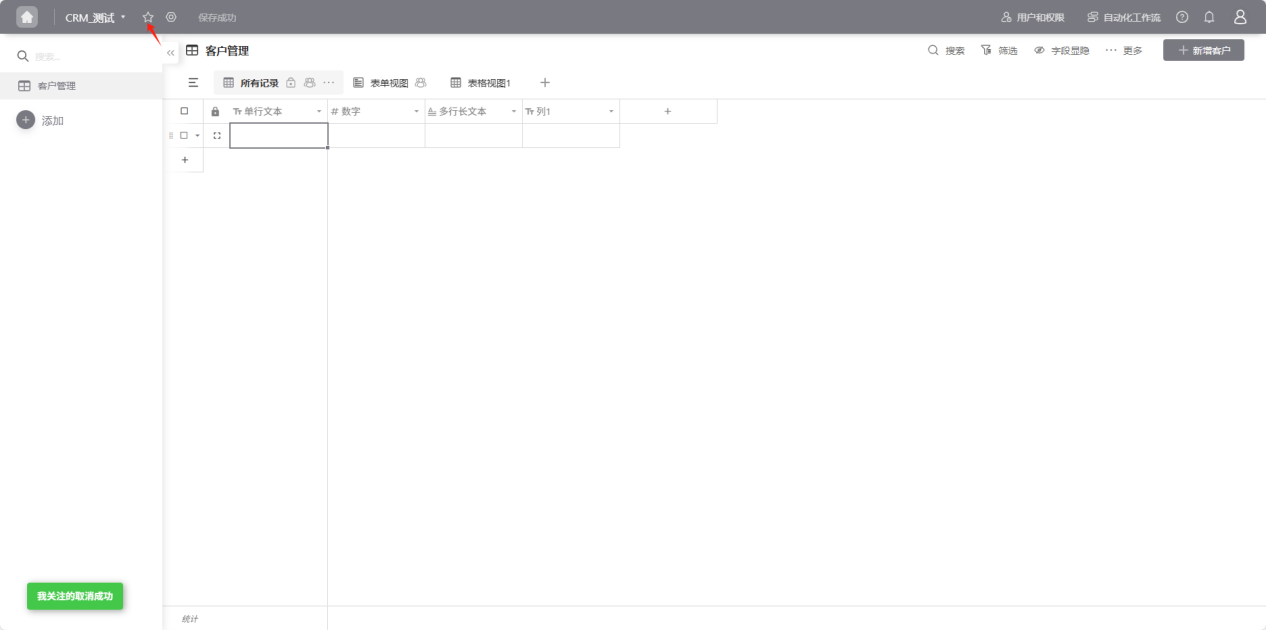
- Workspace → My Favorites → Click the "★" in the upper right corner of the application to remove from favorites, or click the "
 " in the lower right corner of the application, select "Remove from My Favorites" in the edit list, the application disappears from "My Favorites", indicating successful removal.
- All Applications → My Favorites → Click the "★" in the upper right corner of the application to remove from favorites, or click the "" in the lower right corner of the application, select "Remove from My Favorites" in the edit list, the application disappears from "My Favorites", indicating successful removal.


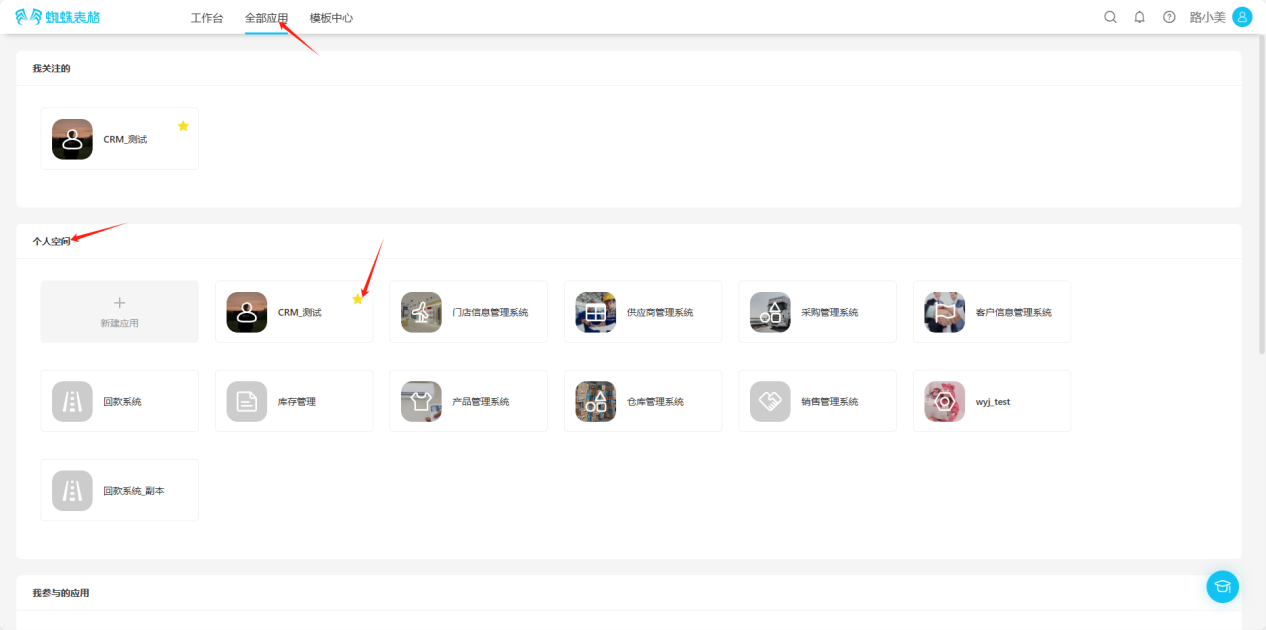
- All Applications → Personal Space → Click the "★" in the upper right corner of the application to remove from favorites, the icon will change from "★" to "☆", or click the "" in the lower right corner of the application, select "Remove from My Favorites" in the edit list, when the edit operation prompt text changes from "★ Remove from My Favorites" to "☆ Add to My Favorites", the removal is successful.

- From the workspace left application list or application cards under all applications, enter the application you want to remove from favorites, click the "★" to the right of the application name, the icon changes to "☆" or click the "" to the right of the application, select "Remove from My Favorites" in the edit list, when the edit operation prompt text changes from "★ Remove from My Favorites" to "☆ Add to My Favorites", the removal is successful.

1.3.3 Users and Permissions
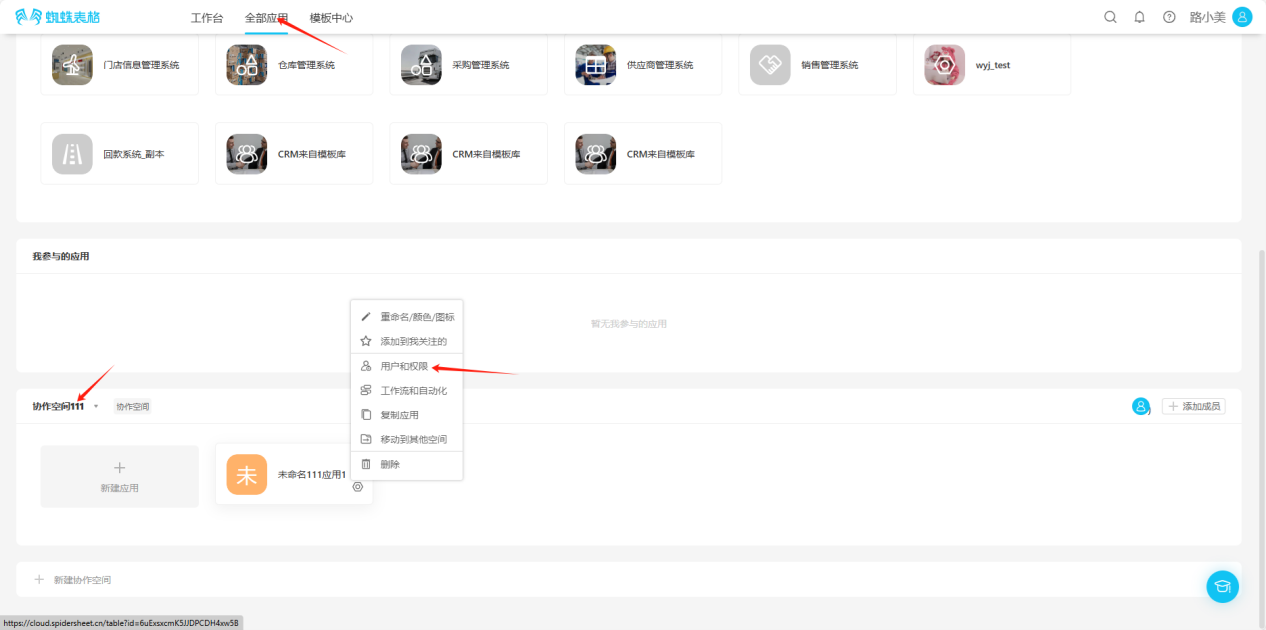
Step 1: Choose any of the following entry points to access "Users and Permissions"
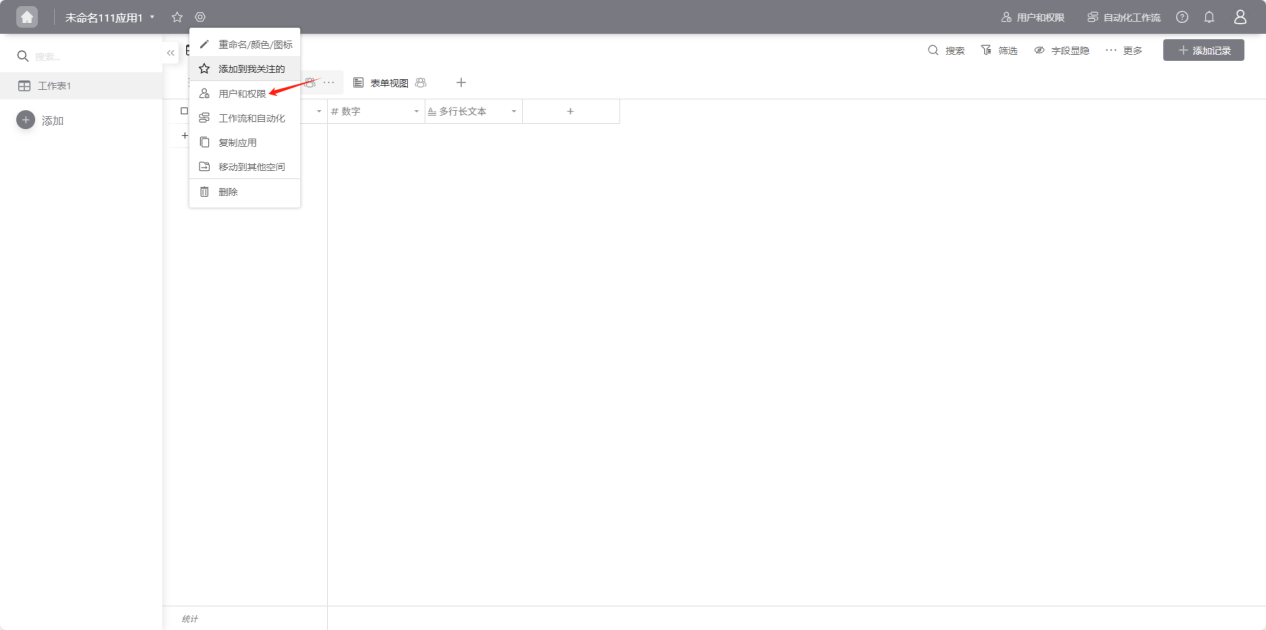
- Open the "Edit List" operation selection dropdown, select "Users and Permissions", and enter the permissions settings page.

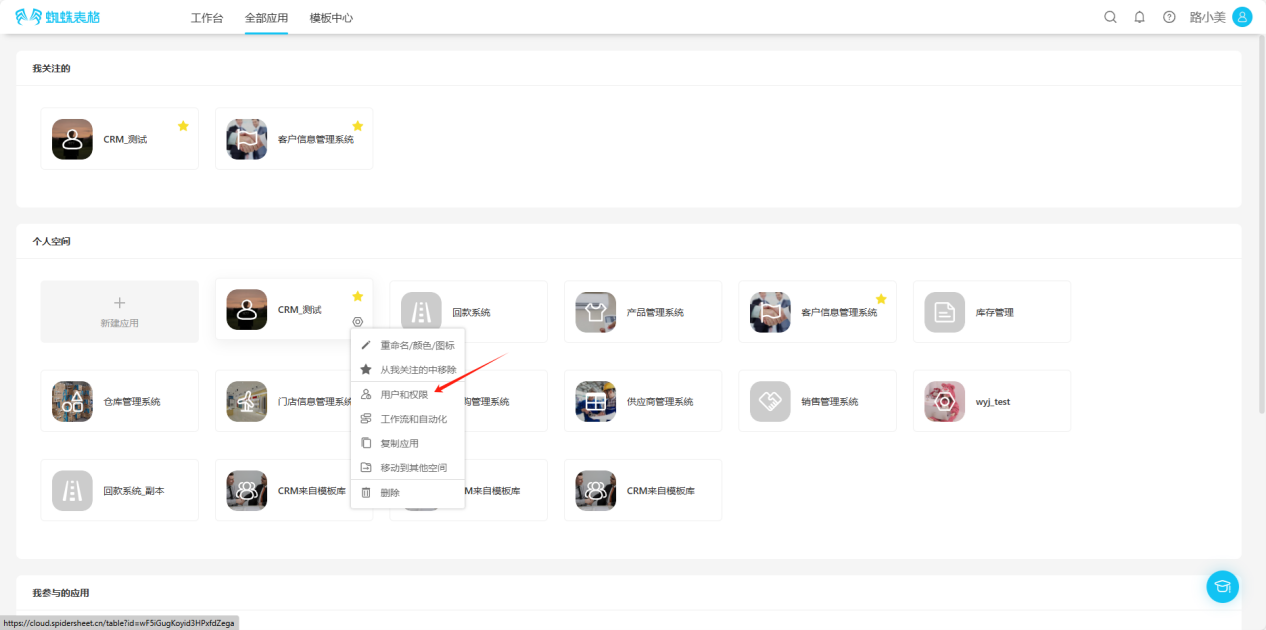
- From the workspace left application list or application cards under all applications, enter the application you want to set permissions for, click "Users and Permissions" in the upper right corner to enter the permissions settings page.

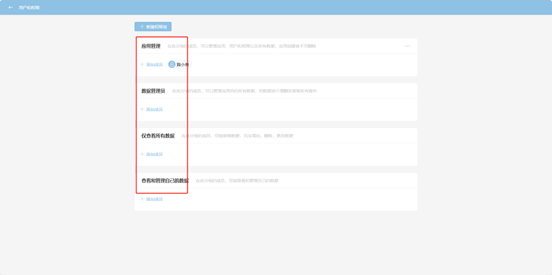
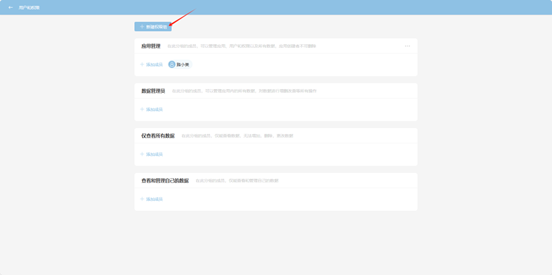
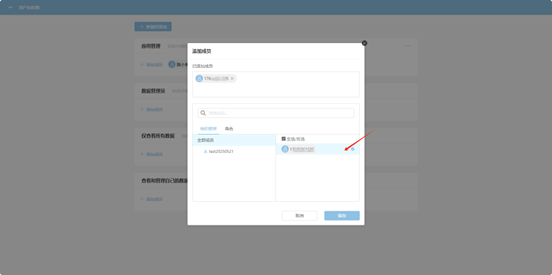
Step 2: Select the permission group to set and add members.
【Application Management represents members in this group who can manage applications, users and permissions, and all data. Application creators cannot be deleted】
【Data Administrator represents members in this group who can manage all data within the application and perform all operations on data including create, read, update, and delete】
【View Only Data represents members in this group who can only view data and cannot add, delete, or modify data】
【View and Manage Own Data represents members in this group who can only view and manage their own data】
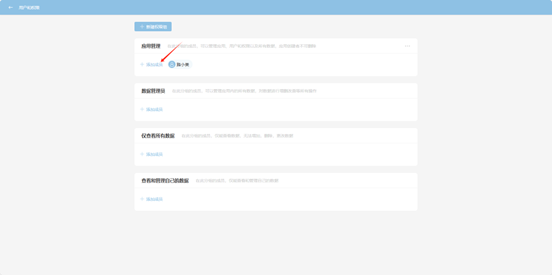

Step 3: If none of the above groups meet your needs, you can select "Create New Permission Group".
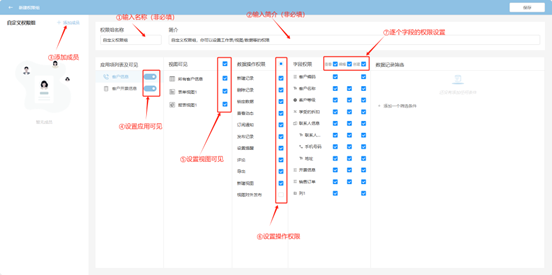
Step 4: In the popup page, set permissions sequentially. The finest granularity can support field-level create, read, update, and delete operations. After completing the settings, click "Save" to take effect.
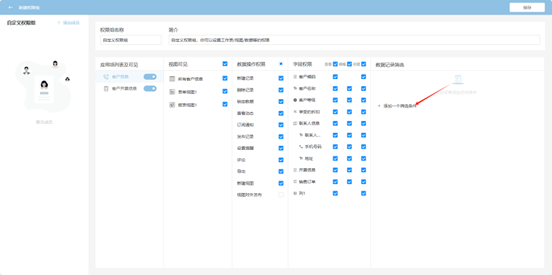
Step 5: If this permission group has filtering requirements for data, you can click "Add a Filter Condition".
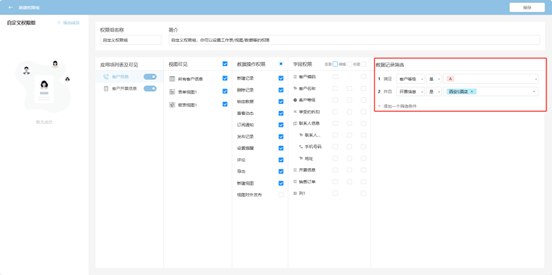
Step 6: The data filtered by the filter conditions is the range of data rows that users in this permission group can operate on, i.e., when a certain field meets certain conditions. Multiple filter conditions are applied simultaneously. After completing the settings, click "Save" to take effect.
1.3.4 Automated Workflow
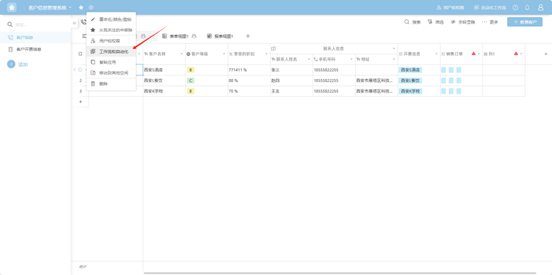
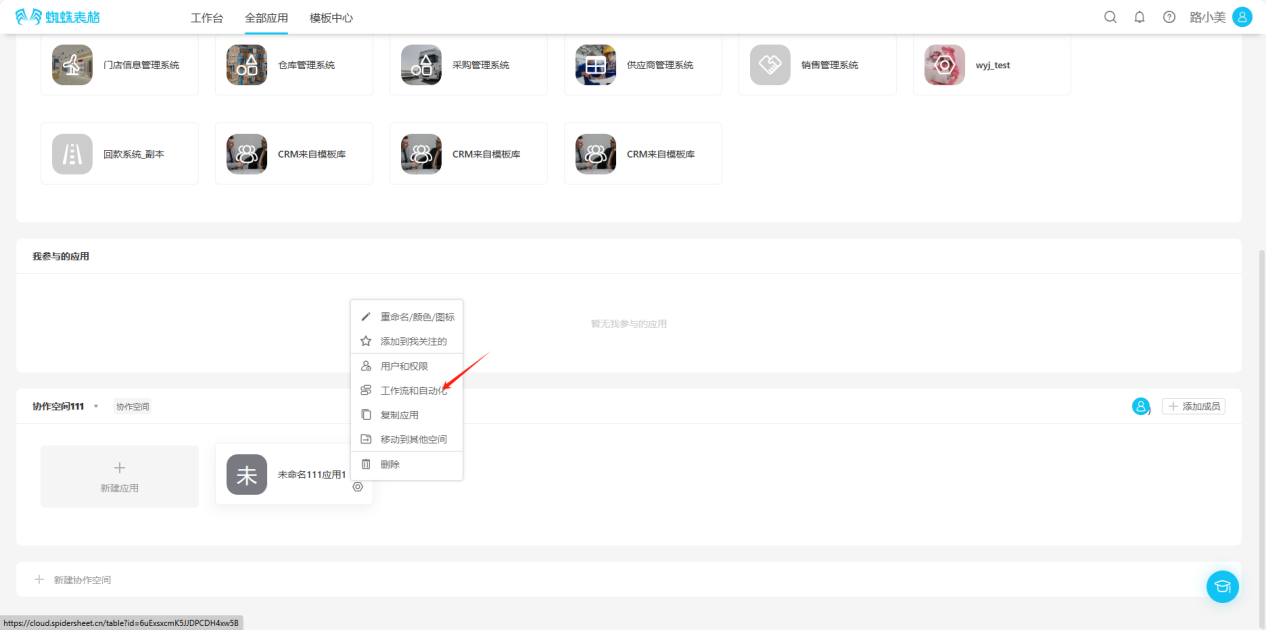
Step 1: Choose any of the following entry points to access "Automated Workflow"
- Open the "Edit List" operation selection dropdown, select "Workflow & Automation", and enter the automated workflow settings page.

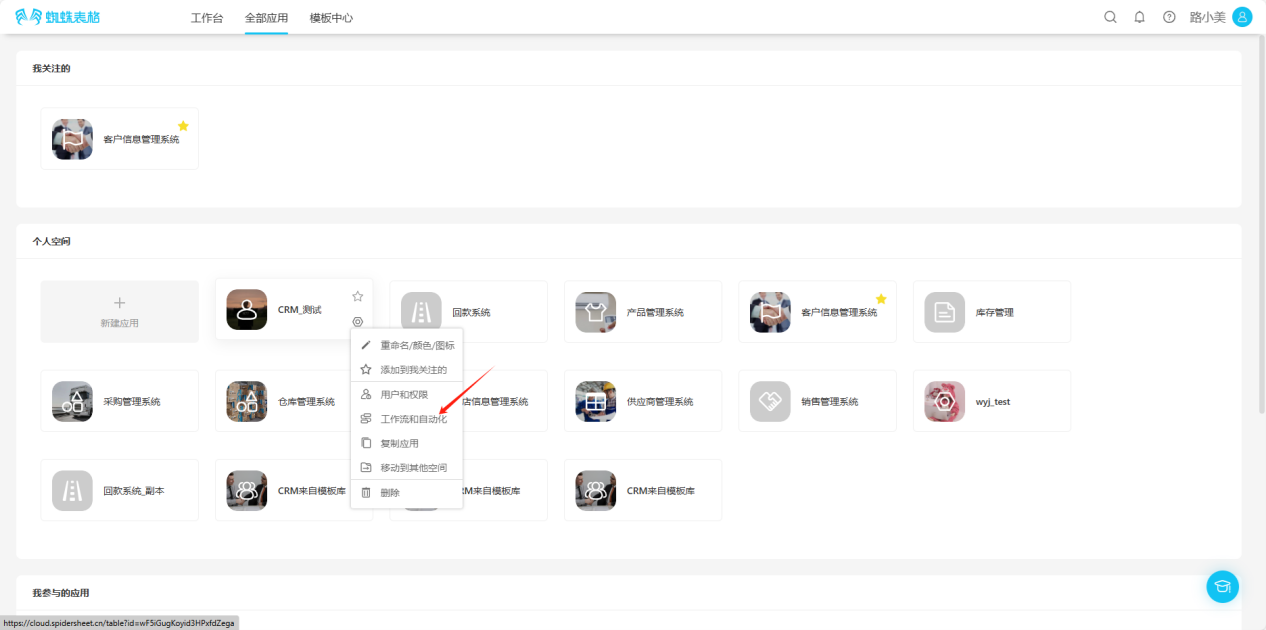
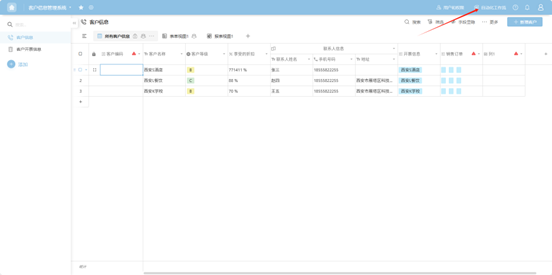
- From the workspace left application list or application cards under all applications, enter the application you want to set up automated workflow for, click "Automated Workflow" in the upper right corner to enter the automated workflow settings page.

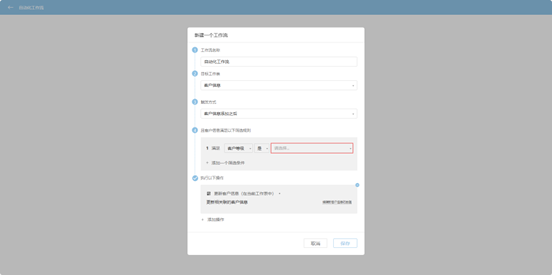
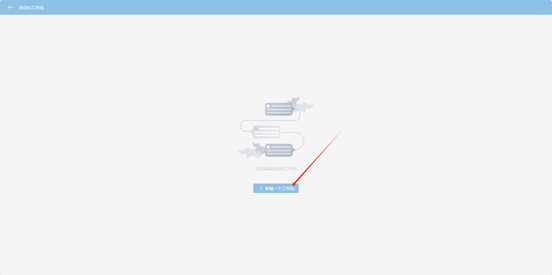
Step 2: In the popup page, select "Create a New Workflow".

Step 3: In the popup page, sequentially set the workflow name, target table, trigger method, filter rules, and operations to execute.
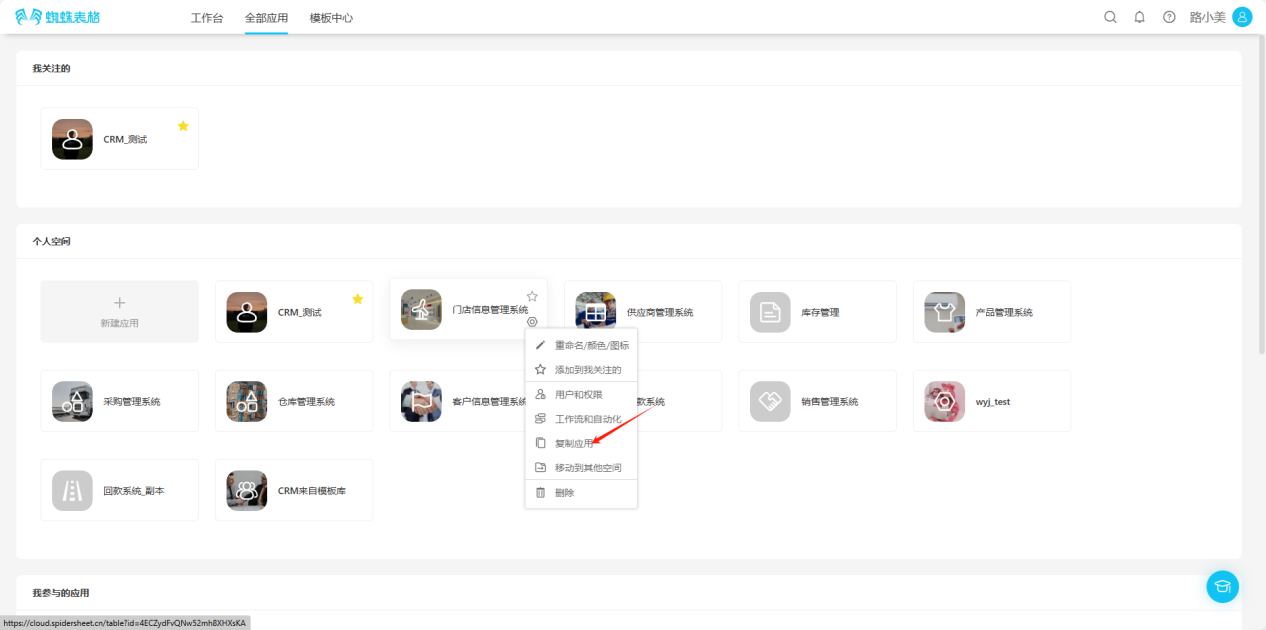
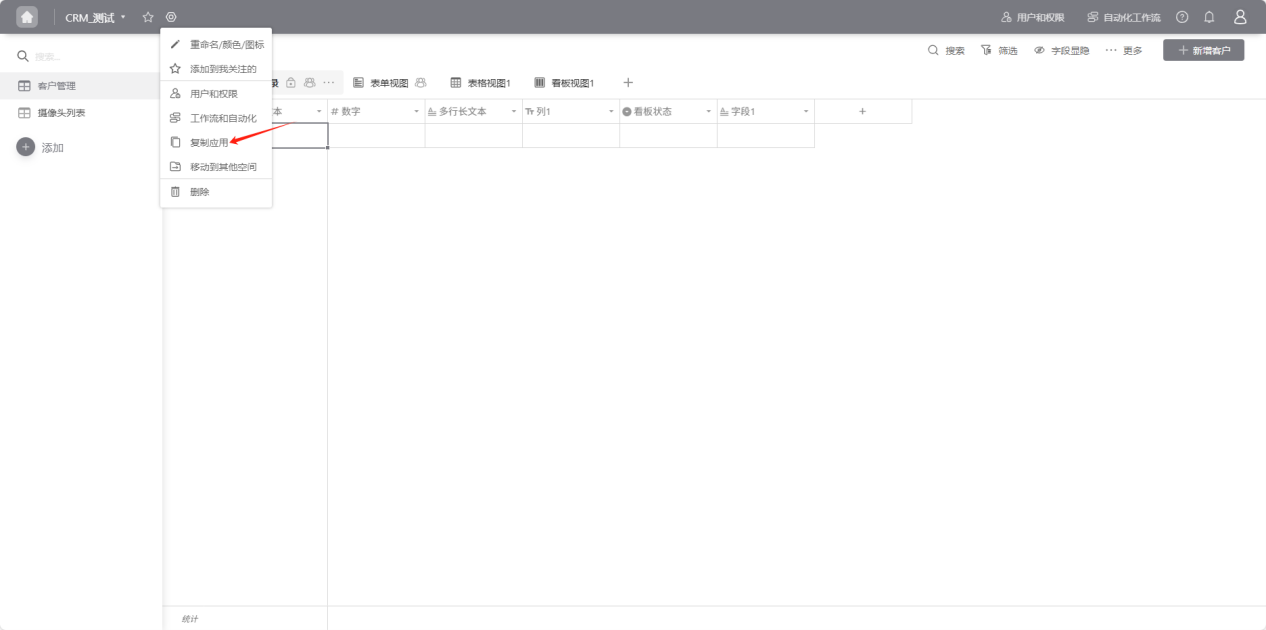
1.3.5 Copy Application
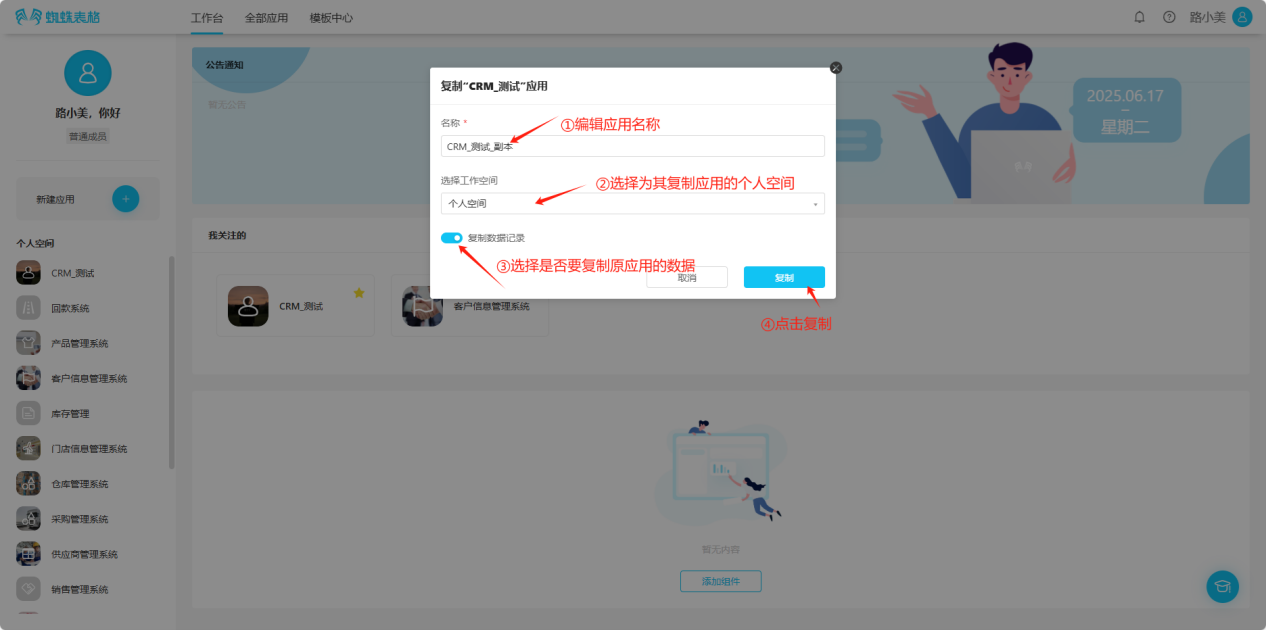
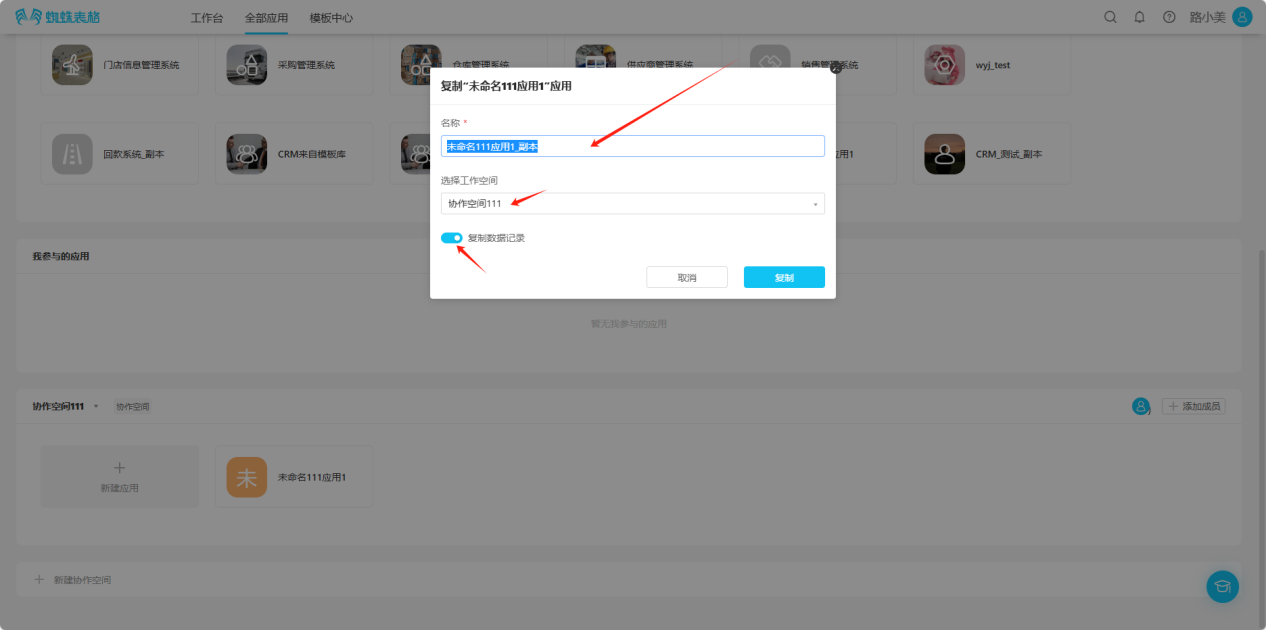
Step 1: Open the "Edit Operation Selection" dropdown and select "Copy Application".
Step 2: In the opened popup, edit the application name, space, and choose whether to copy data sequentially. Click "Copy" to successfully copy. You can view it in the corresponding space.
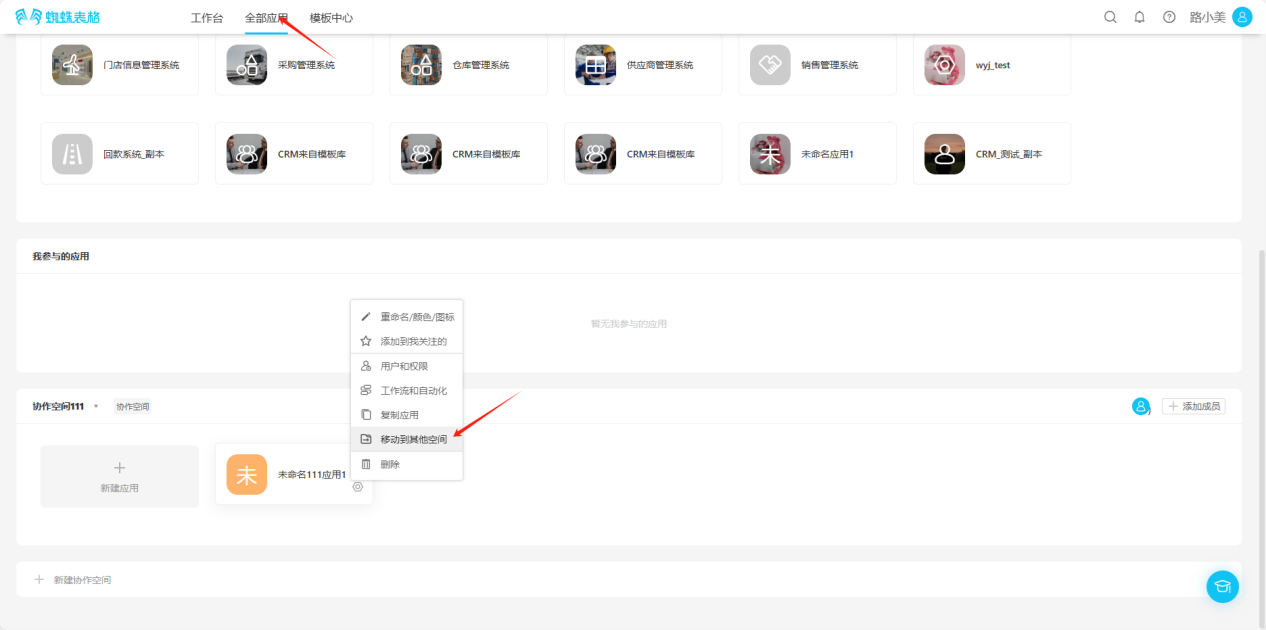
1.3.6 Move to Other Space
Step 1: Open the "Edit Operation Selection" dropdown and select "Move to Other Space".
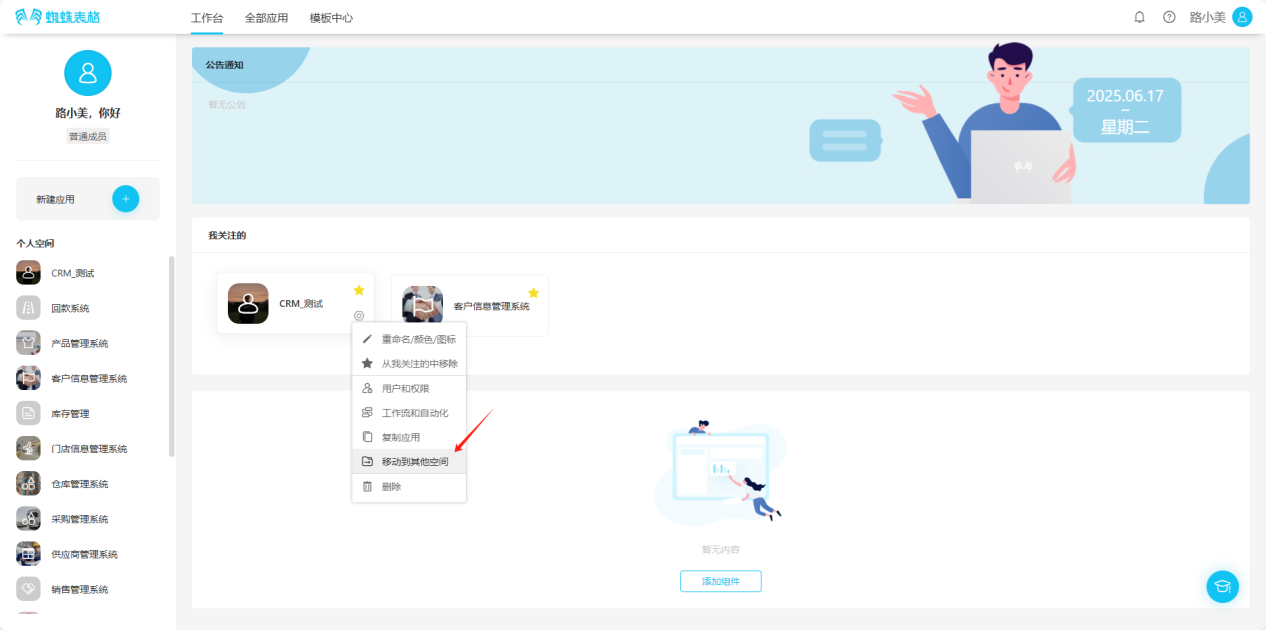

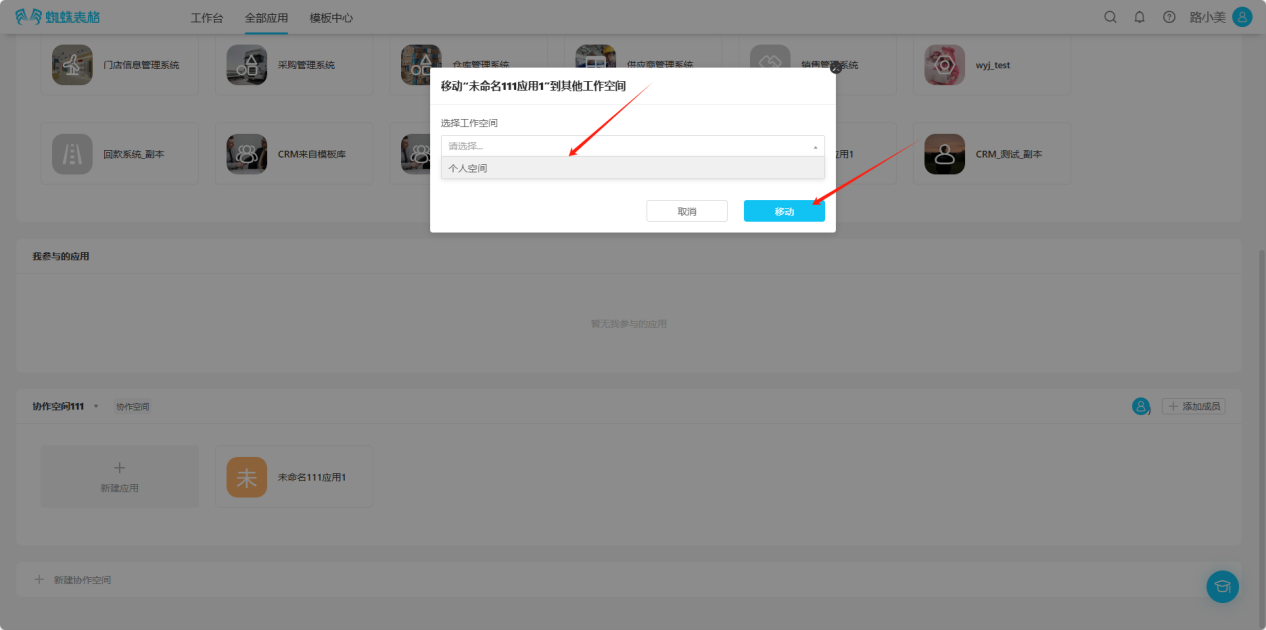
Step 2: In the opened popup, select the space to move to, click "Move" to successfully move. You can view the application in the moved space.

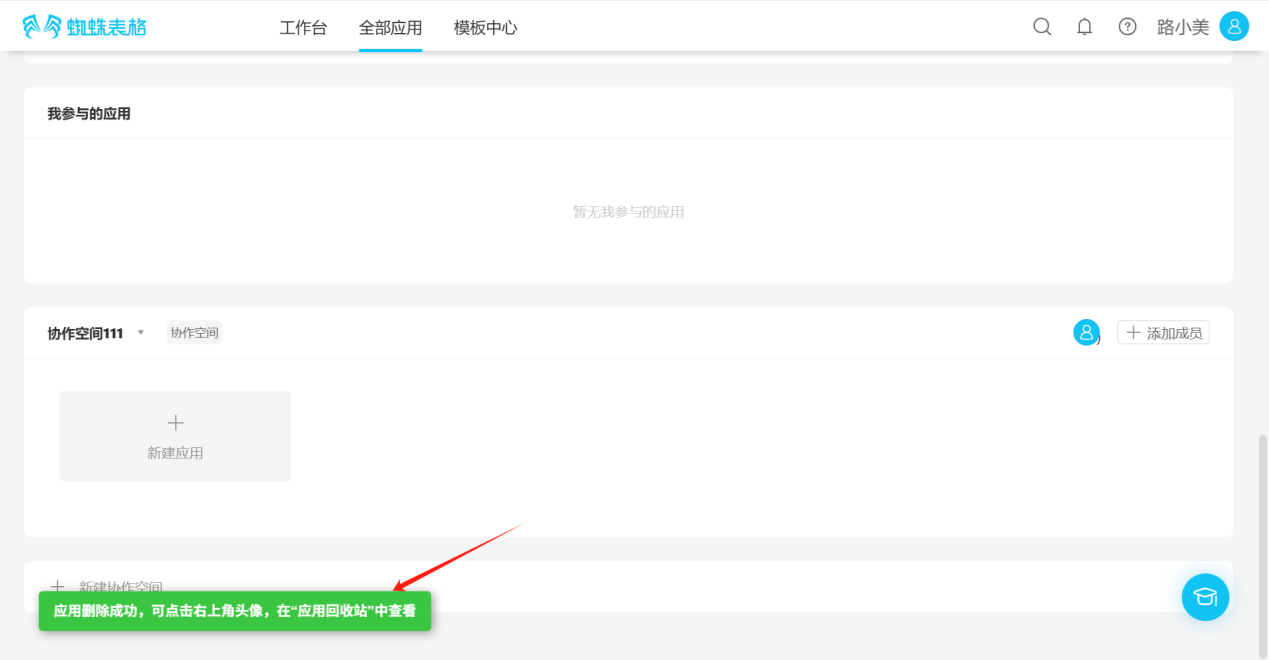
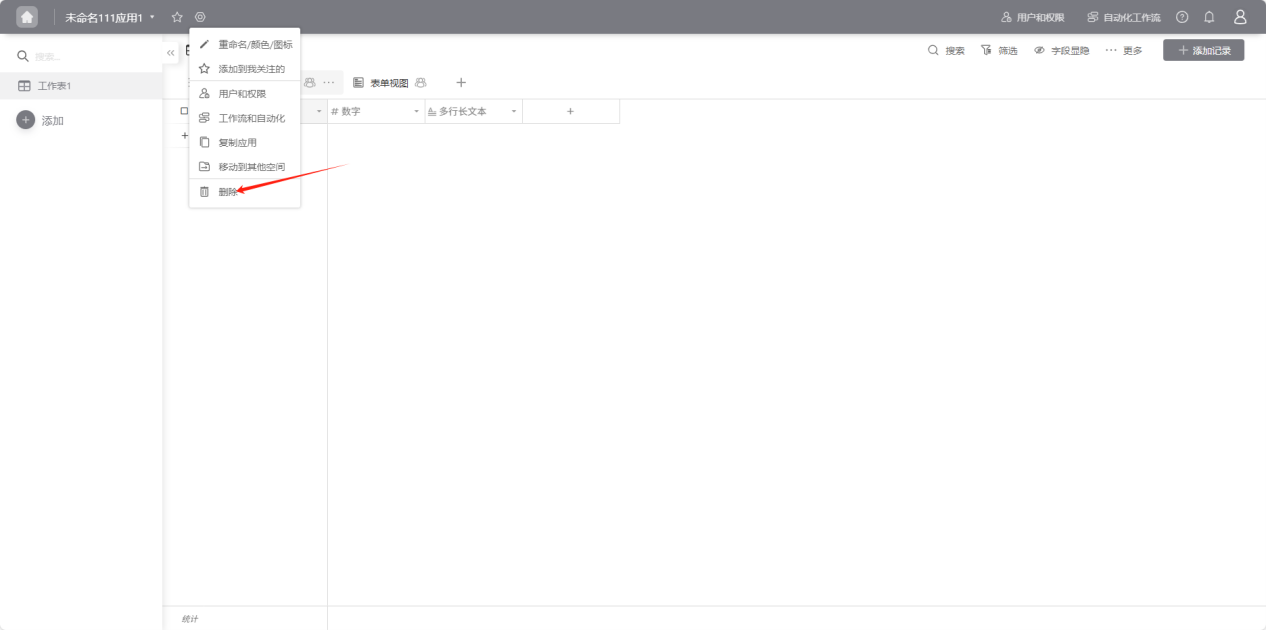
1.3.7 Delete Personal Space Application
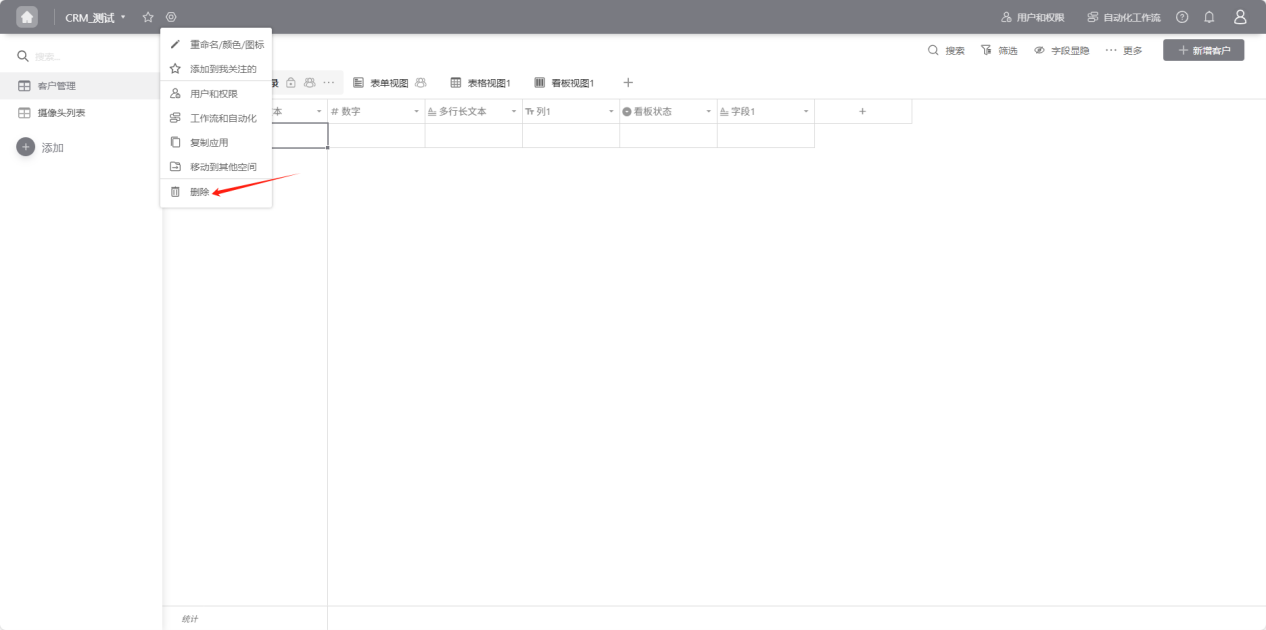
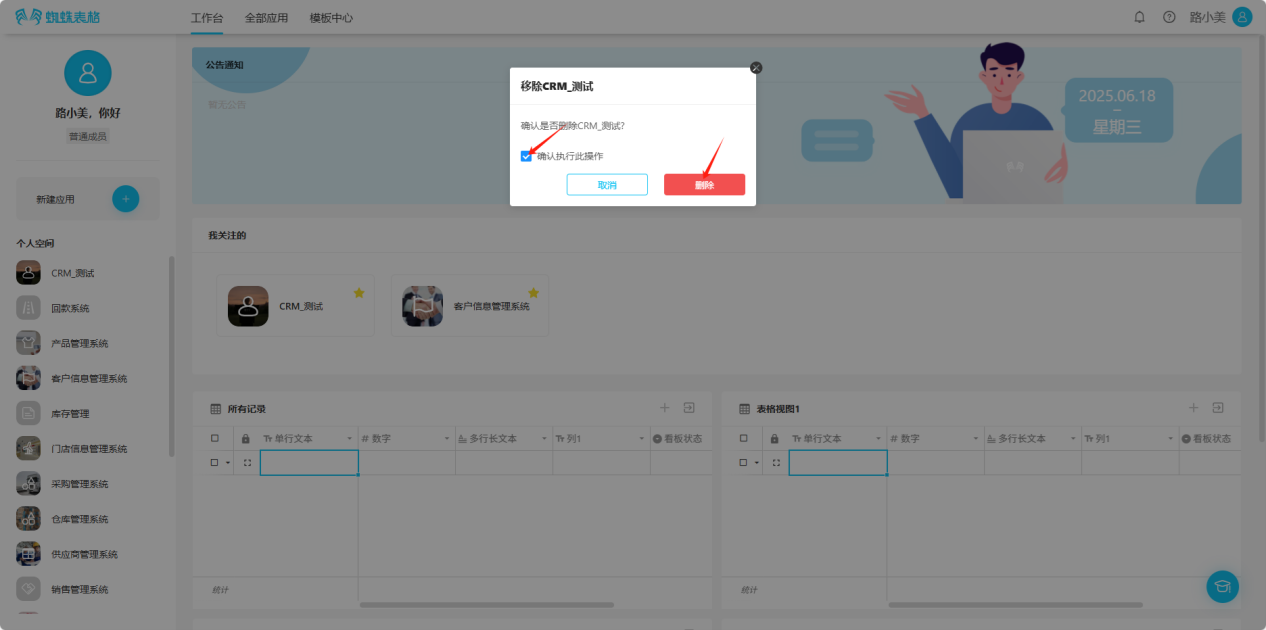
Step 1: Open the "Edit Operation Selection" dropdown and select "Delete".
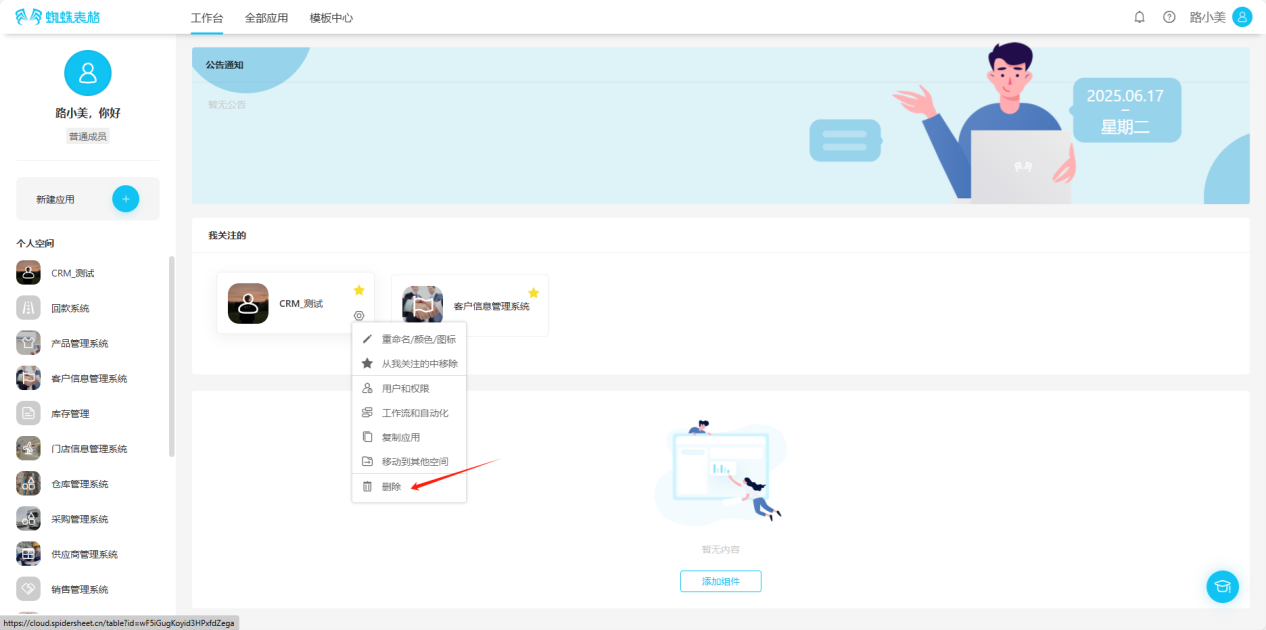
Step 2: Check "Confirm to execute this operation", click the "Delete" button to confirm deletion.
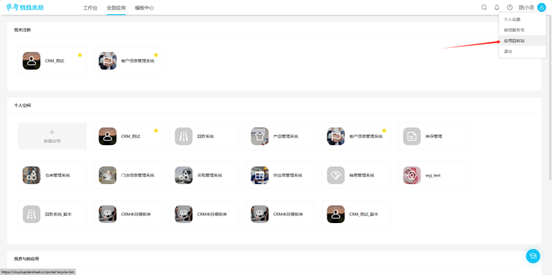
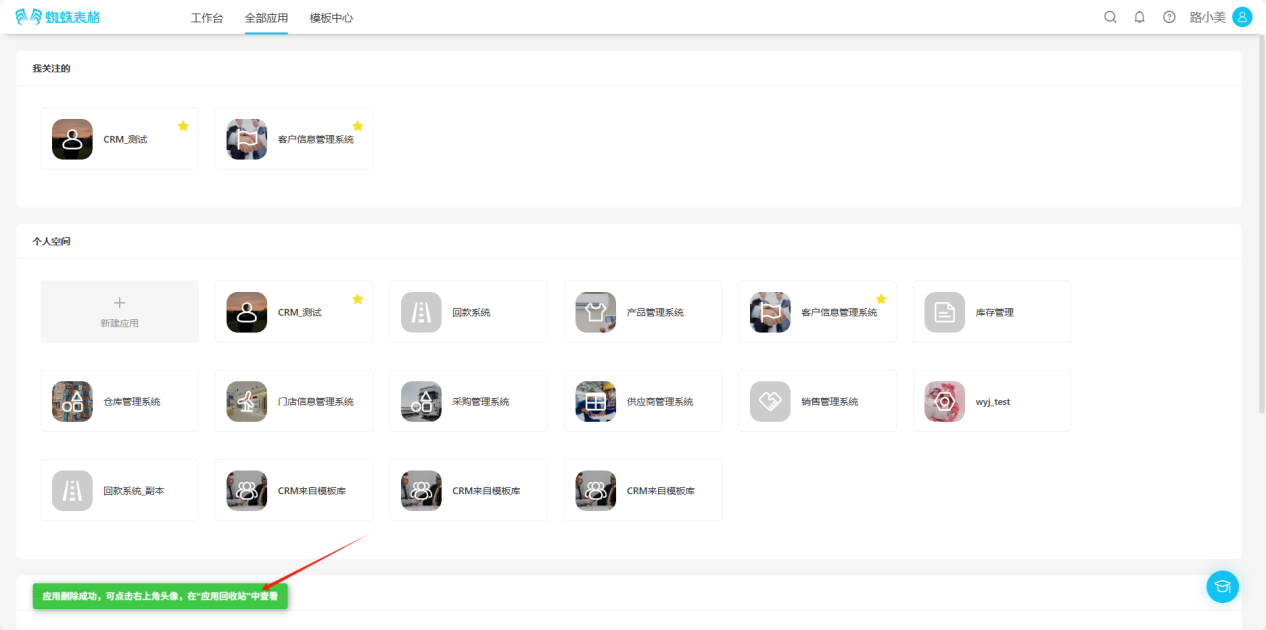
Step 3: The message "Application deleted successfully, you can click the avatar in the upper right corner to view in 'Application Recycle Bin'" indicates successful deletion.

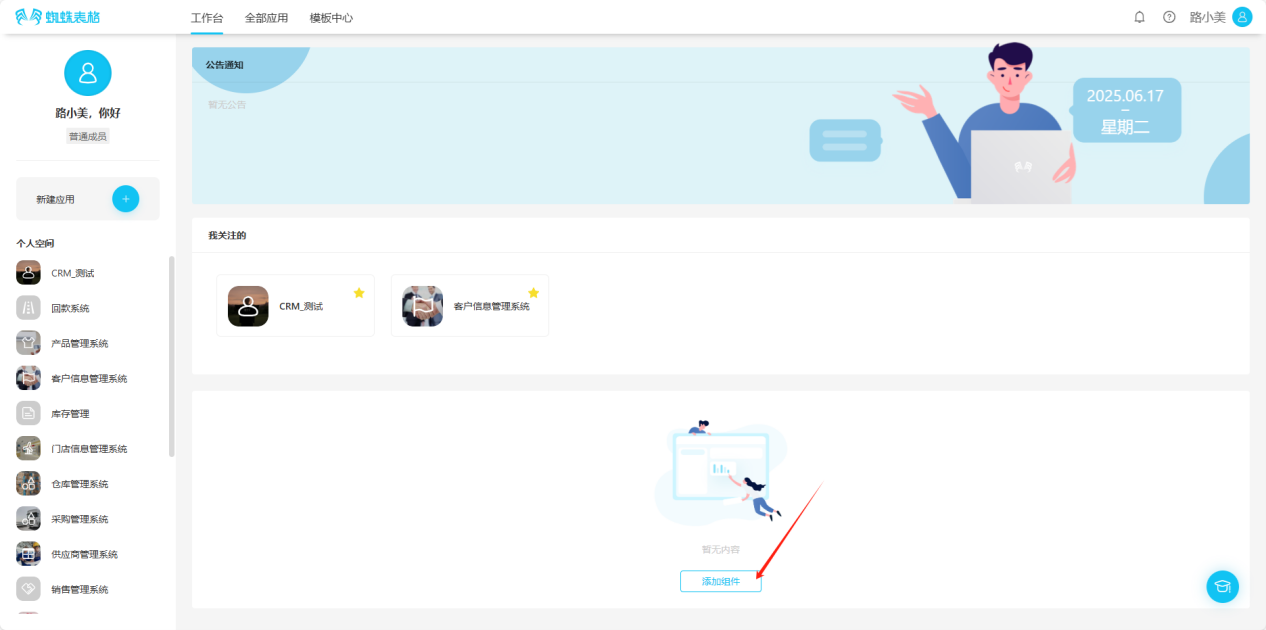
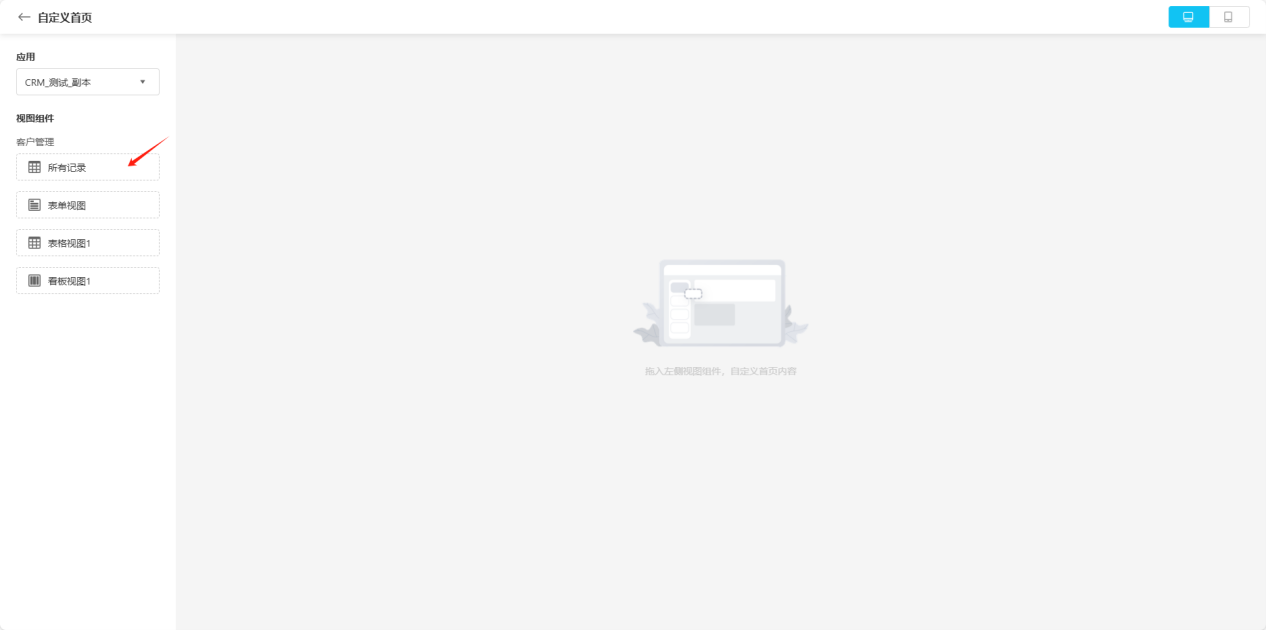
1.4 Adding Workspace Components
Step 1: Workspace → Add Component.
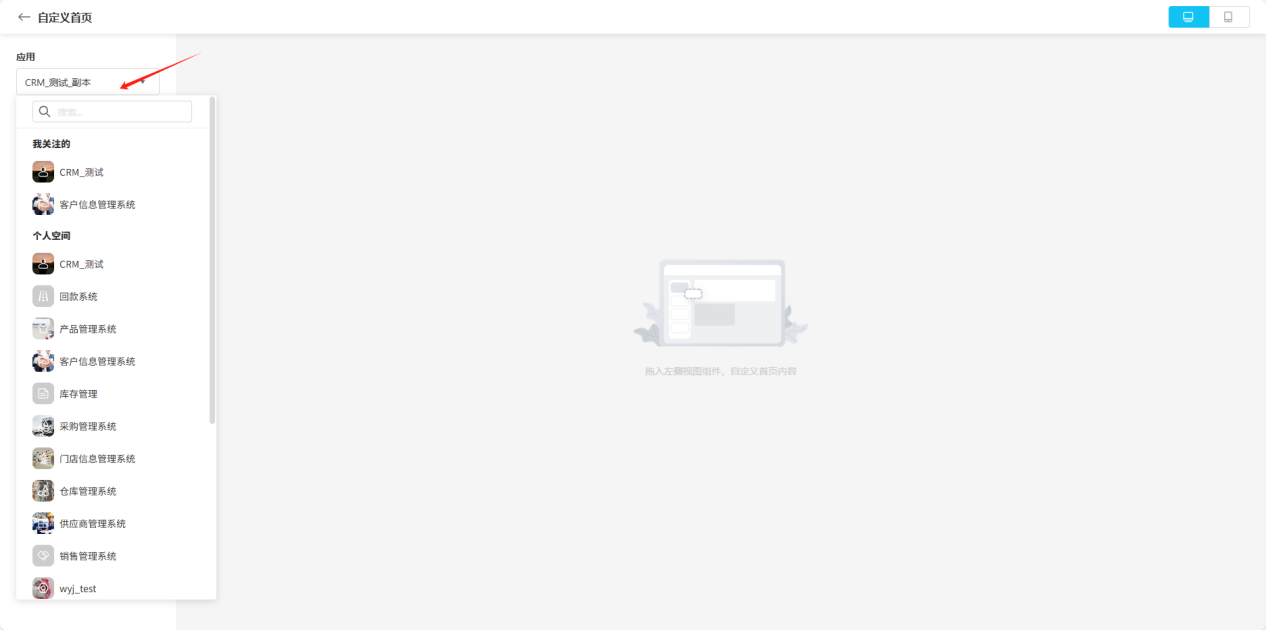
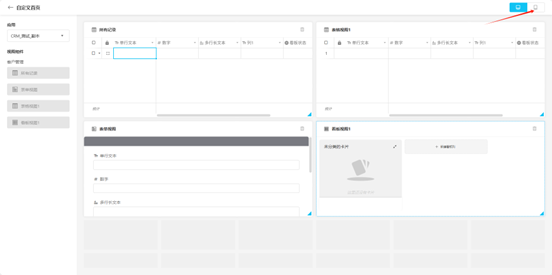
Step 2: Select the application and worksheet you want to add to the homepage, drag them to the layout area on the right.
Step 3: Select the toggle button in the upper right to view the preview effects for PC and mobile.
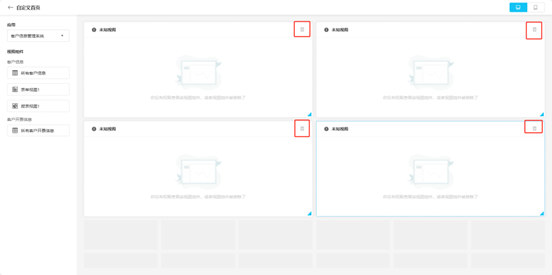
Step 4: Select the " " icon in the upper right corner of the card to delete that card.
2. Collaborative Space Operations
2.1 Creating New Collaborative Space
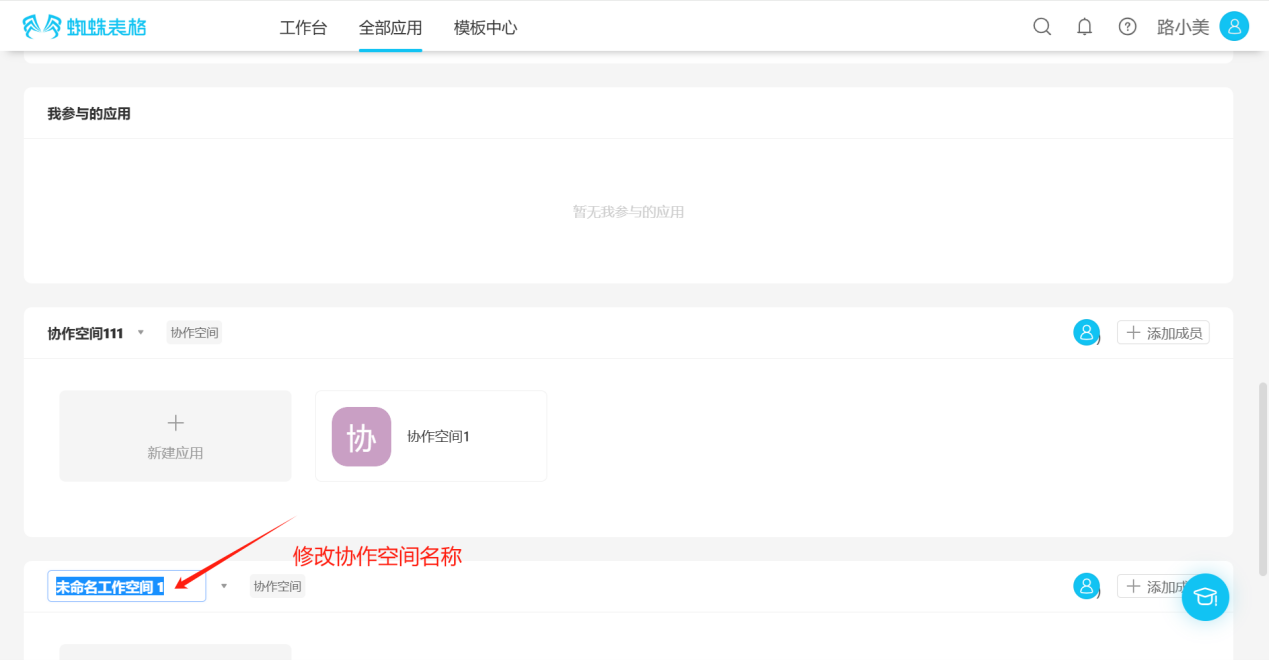
Step 1: All Applications → Create Collaborative Space.
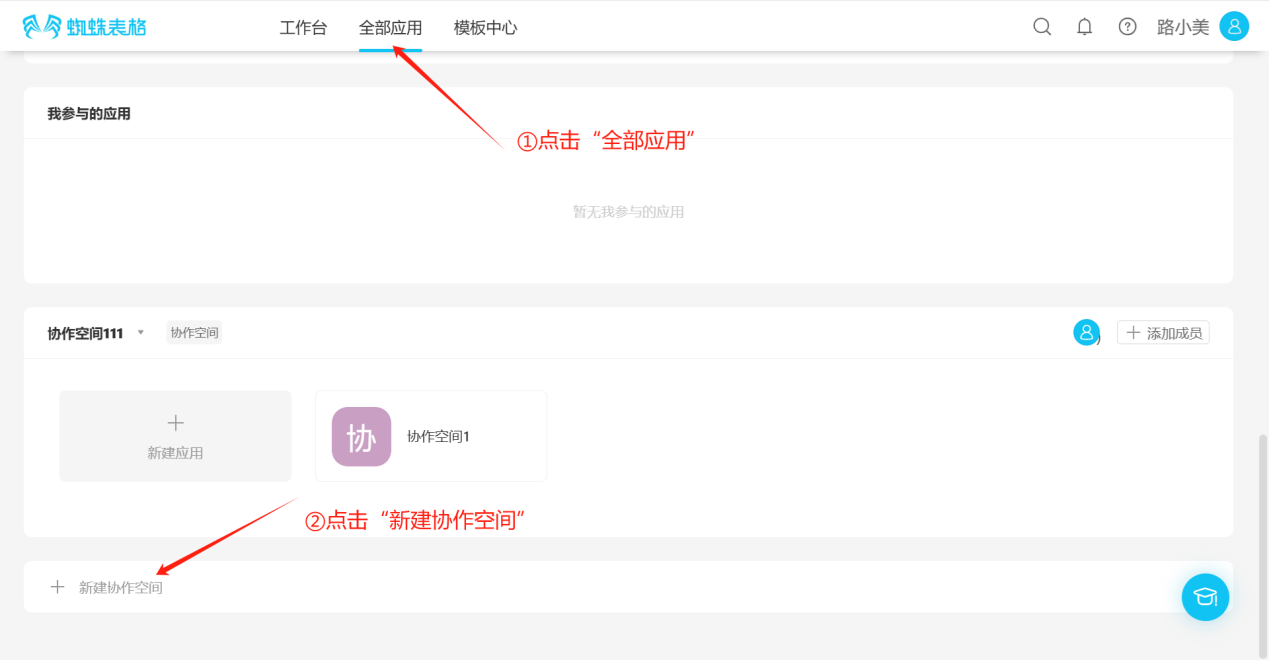
Step 2: Modify the collaborative space name.
2.2 Editing Collaborative Space
2.2.1 Space Rename
Step 1: Click the inverted triangle symbol to the right of the collaborative space name, open the edit list, click "Space Rename".
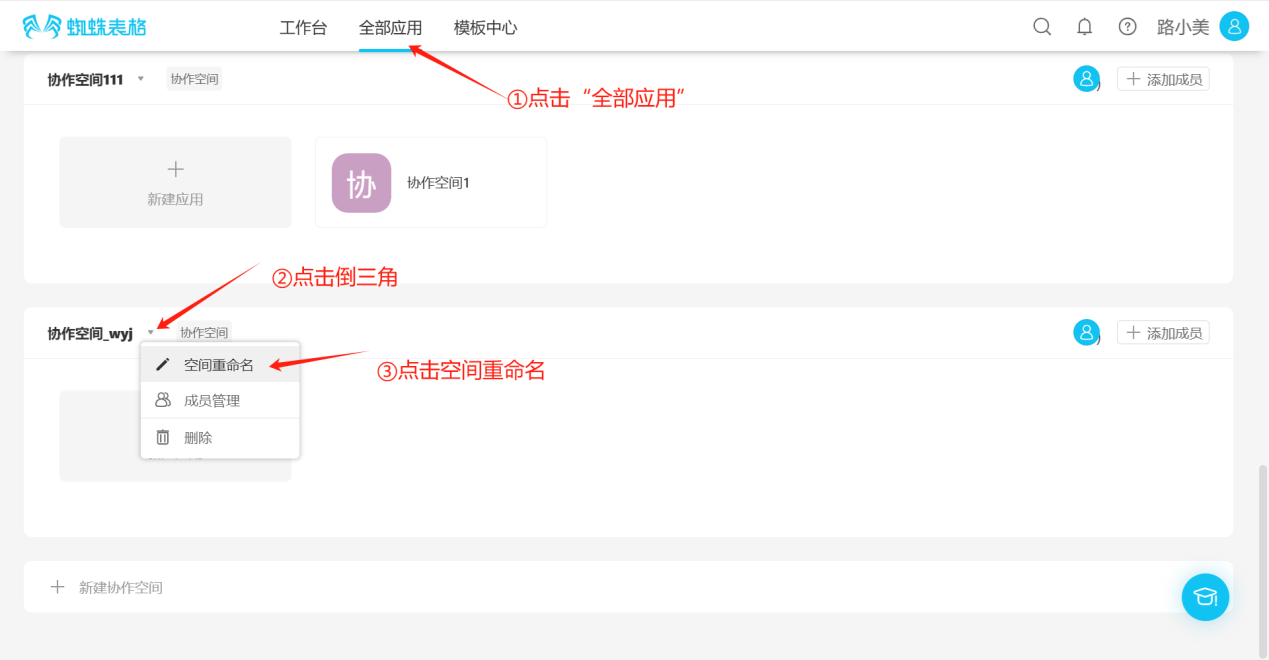
Step 2: Enter the new name in the input box.

2.2.2 Space Member Management
(1) Adding Members
- Method 1
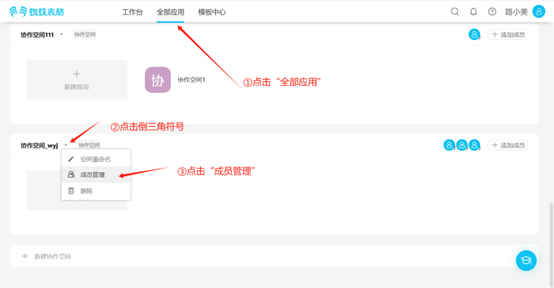
Step 1: Click the inverted triangle symbol to the right of the collaborative space name, open the edit list, click "Member Management", open the member management page.
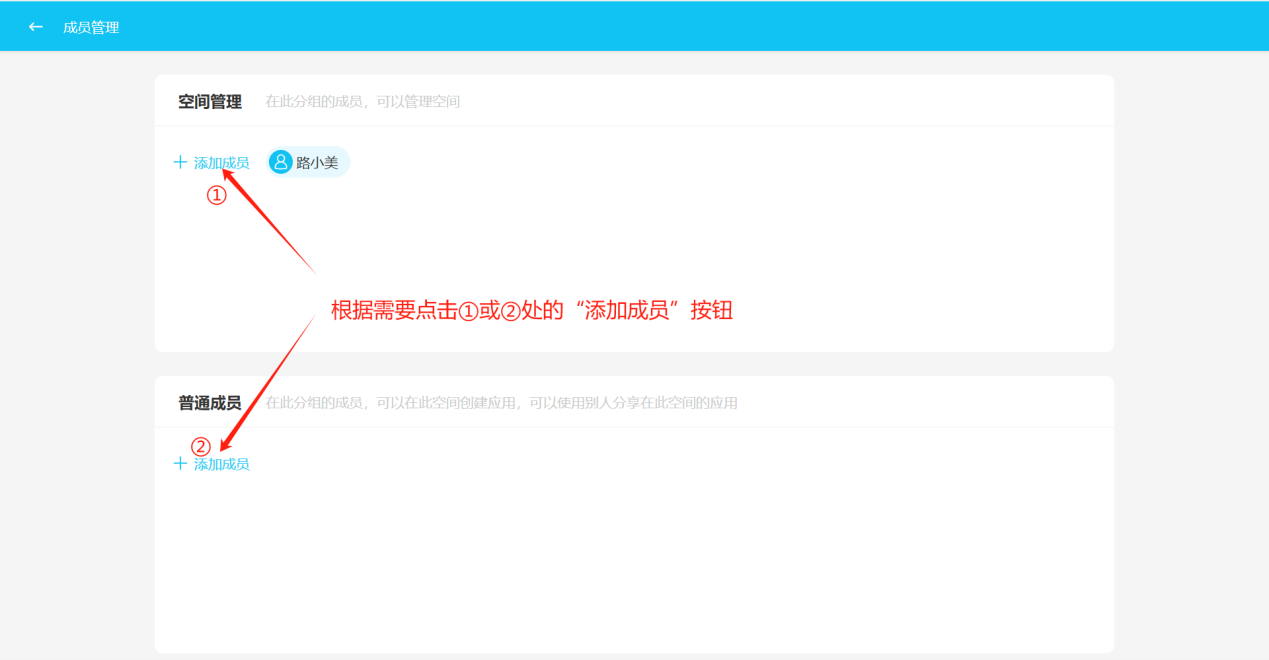
Step 2: Click the "Add Member" button under the corresponding permission module to open the "Add Member" popup.
【Space Management: Members in this group can manage the space】
【Regular Members: Members in this group can create applications in this space and use applications shared by others in this space】
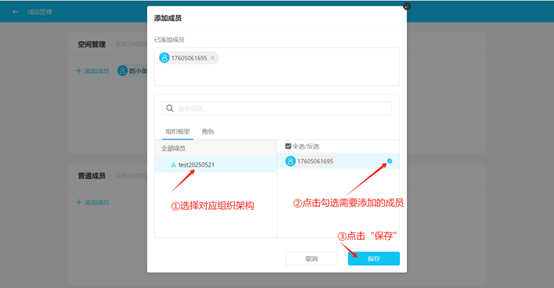
Step 3: In the "Add Member" popup, batch select members according to "Organizational Structure" or "Role", then click Save. (You can also search for members using the search box)

Step 4: If the member's name appears under the corresponding module in the member management page, it indicates successful member addition.
- Method 2
Step 1: Click "All Applications", find the corresponding collaborative space, click the "Add Member" button to the right of that collaborative space to open the "Add Member" popup.
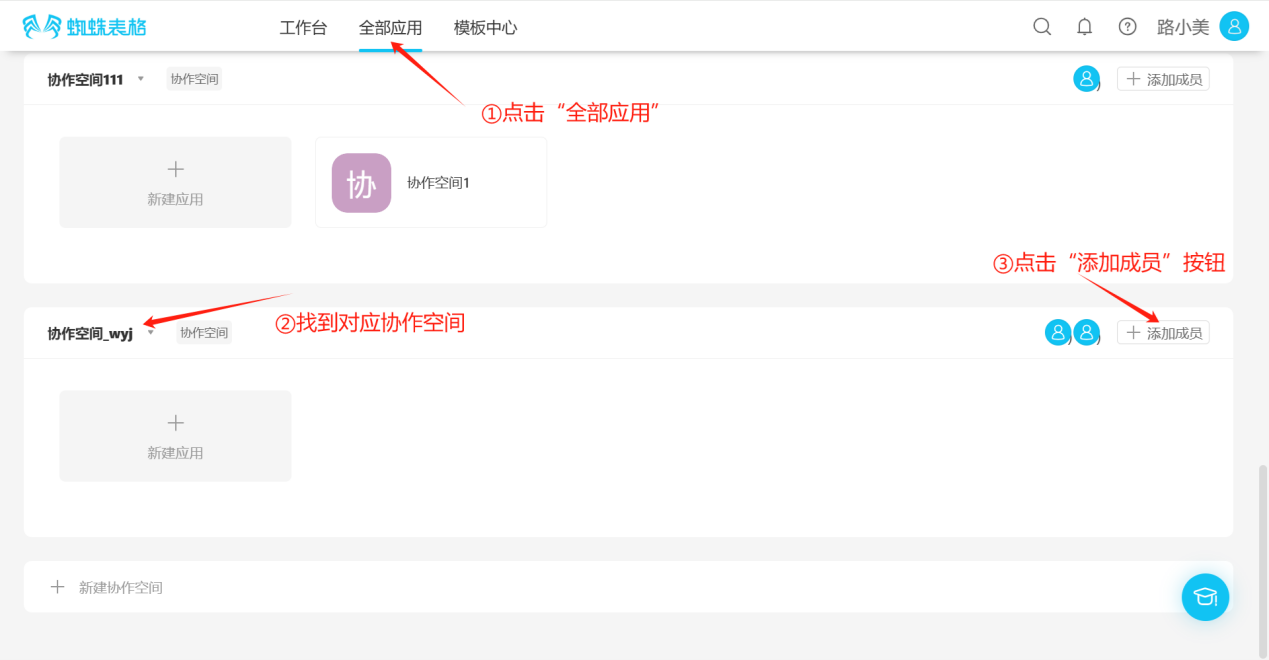
Step 2: In the "Add Member" popup, batch select members according to "Organizational Structure" or "Role", then click Save. (You can also search for members using the search box)
【Note: Members added using this method are all "Regular Members", which can be viewed in the "Member Management" page】
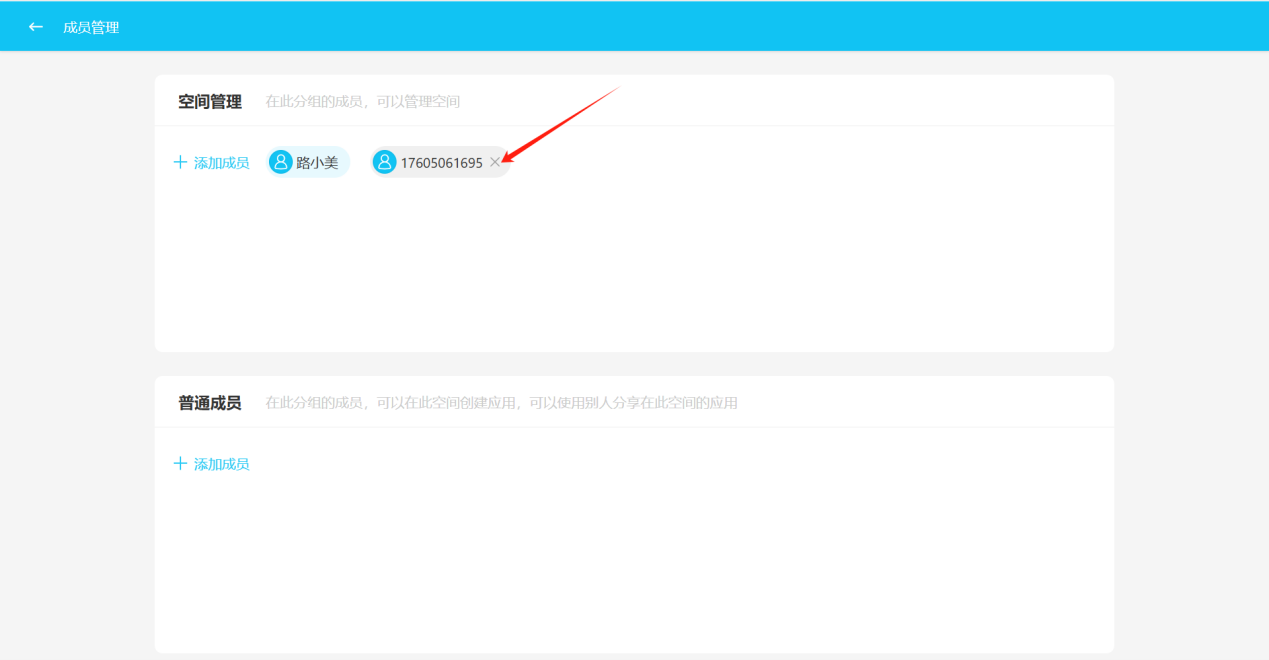
(2) Deleting Members
Step 1: Click the inverted triangle symbol to the right of the collaborative space name, open the edit list, click "Member Management", open the member management page.

Step 2: Hover over the member account you need to delete, an X appears after the account, click the X to delete.
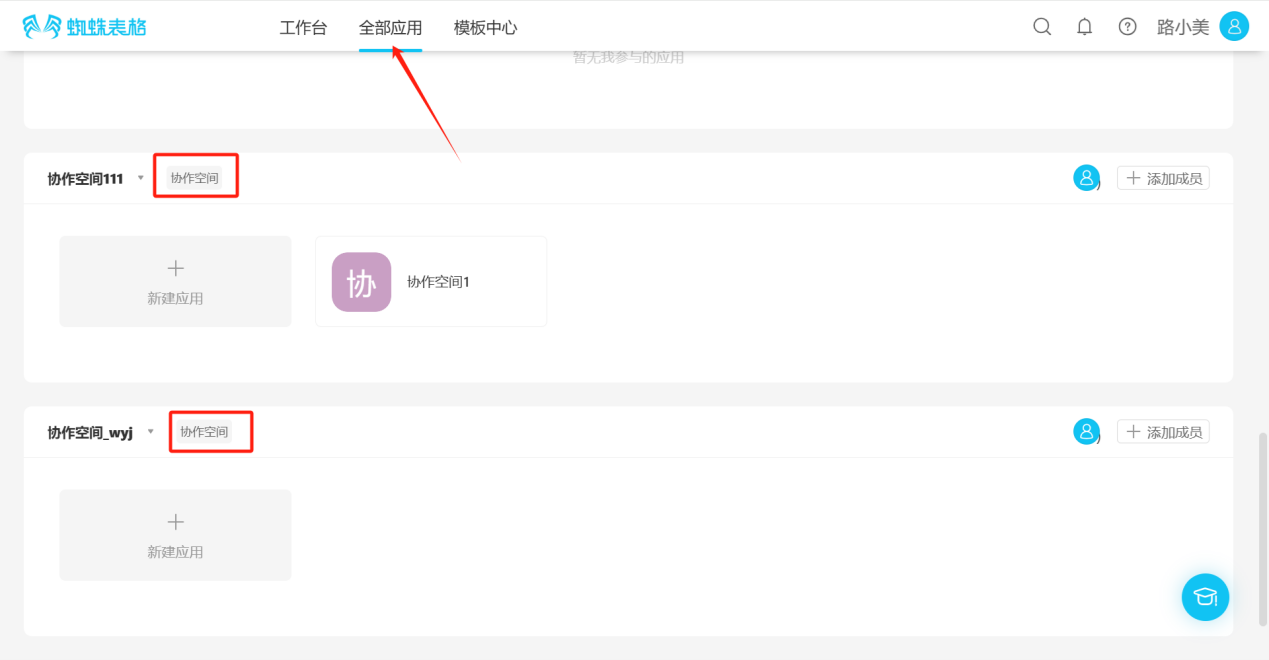
2.3 Viewing Collaborative Space
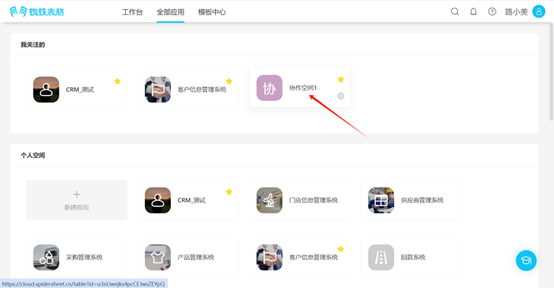
Under "All Applications", spaces with the "Collaborative Space" label are collaborative spaces.
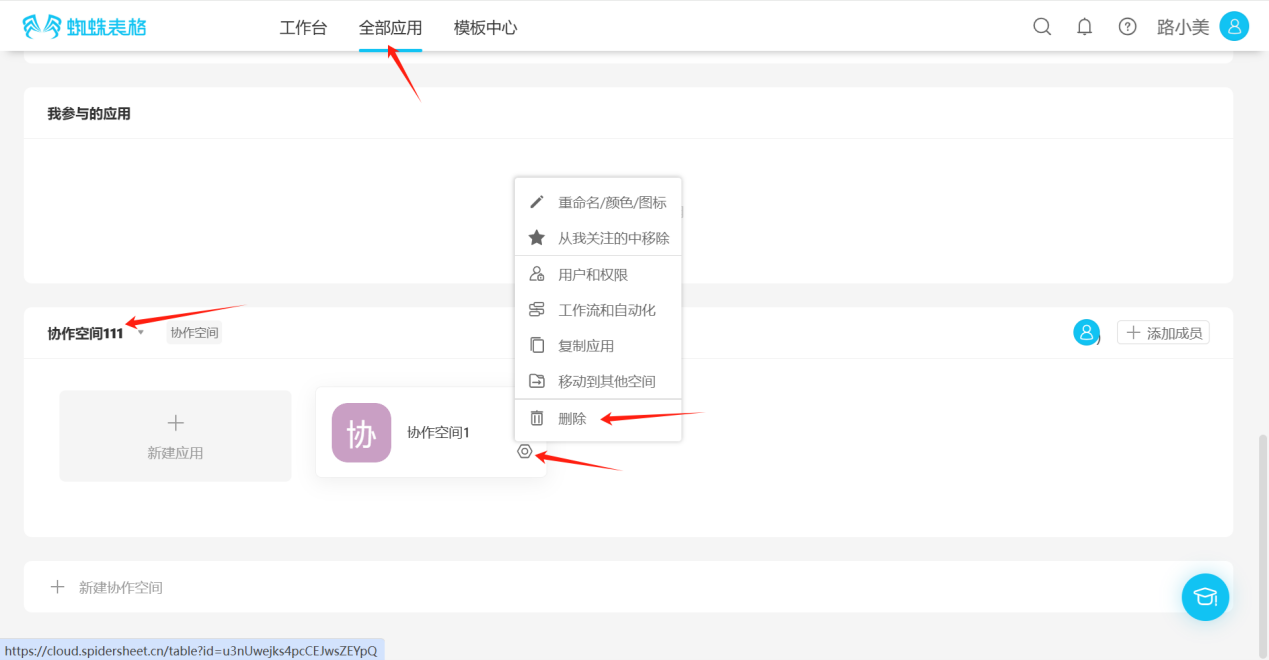
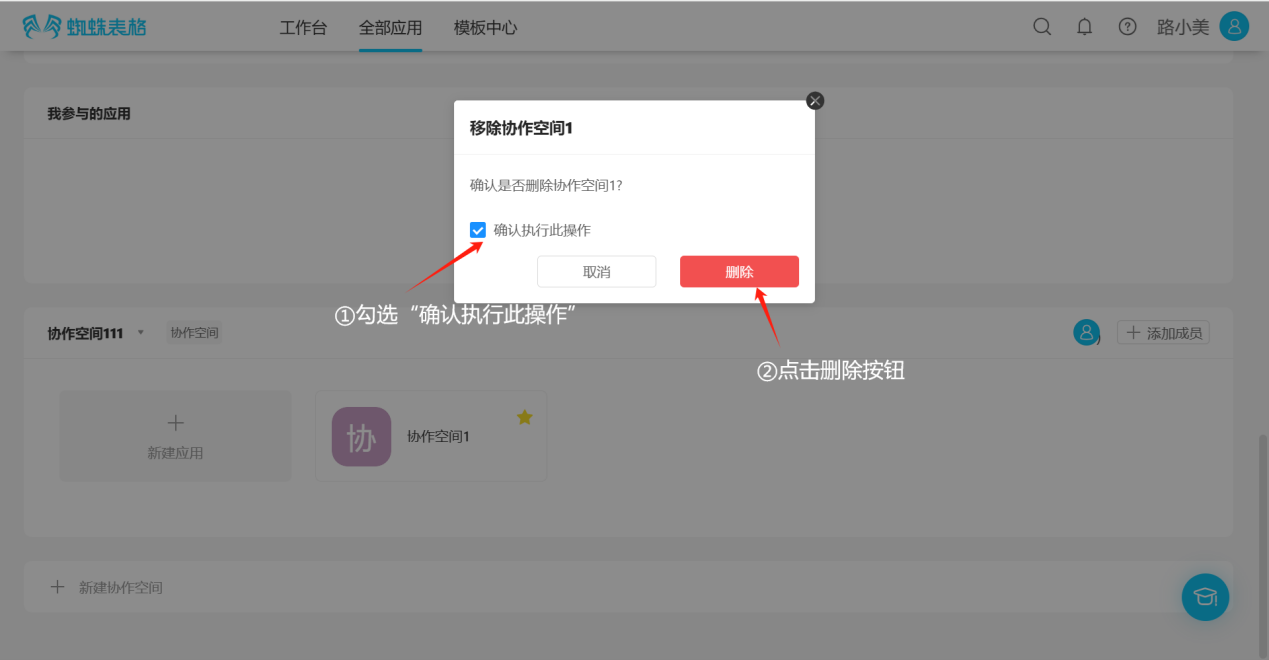
2.4 Deleting Collaborative Space
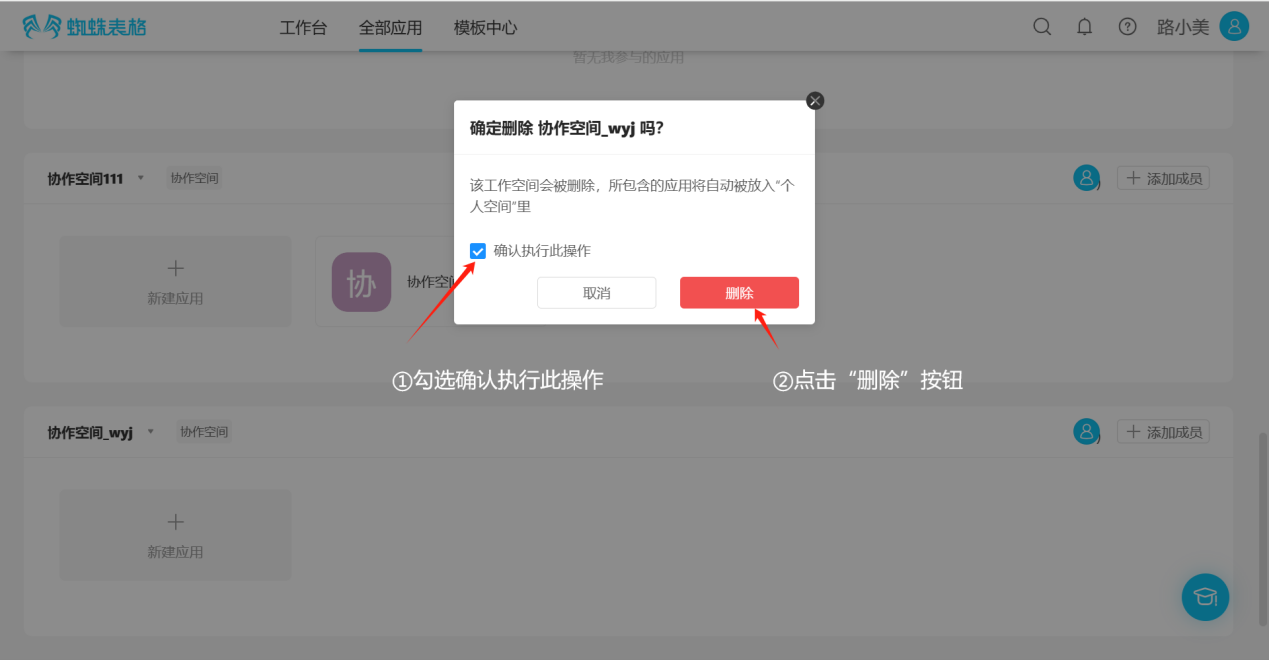
Step 1: Click "All Applications", find the collaborative space to delete, click the inverted triangle symbol to the right of the space name to open the edit list, then click the "Delete" button to open the delete confirmation dialog.

Step 2: In the delete confirmation dialog, check "Confirm to execute this operation", then click the "Delete" button to delete.
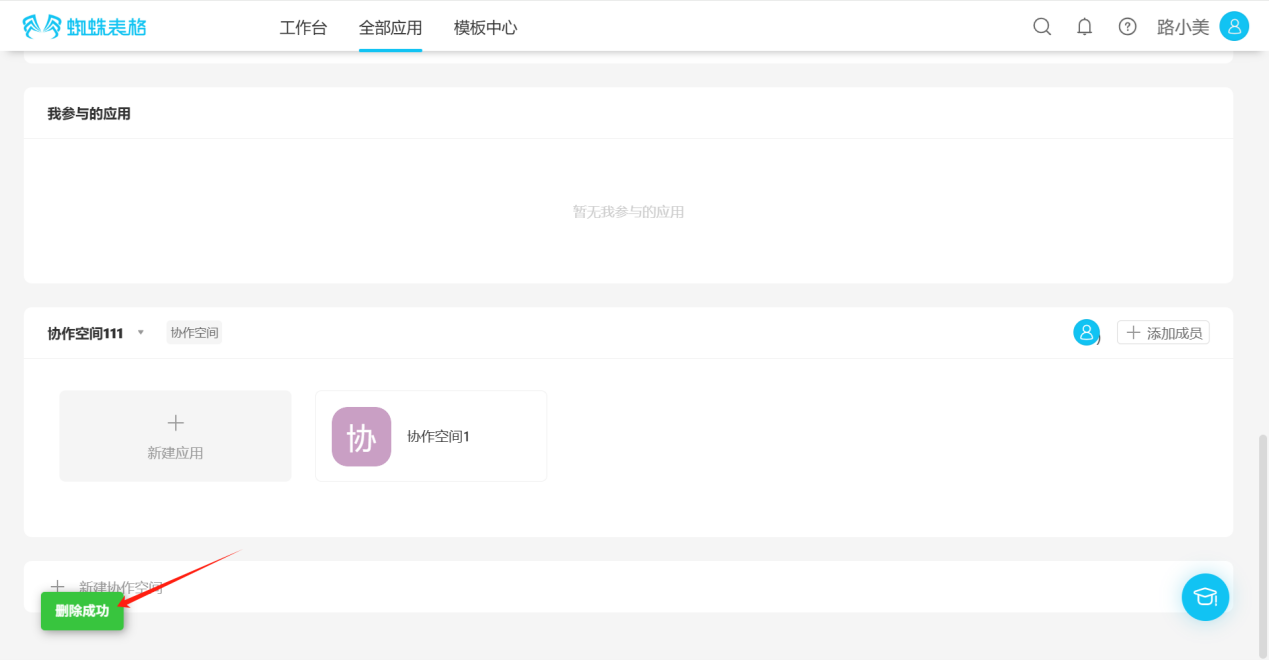
Step 3: The "Deletion Successful" message indicates successful deletion.
2.5 Creating New Applications in Collaborative Space
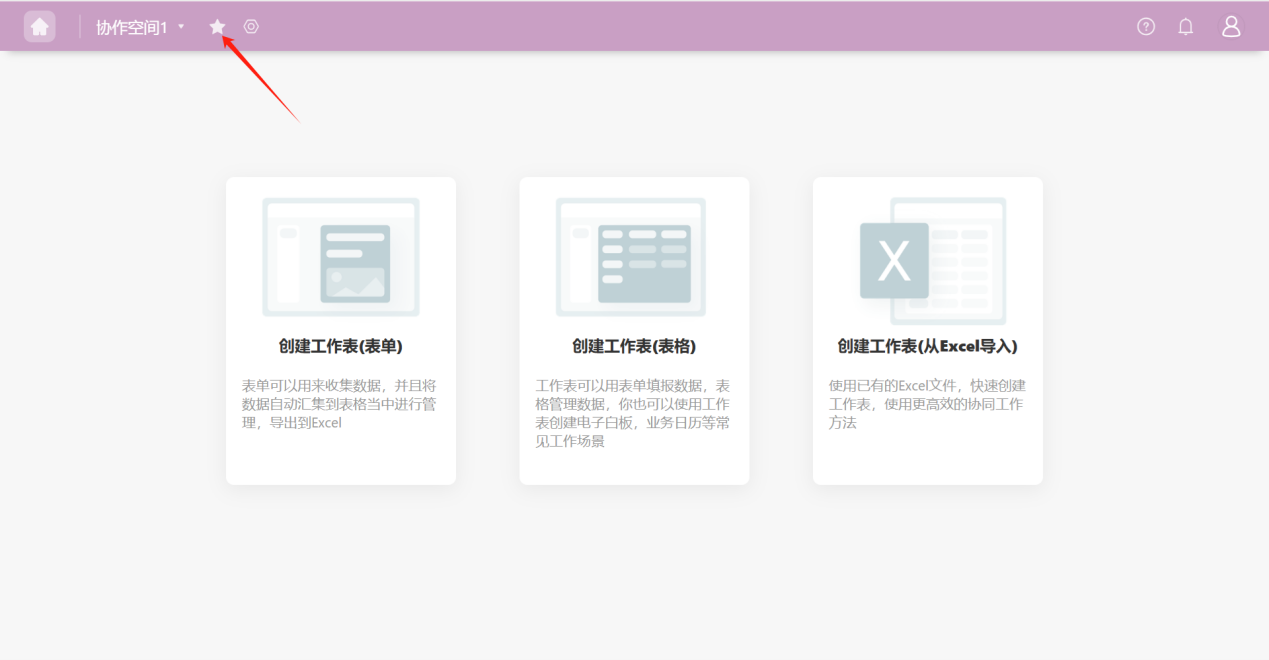
2.5.1 Creating a Blank Application
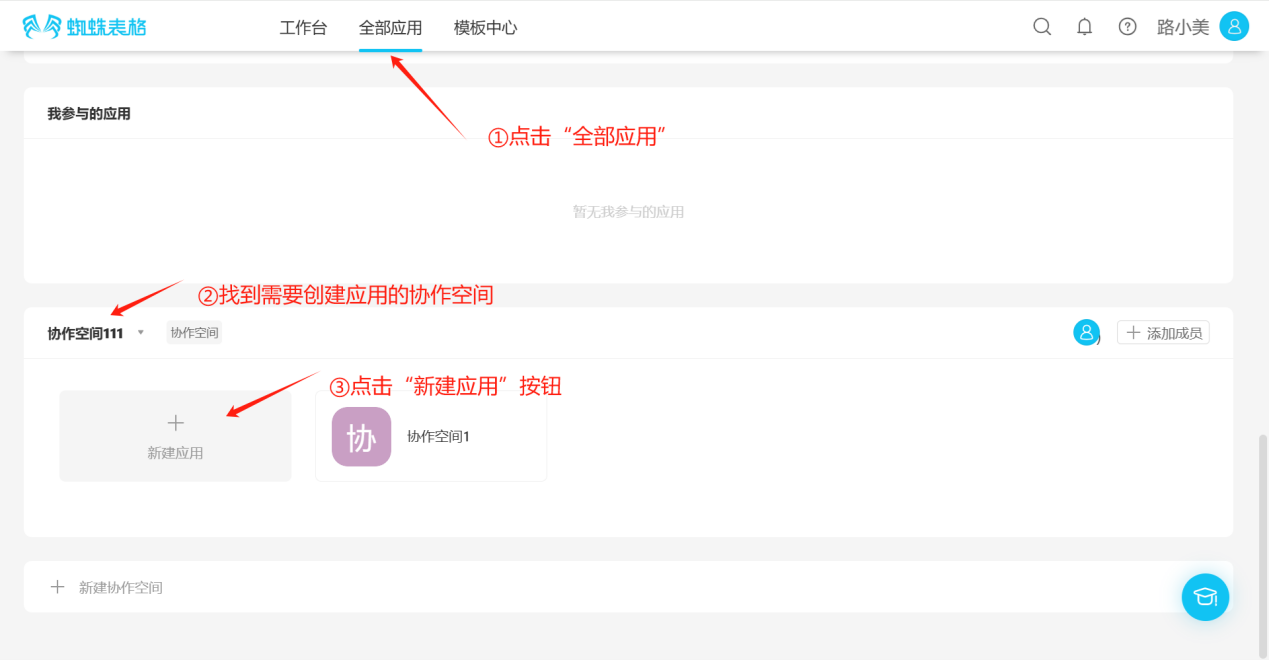
Step 1: Click "All Applications", find the collaborative space where you want to create an application, click the "Create Application" button to open the "Create Application" popup.
Step 2: In the "Create Application" popup page, select "Create Blank Application" to enter the "Application Settings" popup.
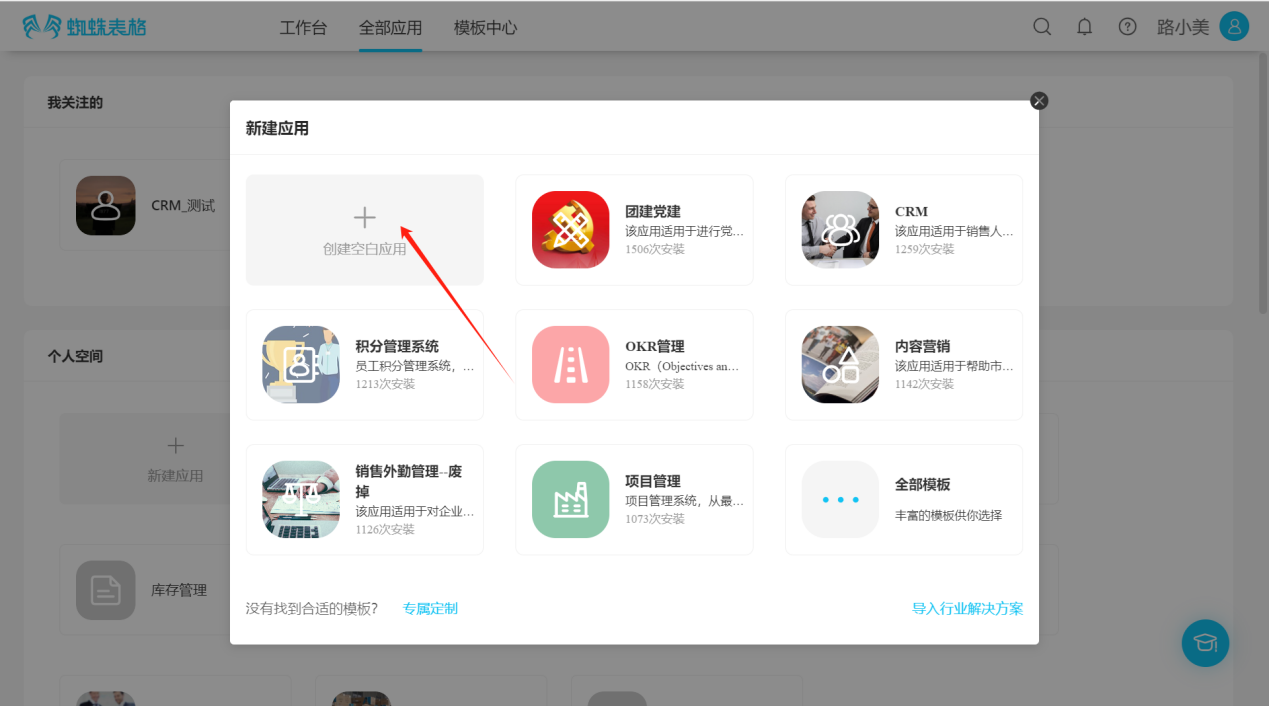
Step 3: In the "Application Settings" popup page, enter or select the application's name, color, icon, etc., and select "Save" to successfully create the application.
2.5.2 Creating Applications Using Templates
Step 1: Enter the "Create Application" popup, select an appropriate template, click "Install Now", click "All Templates" to view more templates.

Step 2: In the popup window, view the detailed introduction and illustrations of the template, confirm whether it matches your needs, and then select "Free Install"
Step 3: In the popup window, edit the application name and space, click "Save", and wait for installation.

2.6 Viewing Collaborative Space Applications
【Includes custom-created applications, applications installed using templates, and applications I participate in. Choose any of the following ways to view all applications】
- All Applications → Collaborative Space
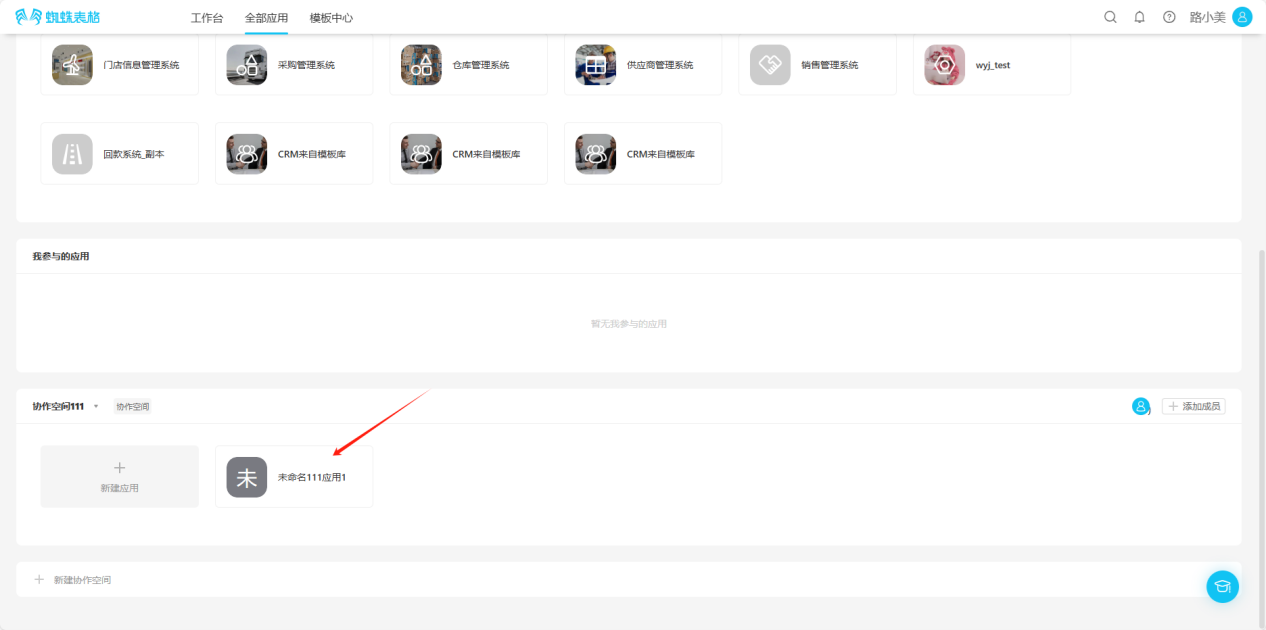
- All Applications → Applications I Participate In

2.7 Editing Collaborative Space Applications
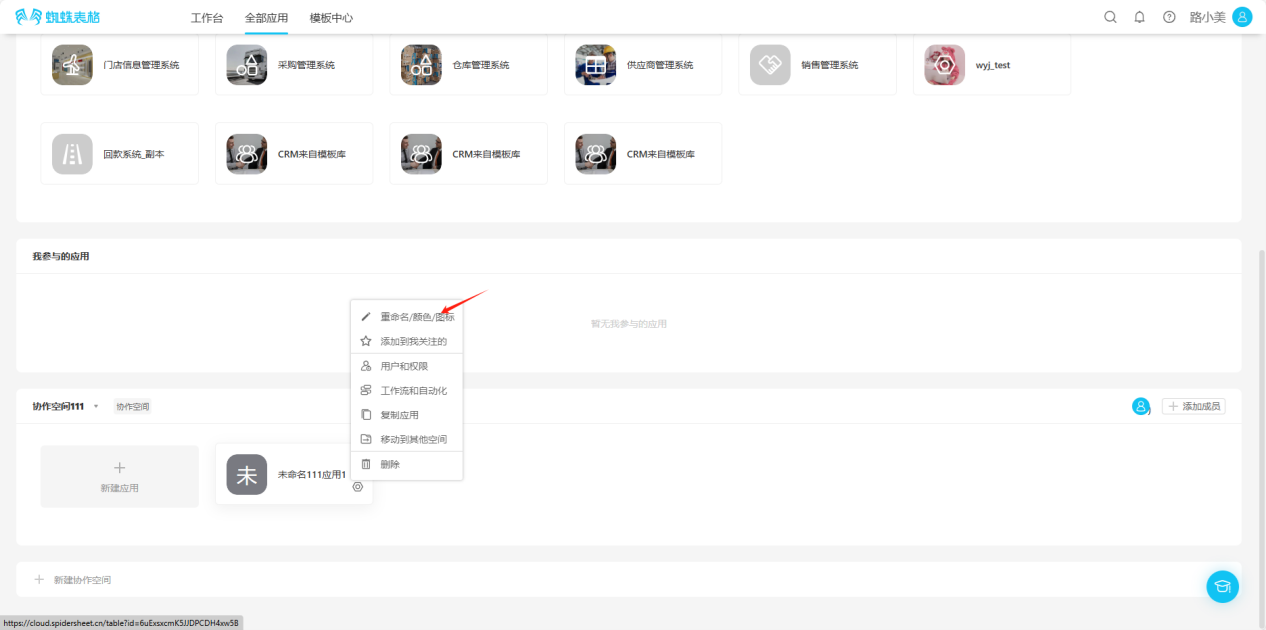
2.7.1 Rename/Color/Icon
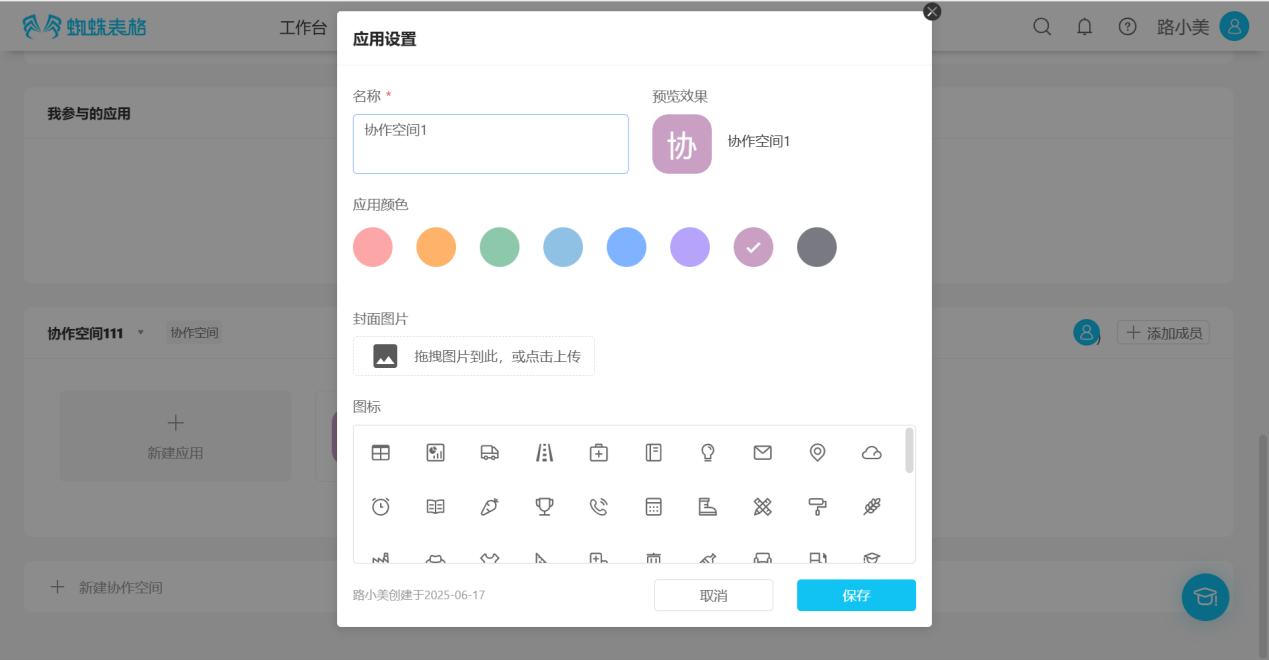
Step 1: Open the "Edit Operation Selection" dropdown and select "Rename/Color/Icon".
Step 2: Make changes to name, color, icon, etc. in the "Application Settings" popup.
2.7.2 Following Applications and Removing Follows
(1) Following Applications
【Choose any of the following methods to follow】
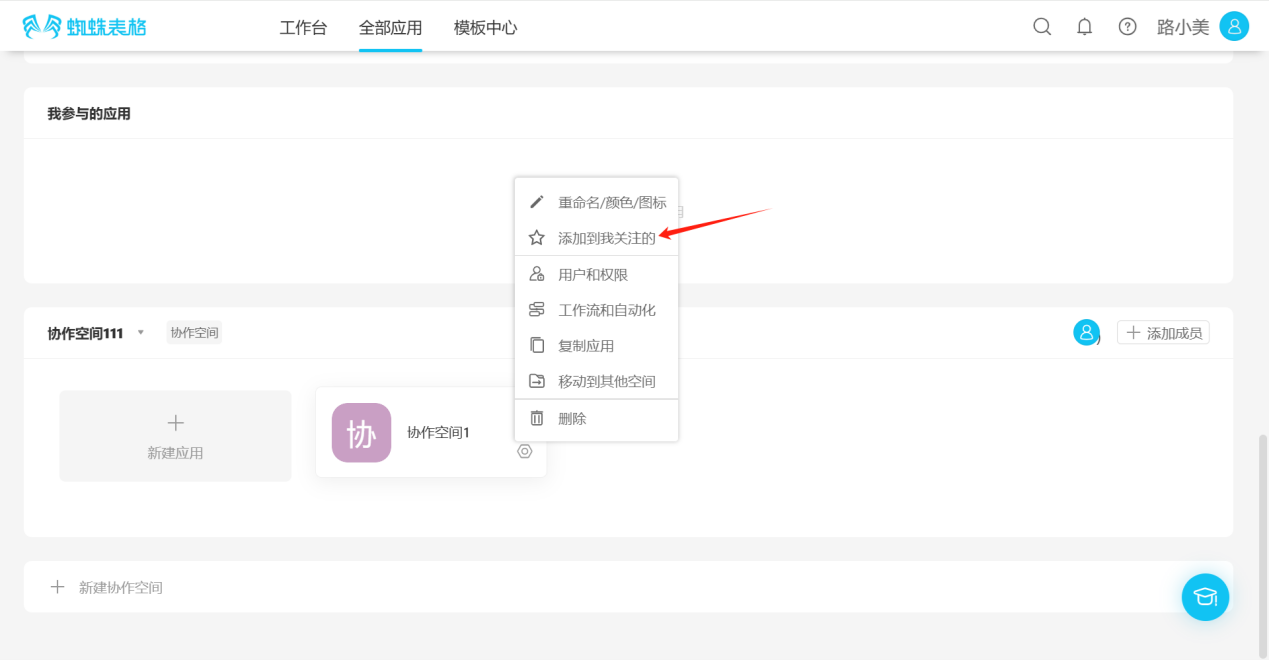
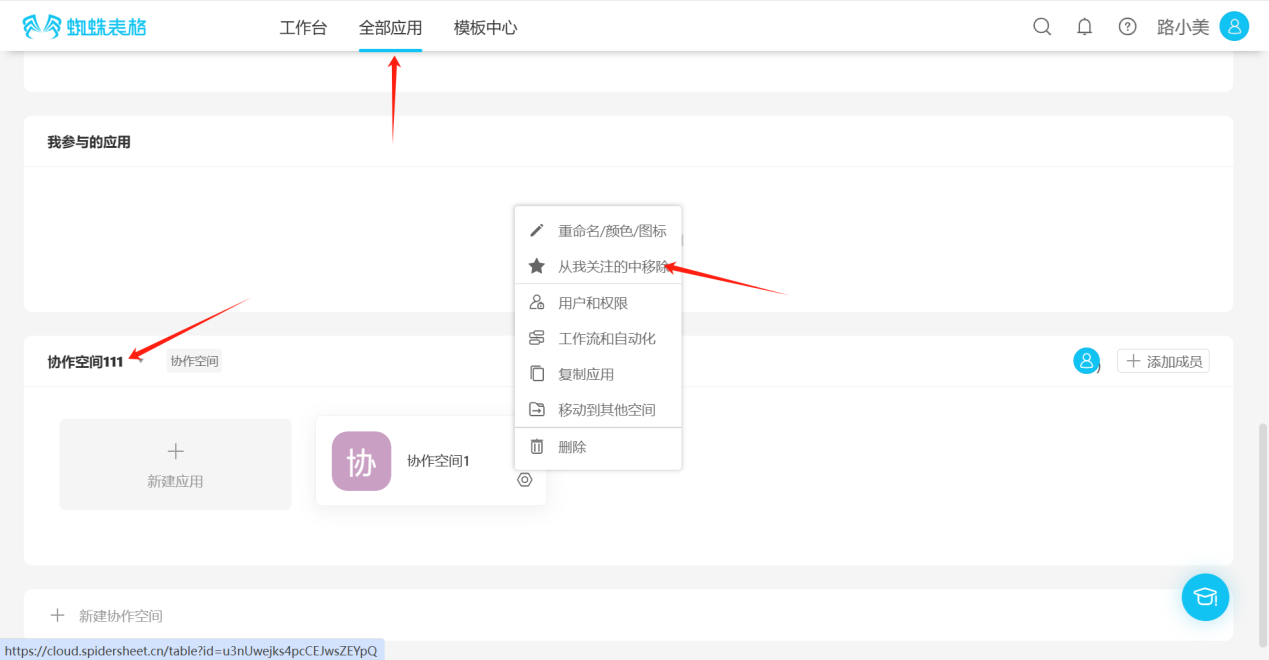
- All Applications → Collaborative Space → Open the "Edit Operation Selection" dropdown, select "Add to My Favorites" when the edit operation prompt text changes from "☆ Add to My Favorites" to "★ Remove from My Favorites", the follow is successful.
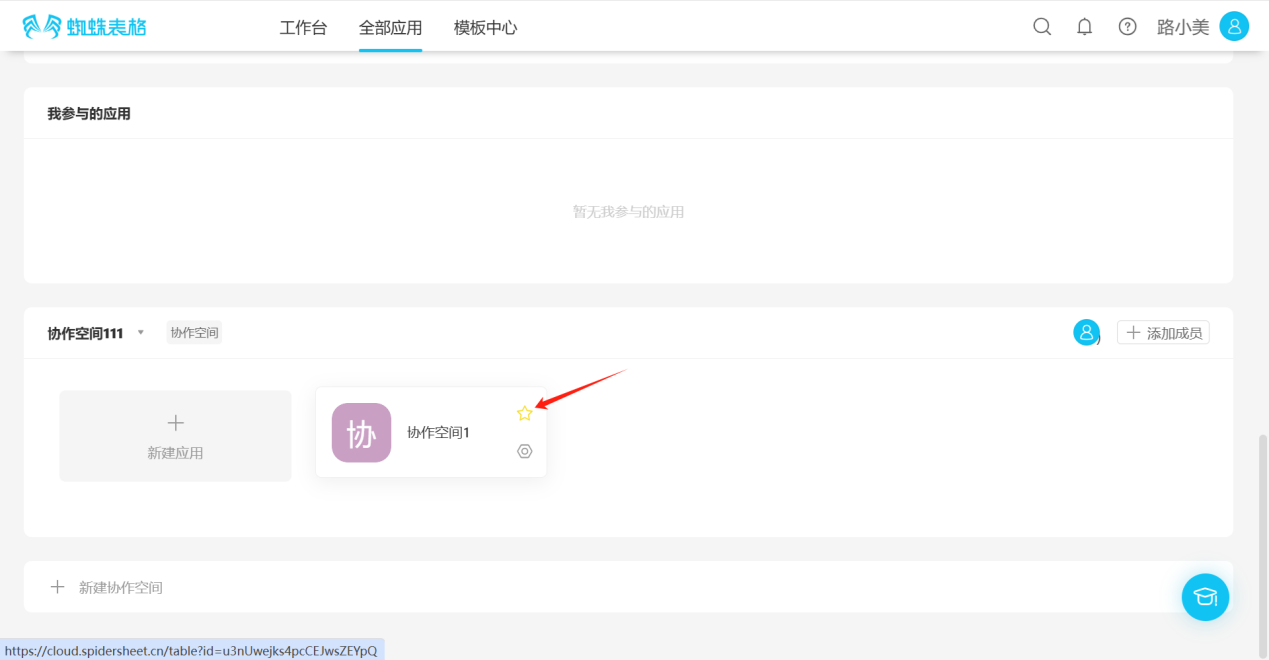
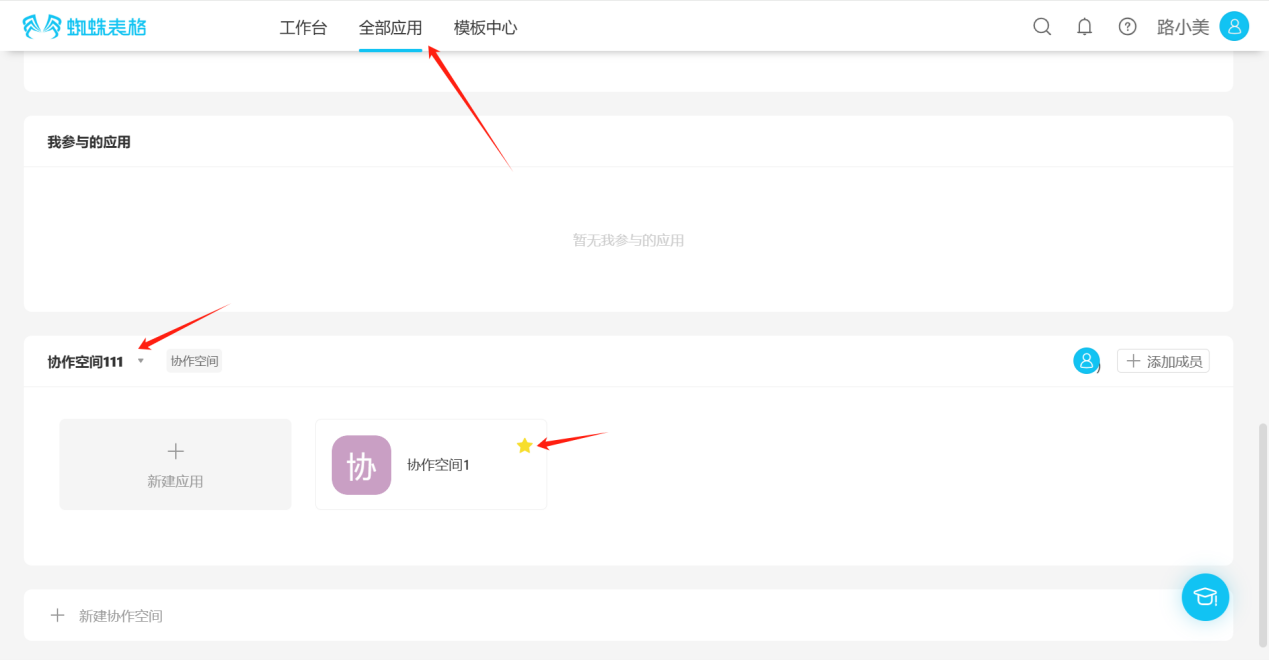
- All Applications → Collaborative Space → Click the "☆" in the upper right corner of the application you want to follow, the icon changes to "★", indicating successful follow.
- From the workspace left application list or application cards under all applications, enter the application you want to follow, click the "☆" to the right of the application name, the icon changes to "★", indicating successful follow.
(2) Viewing Followed Applications
【Choose any of the following methods to view follows】
- Workspace → My Favorites
- All Applications → My Favorites
- Removing Followed Applications
- Workspace → My Favorites → Click the "★" in the upper right corner of the application to remove from favorites, or click the "" in the lower right corner, select "Remove from My Favorites" in the edit list, the application disappears from "My Favorites", indicating successful removal.


- All Applications → My Favorites → Click the "★" in the upper right corner of the application to remove from favorites, or click the "" in the lower right corner of the application, select "Remove from My Favorites" in the edit list, the application disappears from "My Favorites", indicating successful removal.

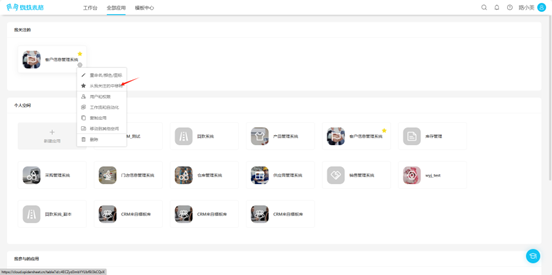
- All Applications → Collaborative Space → Click the "★" in the upper right corner of the application to remove from favorites, the icon will change from "★" to "☆", or click the "" in the lower right corner of the application, select "Remove from My Favorites" in the edit list, when the edit operation prompt text changes from "★ Remove from My Favorites" to "☆ Add to My Favorites", the removal is successful.
- From All Applications → Collaborative Space application cards, enter the application you want to remove from favorites, click the "★" to the right of the application name, the icon changes to "☆" or click the "" to the right of the application, select "Remove from My Favorites" in the edit list, when the edit operation prompt text changes from "★ Remove from My Favorites" to "☆ Add to My Favorites", the removal is successful.
2.7.3 Users and Permissions
Step 1: Choose any of the following entry points to access "Users and Permissions".
- Open the "Edit List" operation selection dropdown, select "Users and Permissions", and enter the permissions settings page.
- From the workspace left application list or application cards under all applications, enter the application you want to set permissions for, click "Users and Permissions" in the upper right corner to enter the permissions settings page.

Step 2: Select the permission group to set and add members.
【Application Management represents members in this group who can manage applications, users and permissions, and all data. Application creators cannot be deleted】
【Data Administrator represents members in this group who can manage all data within the application and perform all operations on data including create, read, update, and delete】
【View Only Data represents members in this group who can only view data and cannot add, delete, or modify data】
【View and Manage Own Data represents members in this group who can only view and manage their own data】


Step 3: If none of the above groups meet your needs, you can select "Create New Permission Group".

Step 4: In the popup page, set permissions sequentially. The finest granularity can support field-level create, read, update, and delete operations. After completing the settings, click "Save" to take effect.

Step 5: If this permission group has filtering requirements for data, you can click "Add a Filter Condition".

Step 6: The data filtered by the filter conditions is the range of data rows that users in this permission group can operate on, i.e., when a certain field meets certain conditions. Multiple filter conditions are applied simultaneously. After completing the settings, click "Save" to take effect.

2.7.4 Automated Workflow
Step 1: Choose any of the following entry points to access "Automated Workflow"
- Open the "Edit List" operation selection dropdown, select "Workflow & Automation", and enter the automated workflow settings page.
- From the workspace left application list or application cards under all applications, enter the application you want to set up automated workflow for, click "Automated Workflow" in the upper right corner to enter the automated workflow settings page.
Step 2: In the popup page, select "Create a New Workflow".
Step 3: In the popup page, sequentially set the workflow name, target table, trigger method, filter rules, and operations to execute.

2.7.5 Copy Application
Step 1: Open the "Edit List" operation selection dropdown and select "Copy Application".


Step 2: In the opened popup, edit the application name, space, and choose whether to copy data sequentially. Click "Copy" to successfully copy. You can view it in the corresponding space.
2.7.6 Move to Other Space
Step 1: Open the "Edit List" operation selection dropdown and select "Move to Other Space".
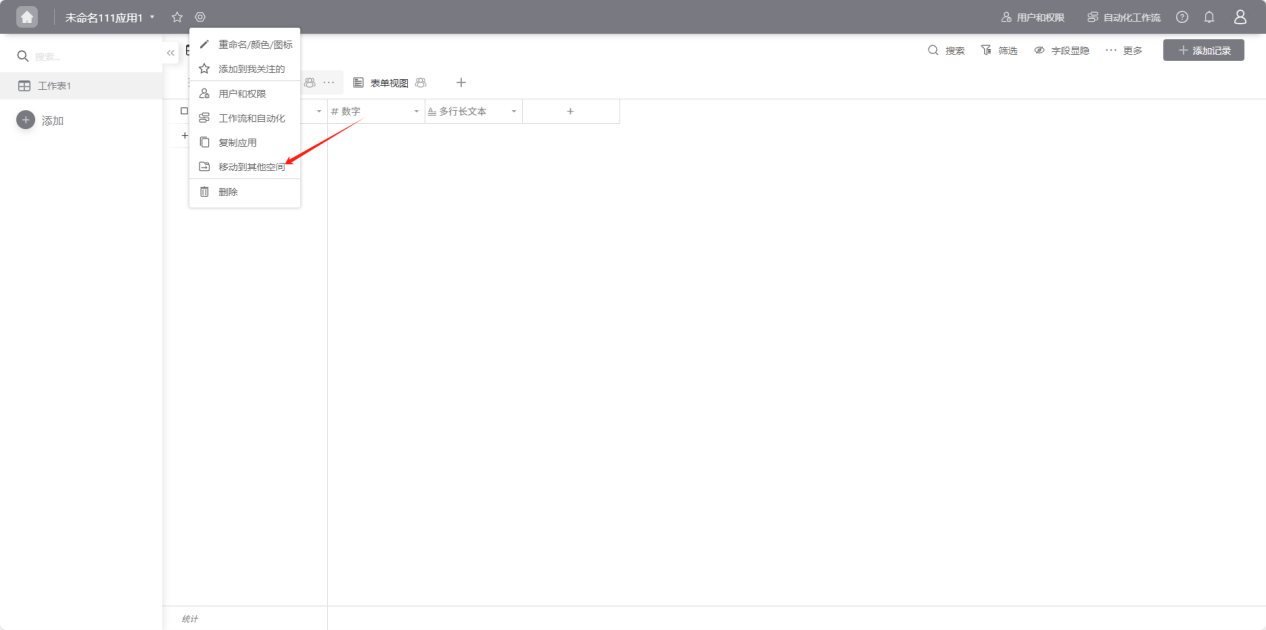
Step 2: In the opened popup, select the space to move to, click "Move" to successfully move. You can view the application in the moved space.
2.7.7 Delete Collaborative Space Application
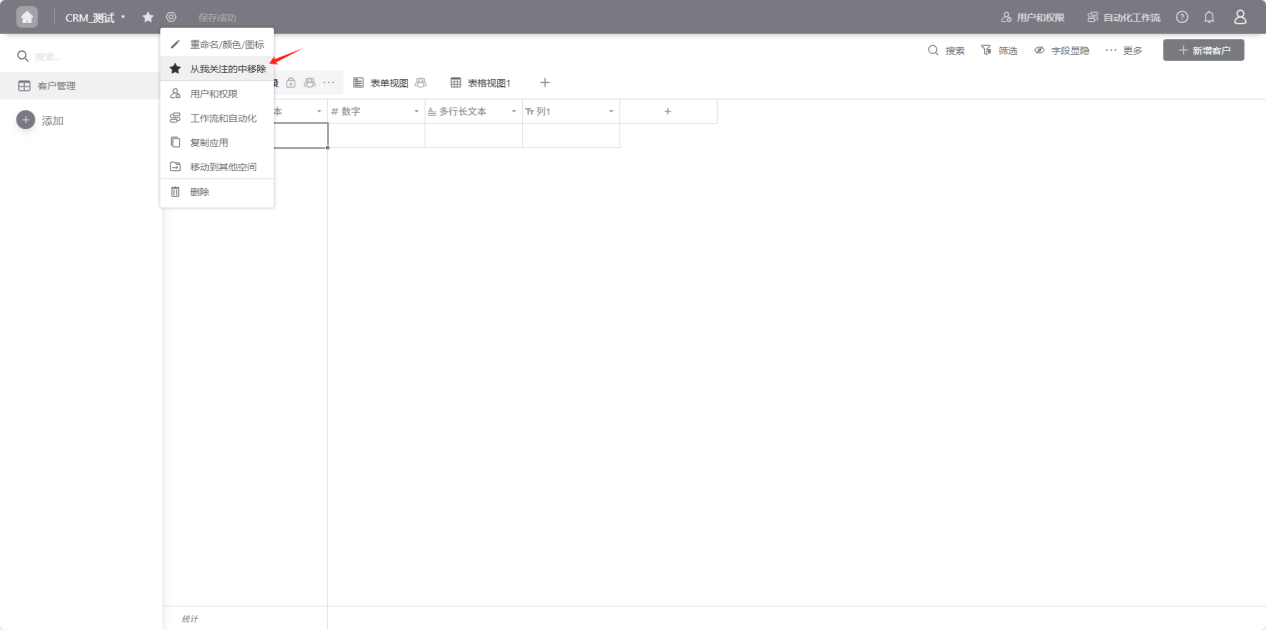
Step 1: Open the "Edit Operation Selection" dropdown and select "Delete".
Step 2: Check "Confirm to execute this operation", click the "Delete" button to confirm deletion.
Step 3: The message "Application deleted successfully, you can click the avatar in the upper right corner to view in 'Application Recycle Bin'" indicates successful deletion.