Operating Worksheet (Table) Rows and Columns
1. Operating on Entire Columns of Data
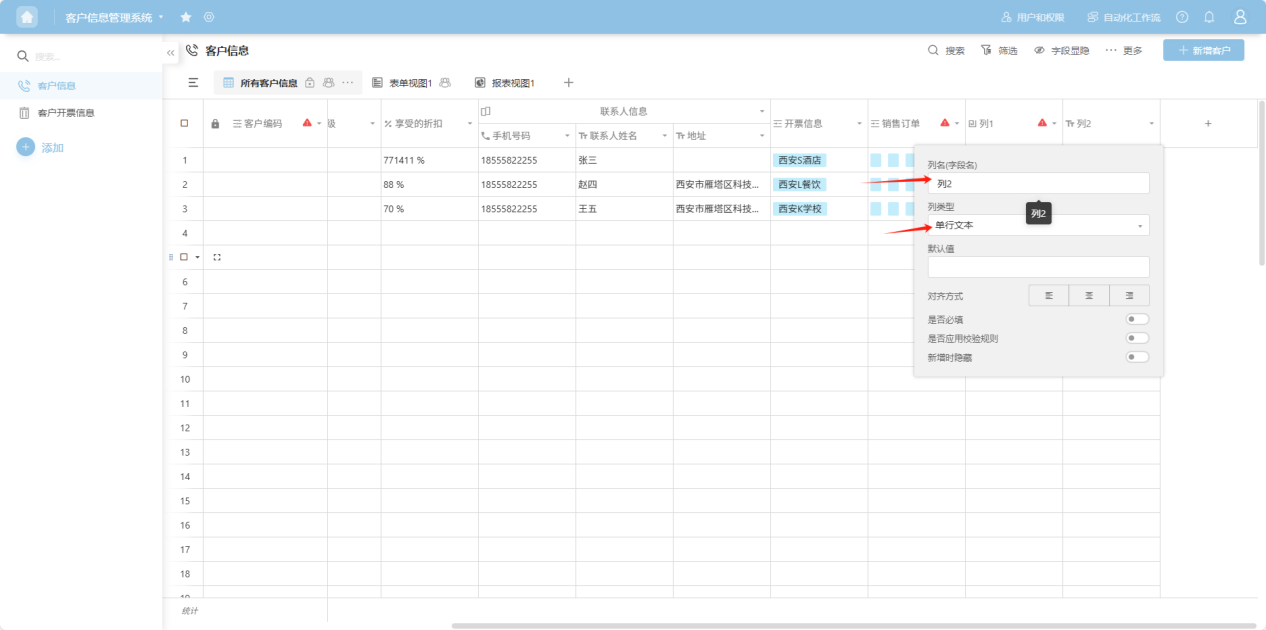
1.1 Insert a Column
Step 1: From the app list on the left side of the workbench or the app cards under 'All Apps', enter the app whose worksheet you want to edit. Select the worksheet to edit from the worksheet list on the left.
Step 2: Click the "+" on the far right side of the table to add a blank column.

Step 3: In the pop-up column edit box, add a column name, select a column type, and configure the corresponding edit items for that column type. For detailed explanations of each column type, refer to the "1.3 Edit Column Settings" section.
1.2 Insert a Column to the Left/Right
Step 1: From the app list on the left side of the workbench or the app cards under 'All Apps', enter the app whose worksheet you want to edit. Select the worksheet to edit from the worksheet list on the left.
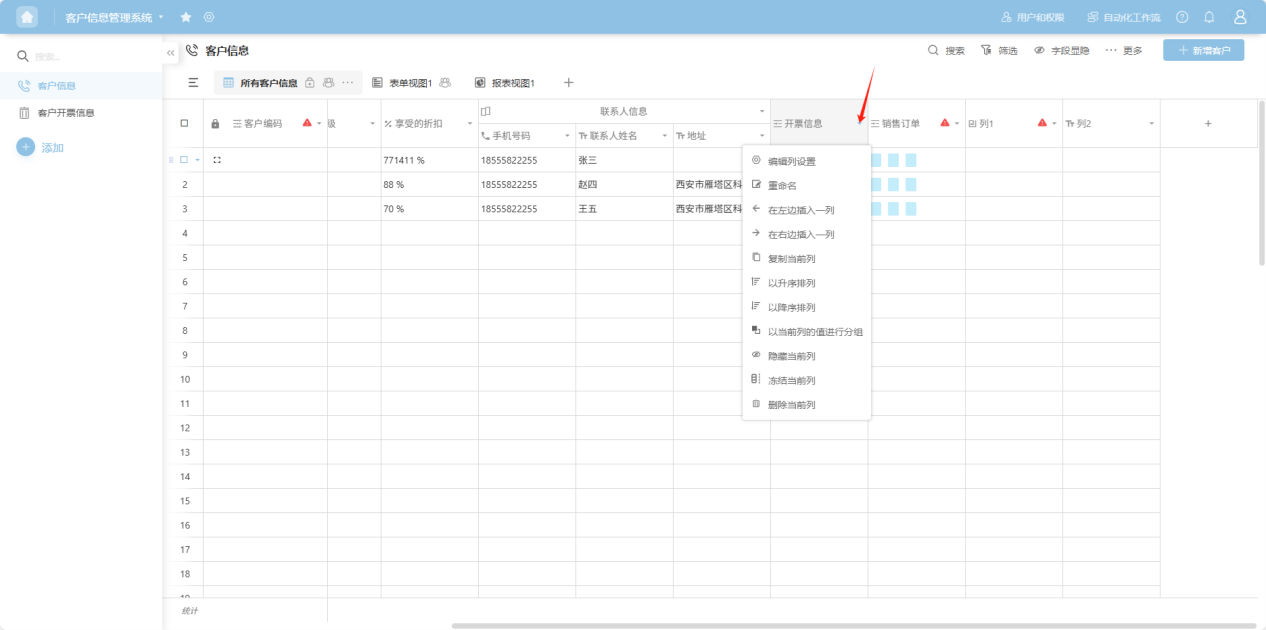
Step 2: Select the column field you want to edit. Click the " " to the right of the column name, or right-click any cell in that column's data to open the column operation dropdown menu. Select "Insert column to the left/right".

Step 3: In the pop-up column edit box, add a column name, select a column type, and configure the corresponding edit items for that column type. For detailed explanations of each column type, refer to the "1.3 Edit Column Settings" section.
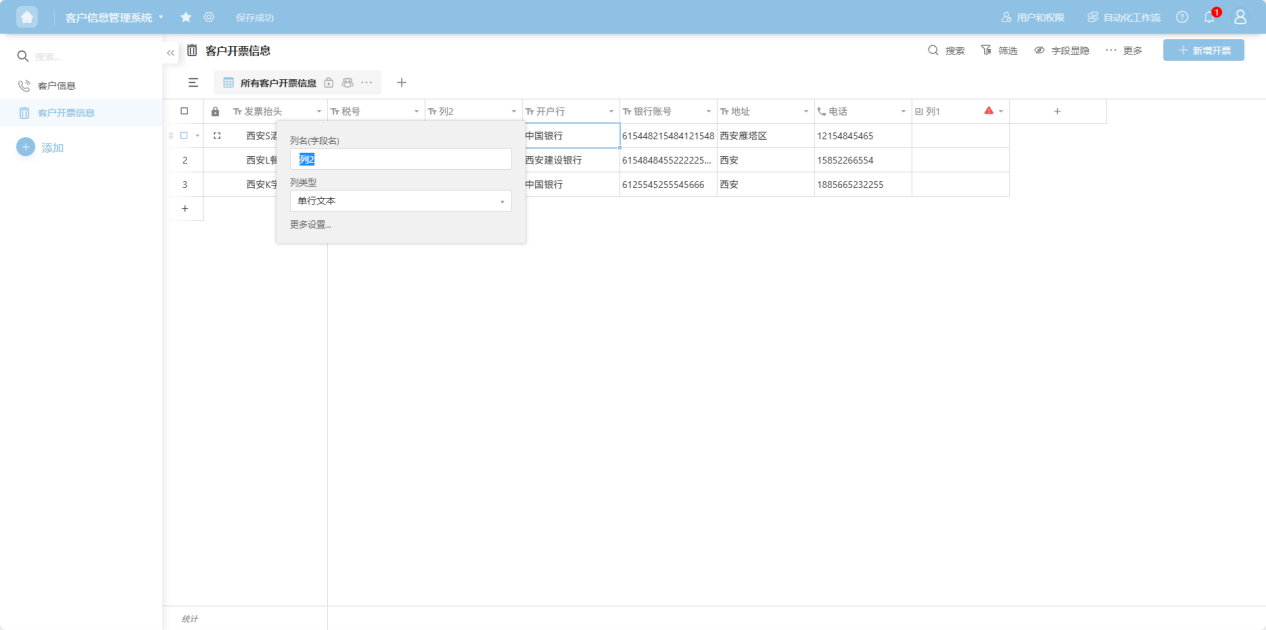
1.3 Edit Column Settings
Step 1: From the app list on the left side of the workbench or the app cards under 'All Apps', enter the app whose worksheet you want to edit. Select the worksheet to edit from the worksheet list on the left.
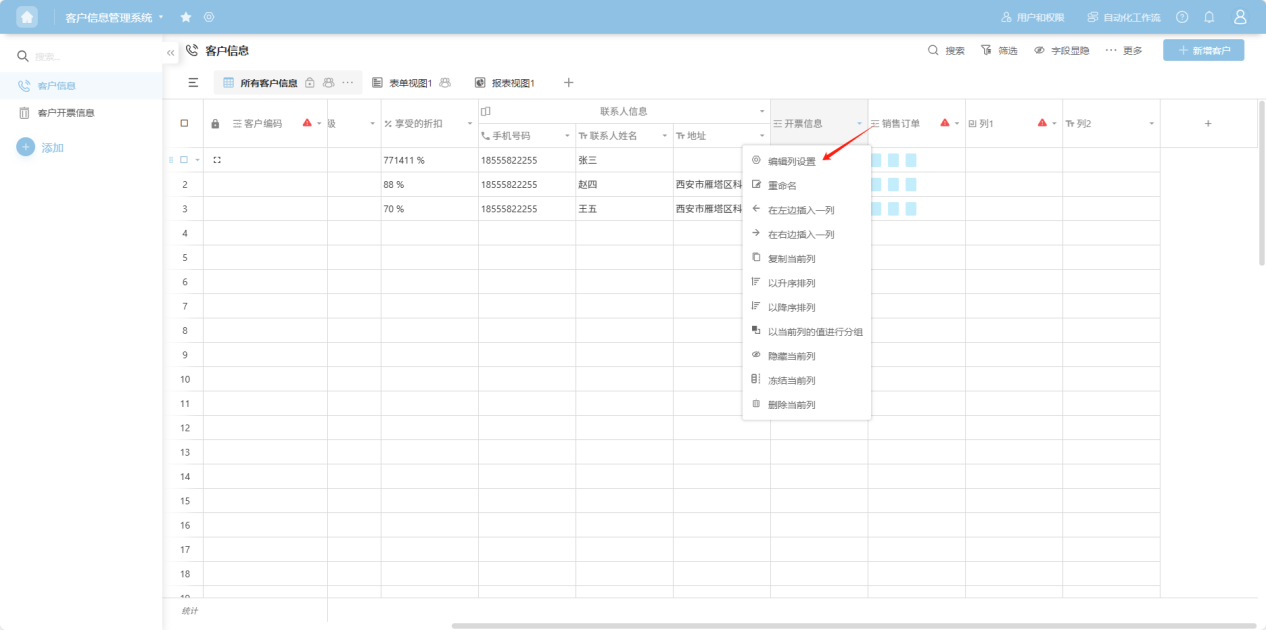
Step 2: Select the column field you want to edit. Click the "" to the right of the column name, or right-click any cell in that column's data to open the column operation dropdown menu.
Step 3: In the column operation dropdown menu, select "Edit column" to open the column edit box.
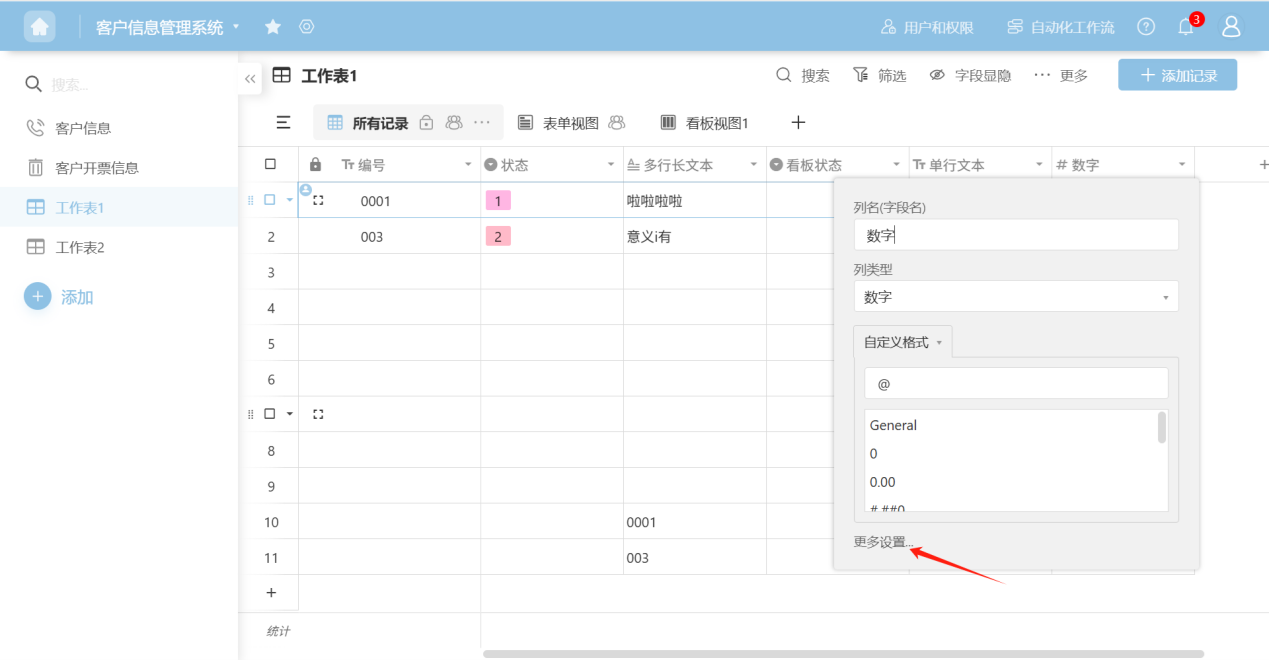
Step 4: In the column edit box, edit the column name, column type, and configure the corresponding edit items for that column type.
Settings for each column type:
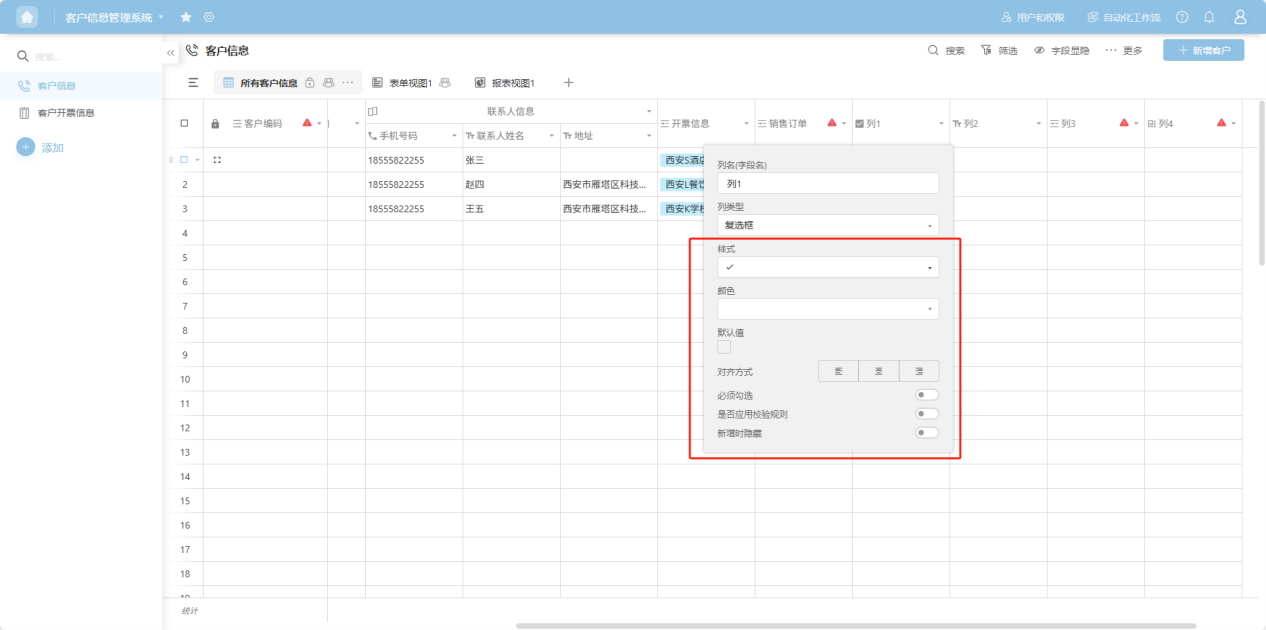
(1) "More Settings" Common to Most Column Types
Common settings applicable to multiple column types, including: Single-line text, Multi-line text, Rich text, Image, Attachment, Email address, IP address, Hyperlink, Location, Phone number, Created by, Last modified by, Handwritten signature. Column types with specific settings are listed below.
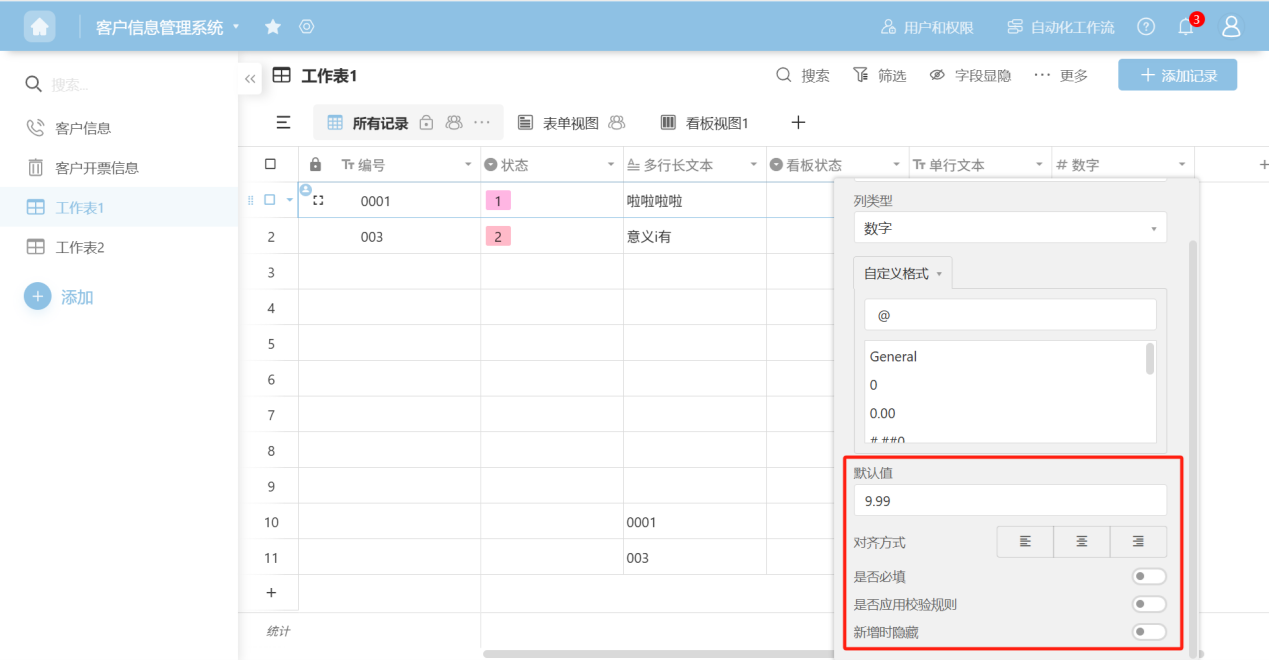
- Default value: The value that will be populated by default when adding a new data row.
- Alignment: Choose the alignment of data within the cell.
- Required field: Turn on this switch to add a required field indicator for this field on the data creation page.
- Apply validation rules: Allows custom data validation rules to be defined.
- Hide when adding: Turn on this switch to hide this field when adding a new record.
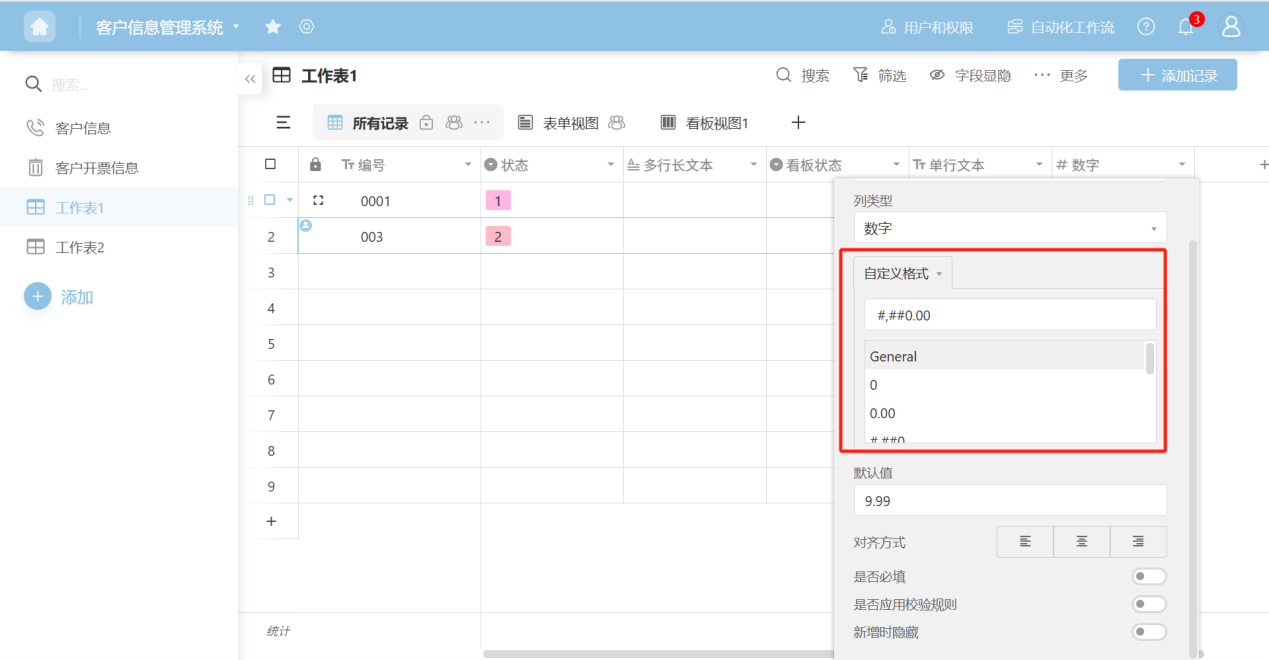
(2) Number Type
【Use when you need numeric data】
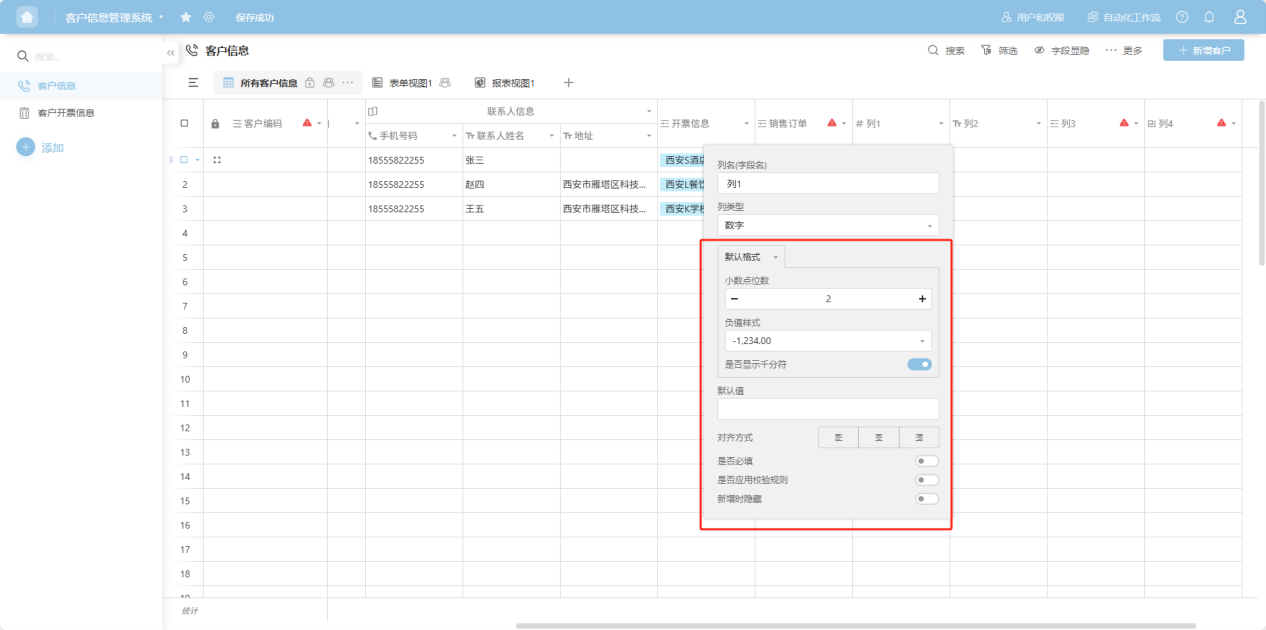
- Default format - Decimal places: Set the number of decimal places for the data.
- Default format - Negative value style: Display style for negative values.
- Custom format: Choose your preferred number format.
(3) Currency Type
【Use when you need currency data】
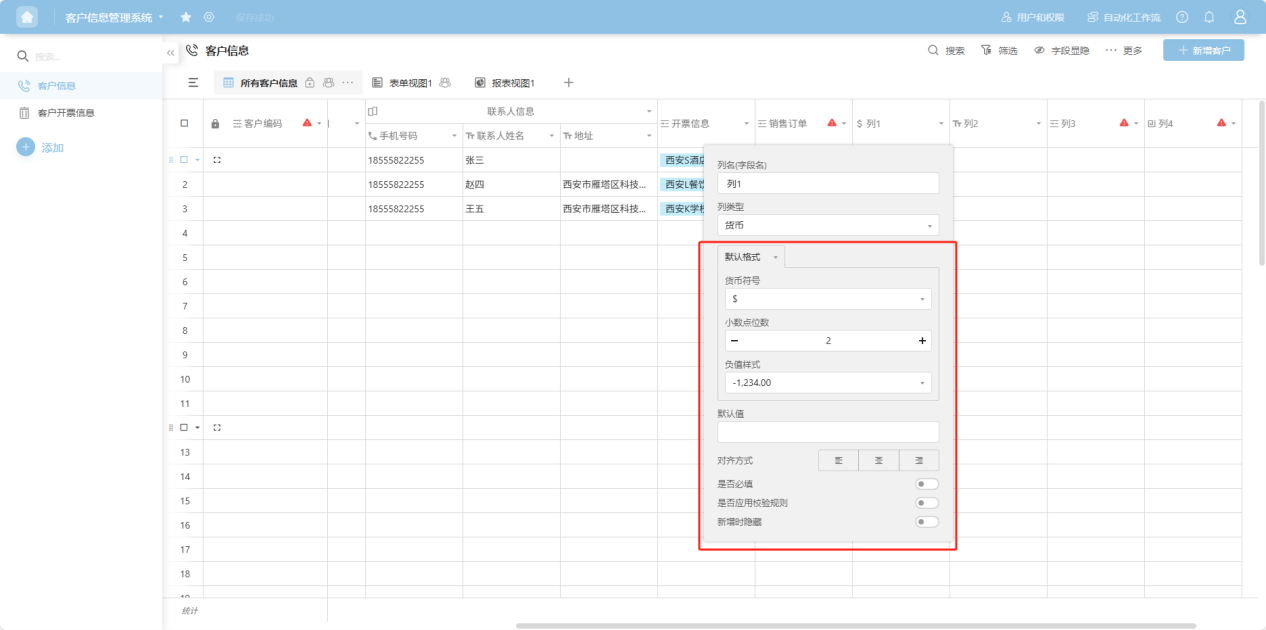
- Default format - Currency symbol: Select based on the currency type for this column.
- Default format - Decimal places: Set the number of decimal places for the data.
- Default format - Negative value style: Display style for negative values.
- Custom format: Choose your preferred number format.
(4) Formula Type
【Use when the data in this column needs to be calculated using a spreadsheet formula】
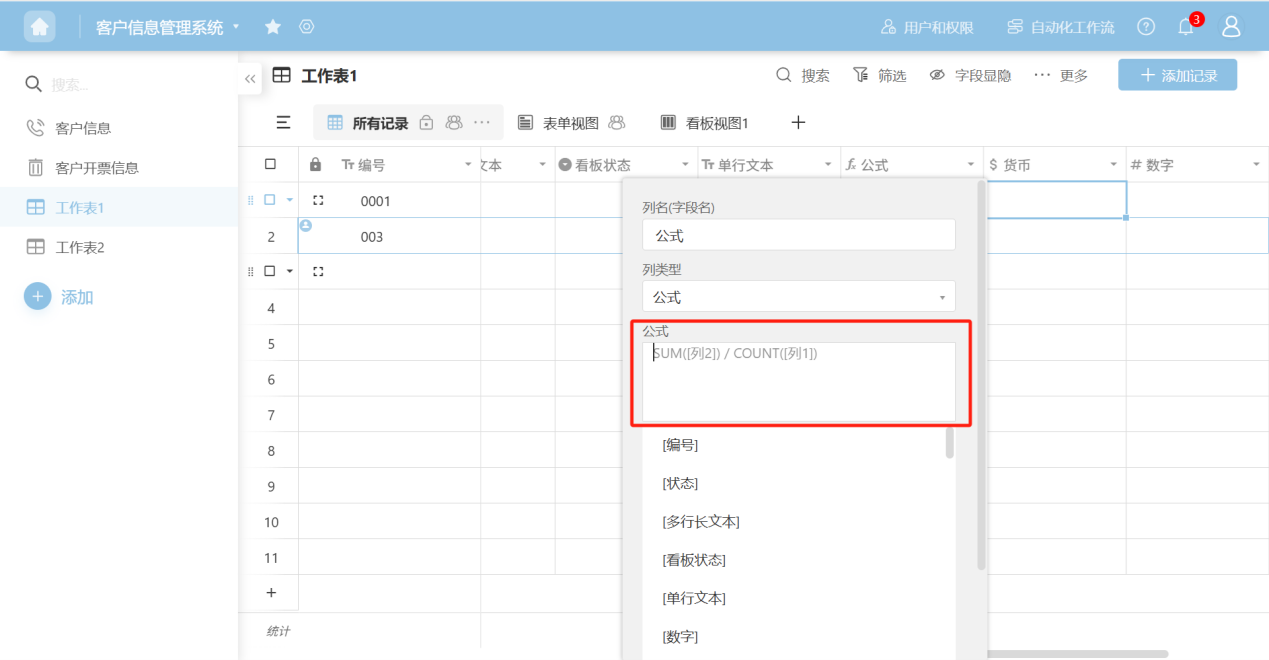
- Formula: Follow the prompts to select the required columns or functions to generate the formula.
(5) Count
【When the cell contains data linked from another table, use Count to tally how many values are in the cell】
(6) Percentage Type
【Use when the data type is a percentage and needs to be displayed as percentage text or in a chart form】
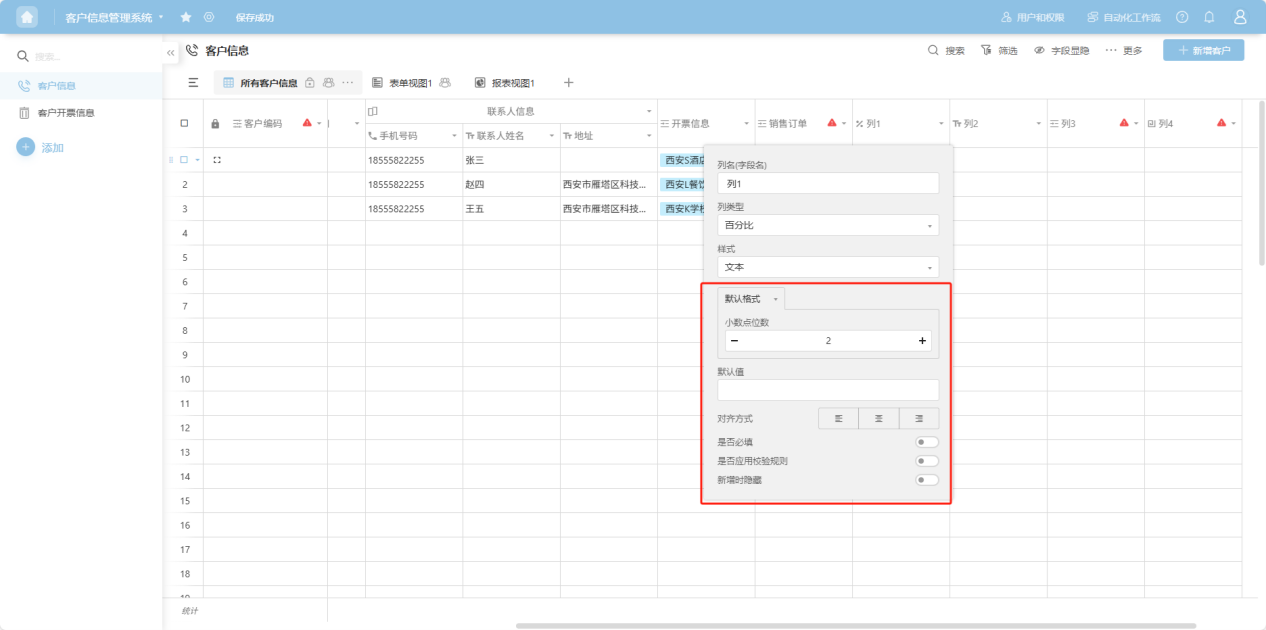
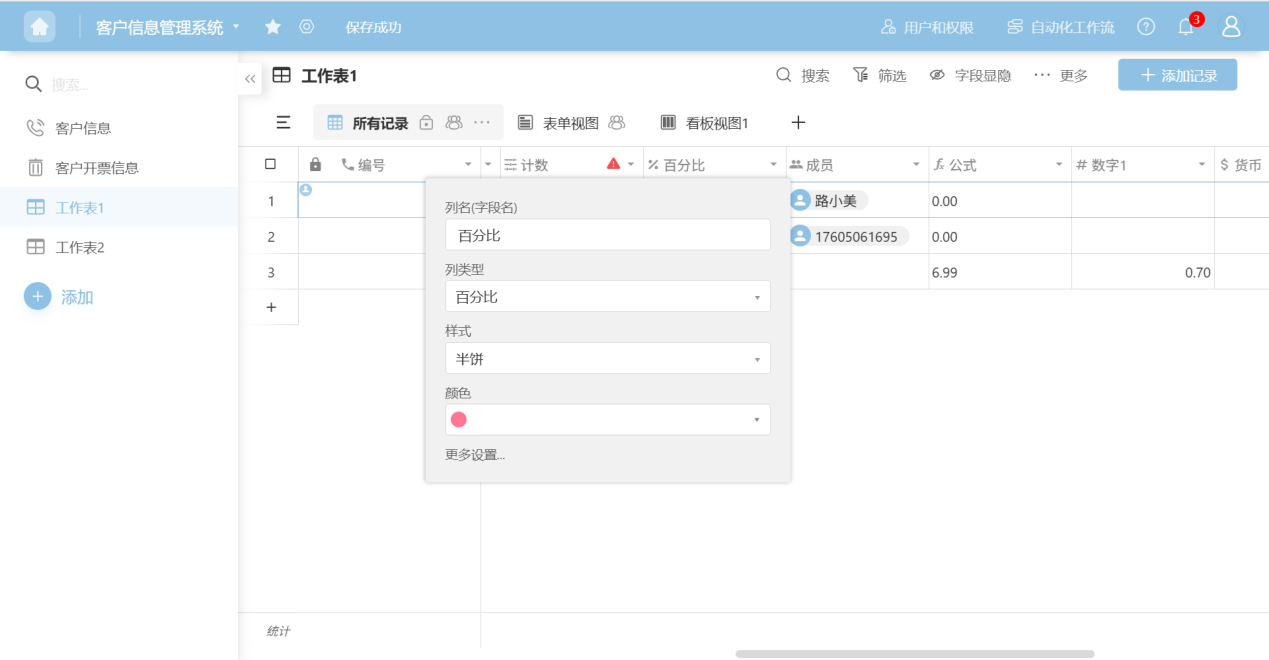
- Style: Choose the display format for the data.
- Default style - Decimal places: When 'Text' style is selected, set the number of decimal places to display.
- Color: When a chart type is selected as the style, choose the chart theme color.
(7) Date Type

- Default format - Date value format: Set the date display format.
- Custom format: Choose your preferred date format.
(8) Time Type
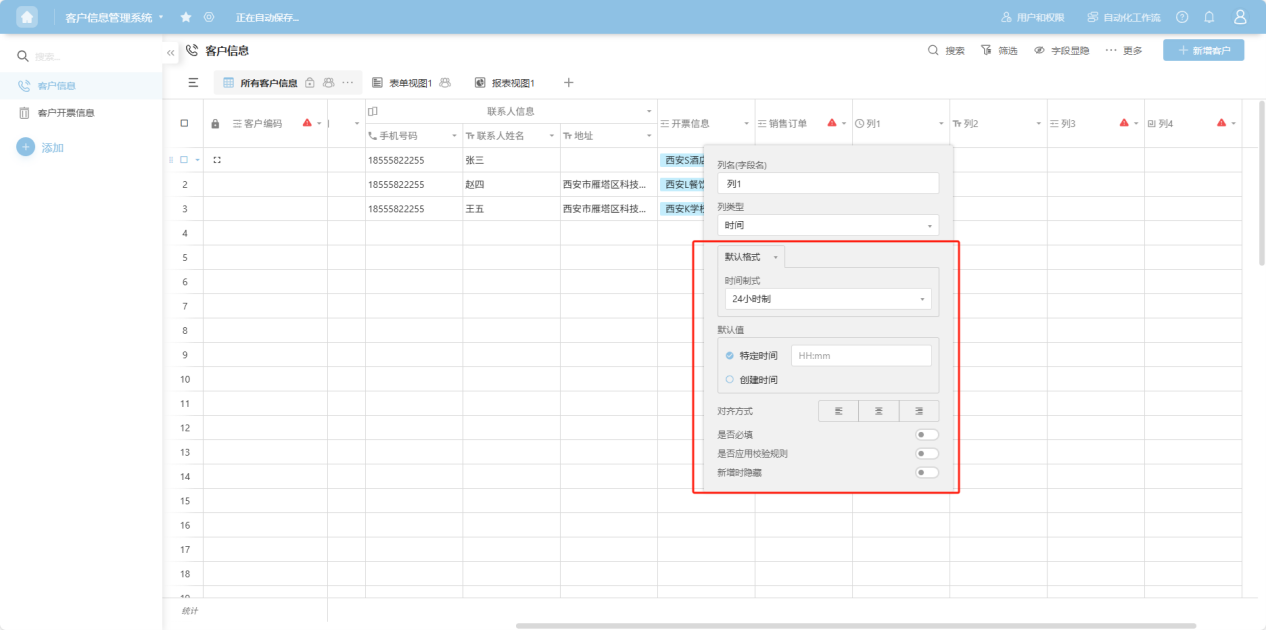
- Default format - Time format: Choose between 12-hour or 24-hour clock.
- Custom format: Choose your preferred time display format.
(9) Date and Time / Created Time / Last Modified Time
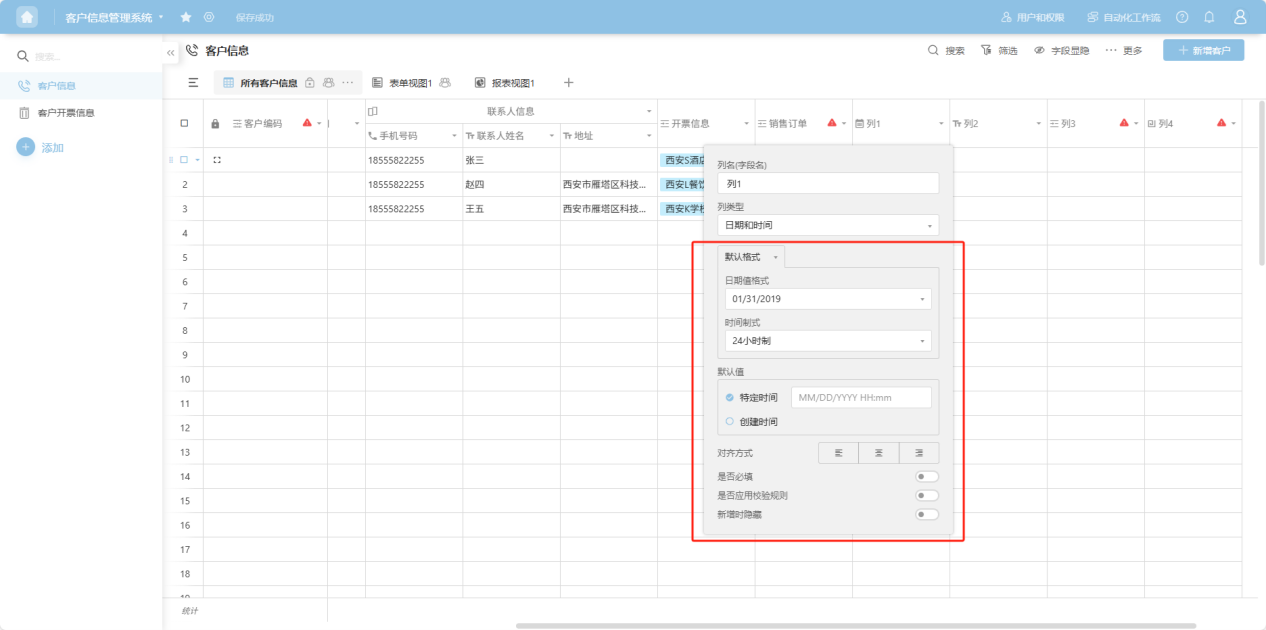
- Default format - Date value format: Set the date display format.
- Default format - Time format: Choose between 12-hour or 24-hour clock.
- Custom format: Choose your preferred date and time format.
(10) Checkbox Type
(11) Single Select / Multiple Select
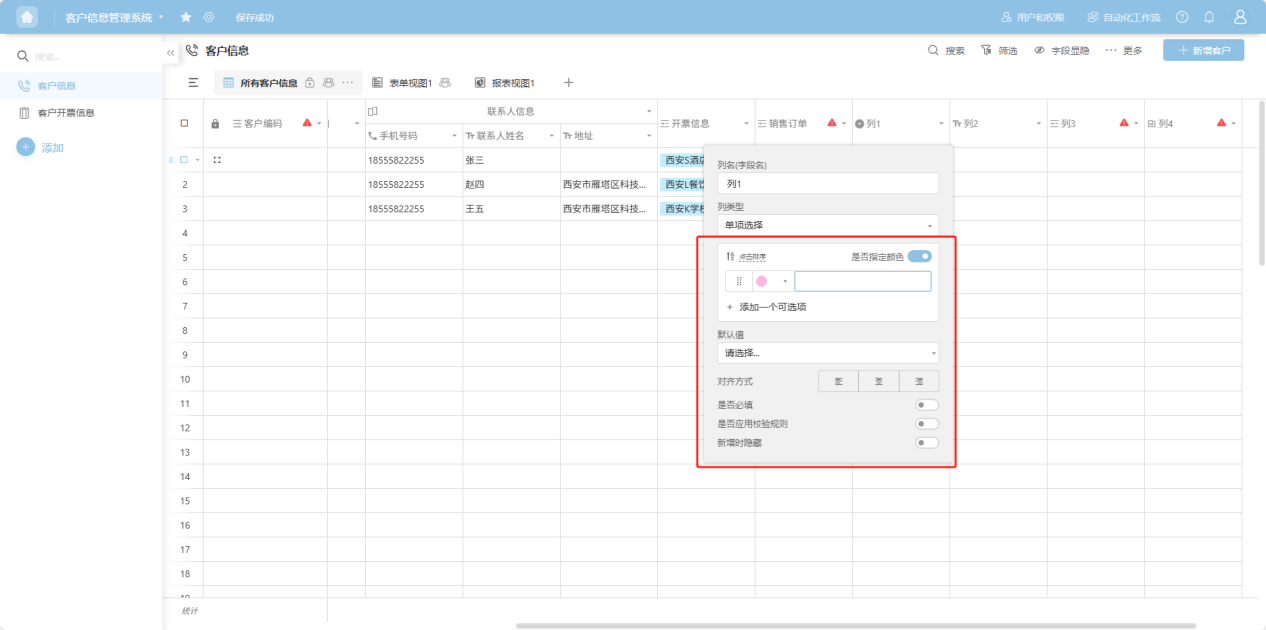

- Assign colors: Turn on this switch to set a background color for corresponding options.
- Add an option: Add an option value.
- Click to sort: Options are sorted alphabetically.
(12) Image Single Select / Image Multiple Select
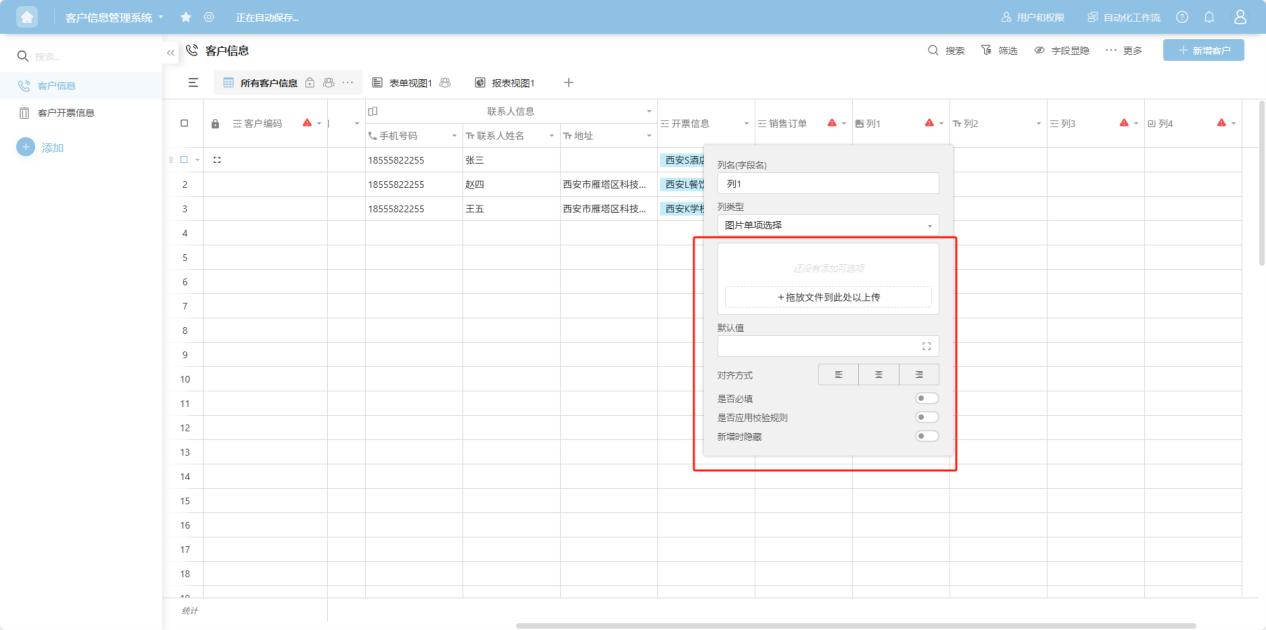
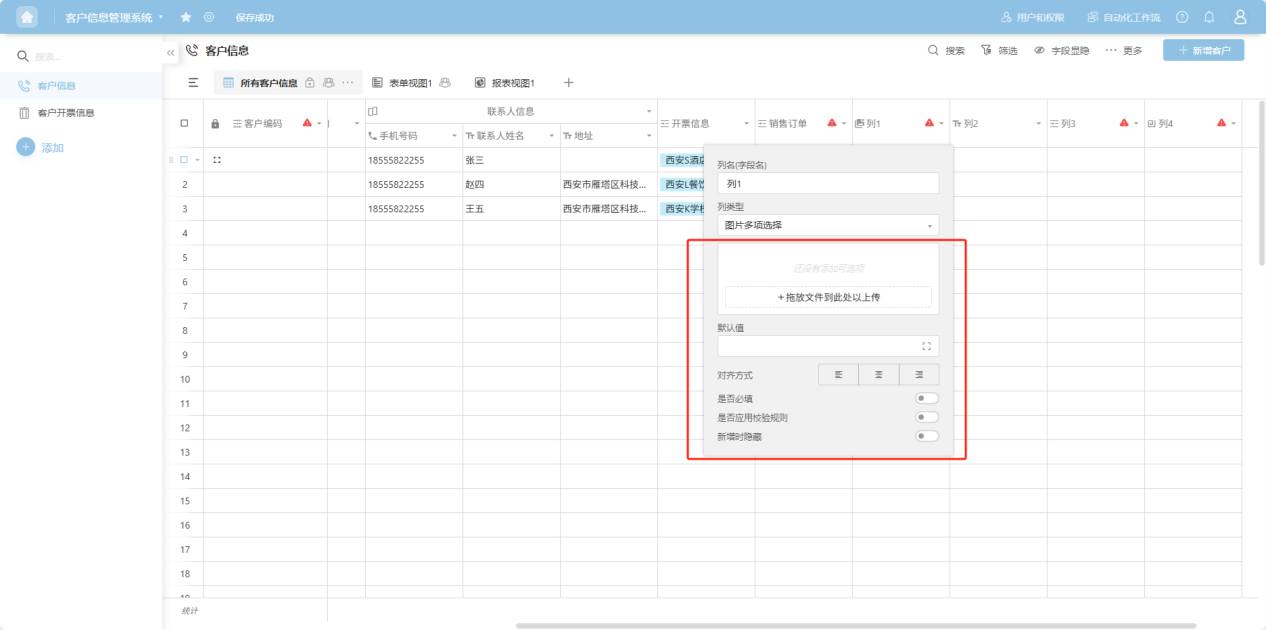
- Drag and drop files to upload image options: You can drag image files to this area to generate image options, or click the button to select images to upload.
(13) Address Type
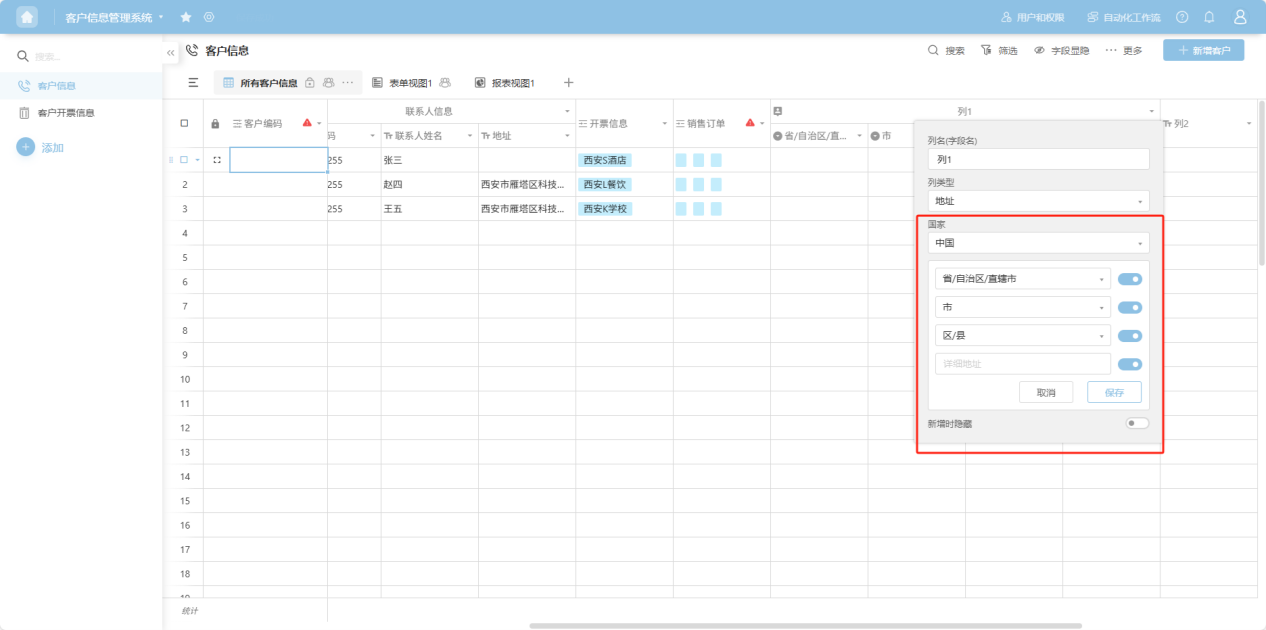
- Country: Select "China" or "United States".
- Toggle switch next to each address level: Controls whether that level of address is displayed.
(14) Auto Number
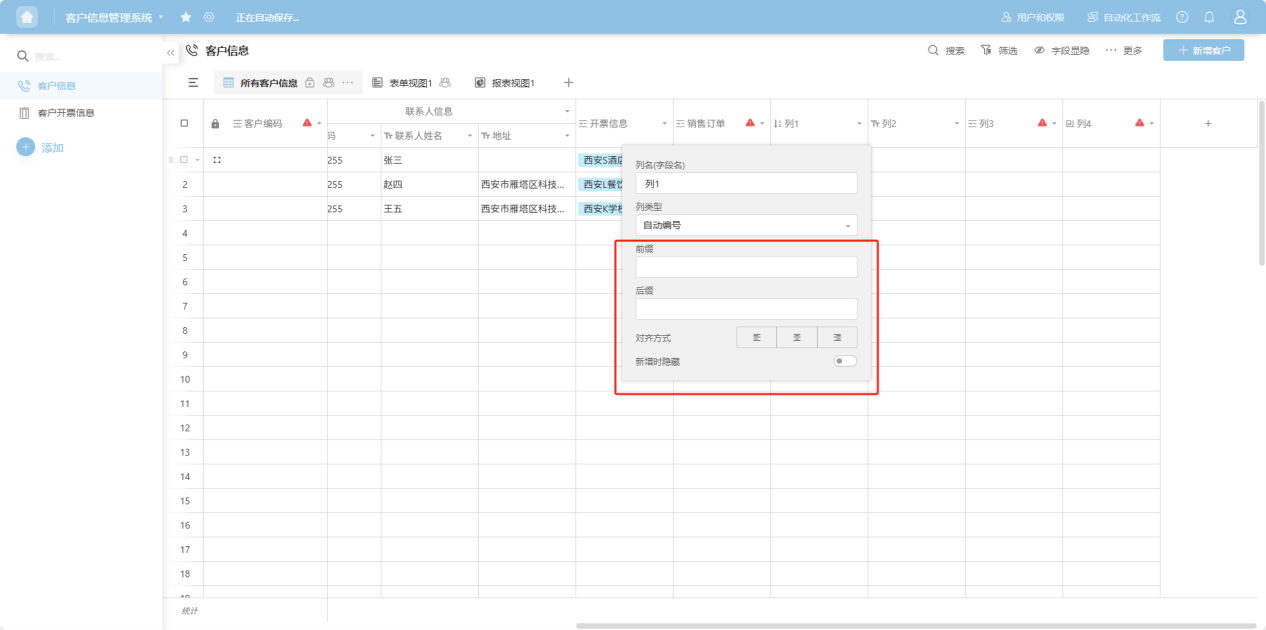
- Prefix: Text displayed before the number.
- Suffix: Text displayed after the number.
(15) Checklist
【Setting the options for this column will automatically add four checklist columns: "Completed", "Assignee", "Due Date", and "Details】
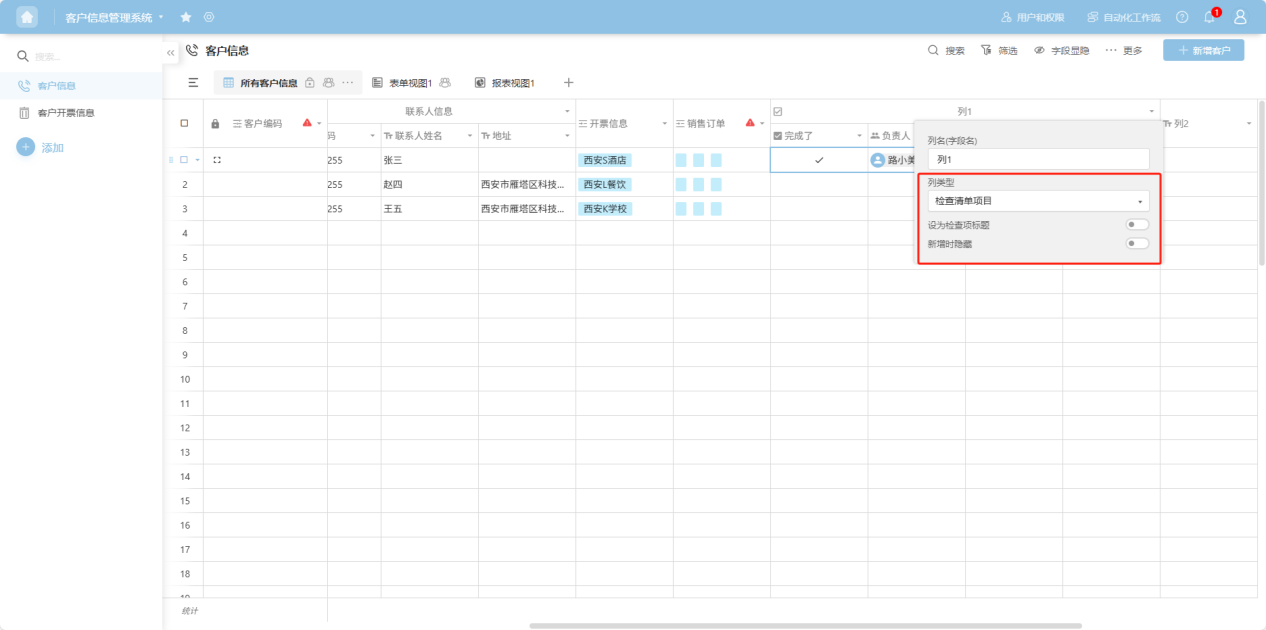
- Set as checklist title: Turn on this switch to only add the Details column.
(16) Rating Type
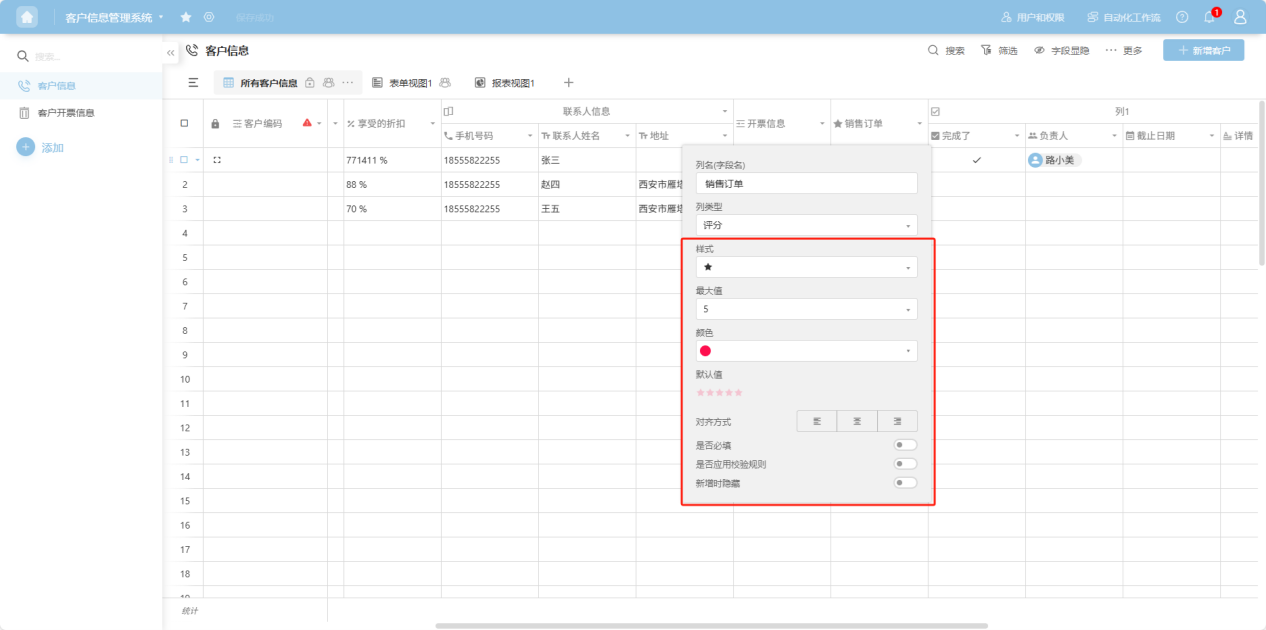
- Style: Set the rating icon.
- Maximum value: Set the maximum rating value.
- Color: Set the theme color for the rating icon.
(17) Collaborator
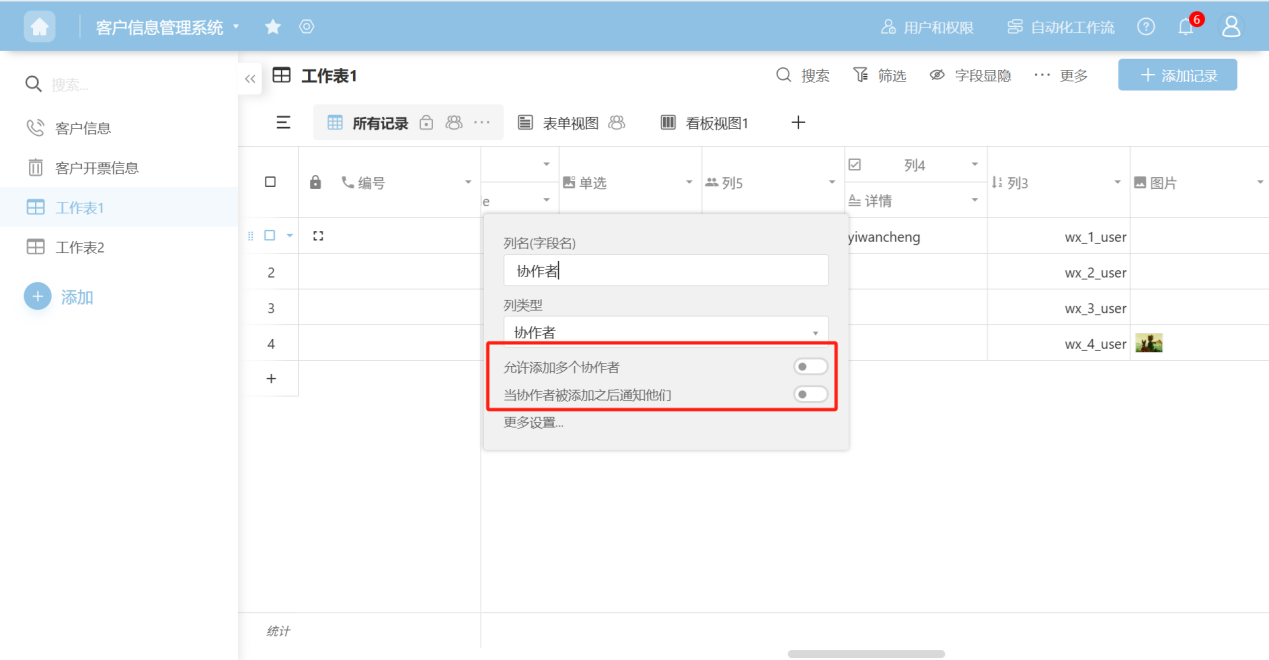
- Allow adding multiple collaborators: Turn on this switch to allow adding multiple collaborators to each record.
- Notify collaborators when added: Turn on this switch, and collaborators will receive a notification via "Internal Message" when they are added.
(18) Grouped Column
【Selecting this column type allows you to set other columns as secondary headers under this column】
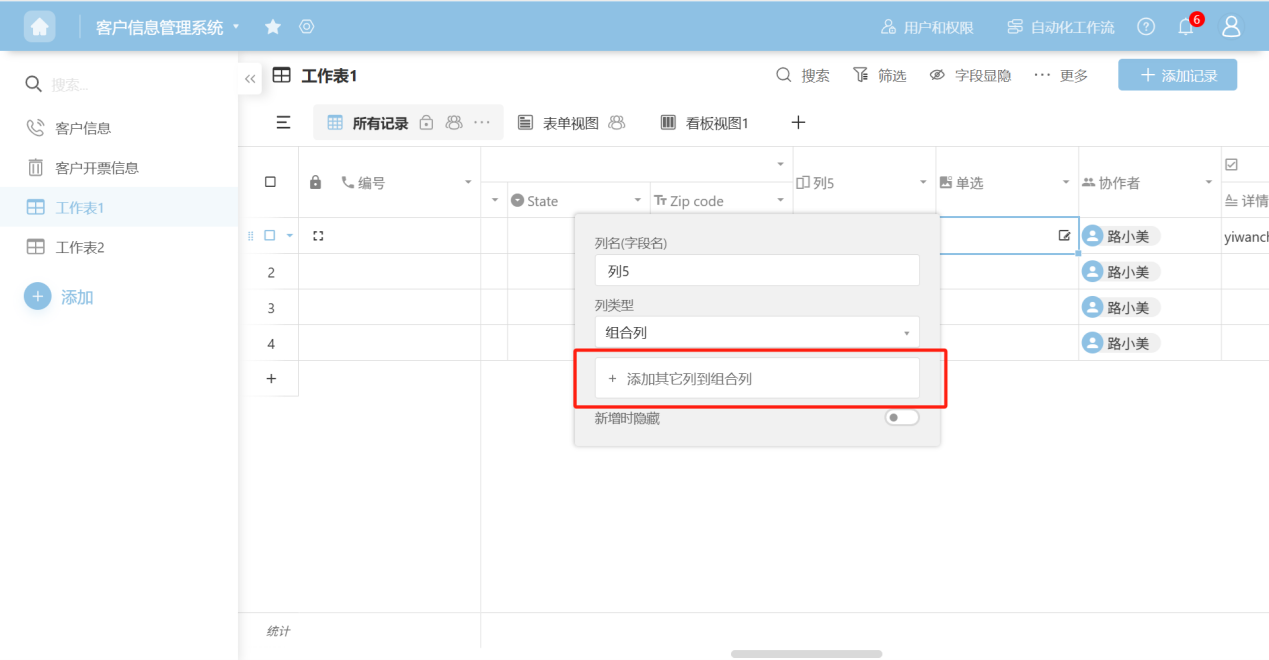
- Add other columns to the grouped column: Select existing columns to add them as secondary headers under this primary header.
(19) Department Type
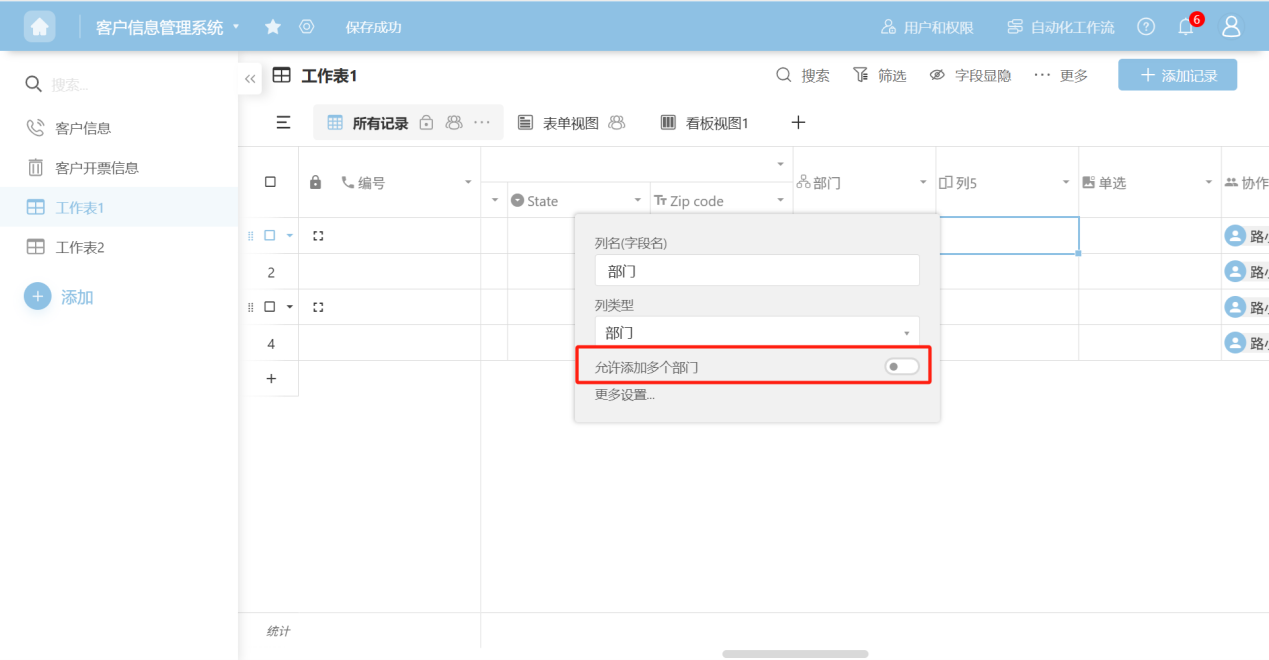
- Allow adding multiple departments: Allows adding multiple department entries to each record.
(20) Member Type
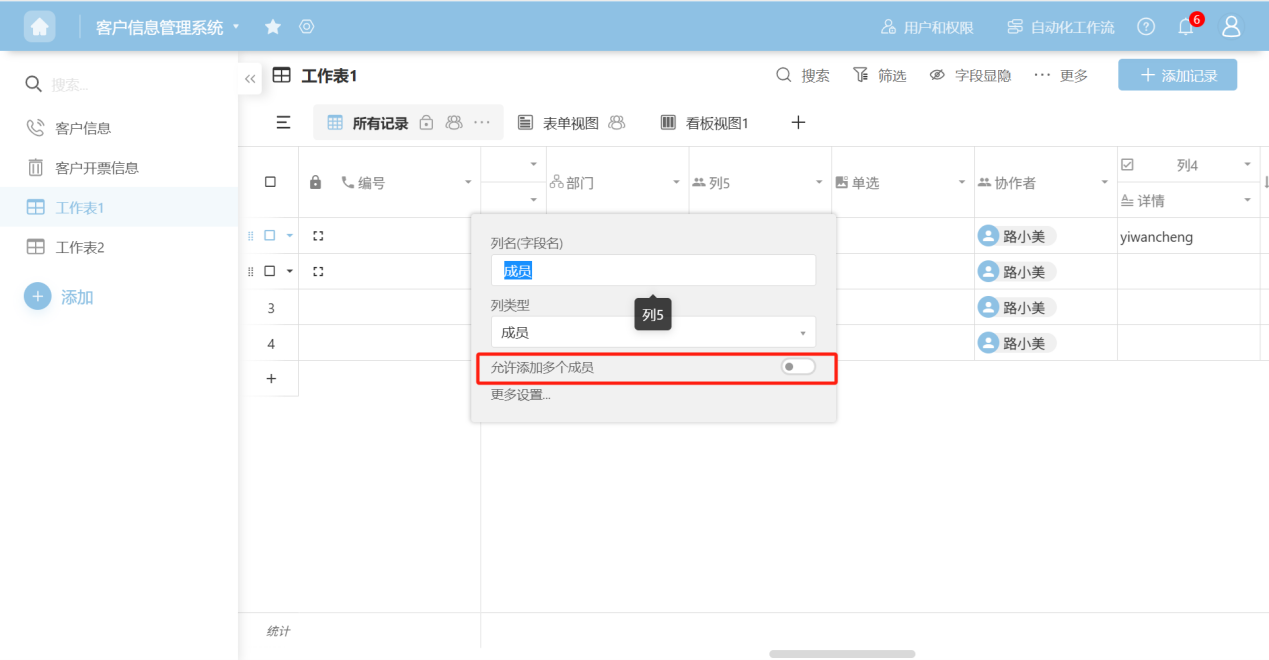
- Allow adding multiple members: Allows adding multiple member entries to each record.
(21) Link Data from Another Worksheet
【Use this function when you need to link to data from another table】
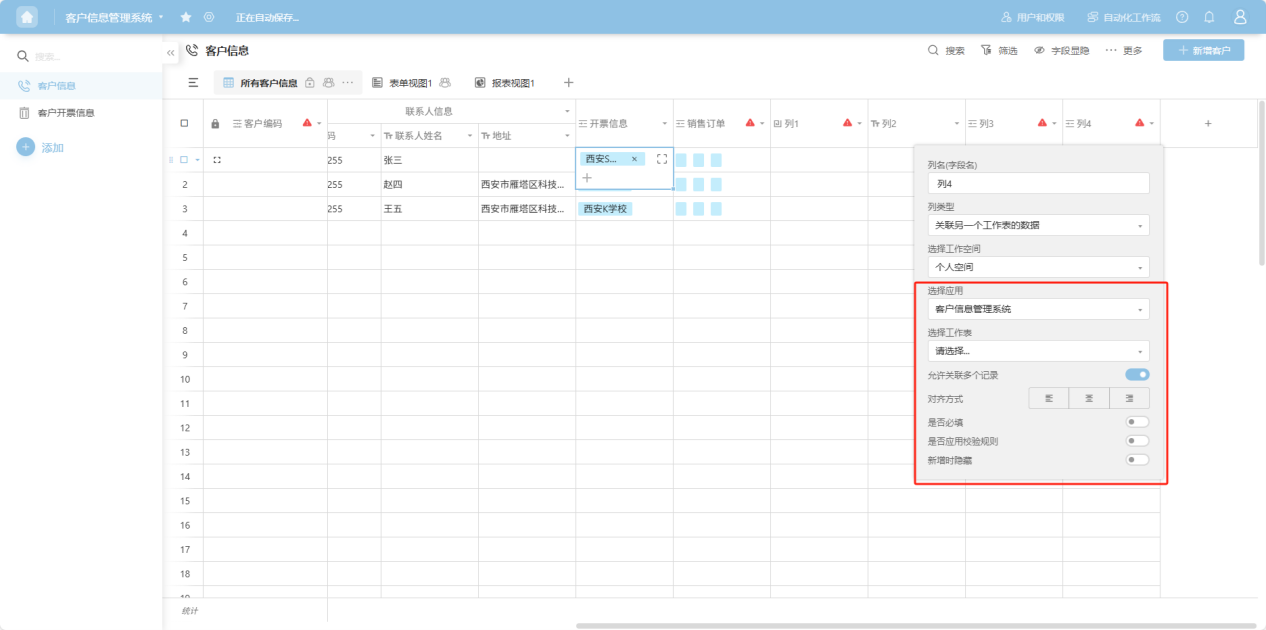
After selecting this type, the following fields need to be filled out:
- Select Workspace: You can choose your Personal Space or a custom collaborative space.
- Select App: Select the app (within the chosen workspace) where the data you want to link to is located.
- Select Worksheet: Select the worksheet where the data you want to link to is located.
- Display Field: The data column from the linked table whose value you want to show.
- User Permissions: Select permissions or create new data permissions.
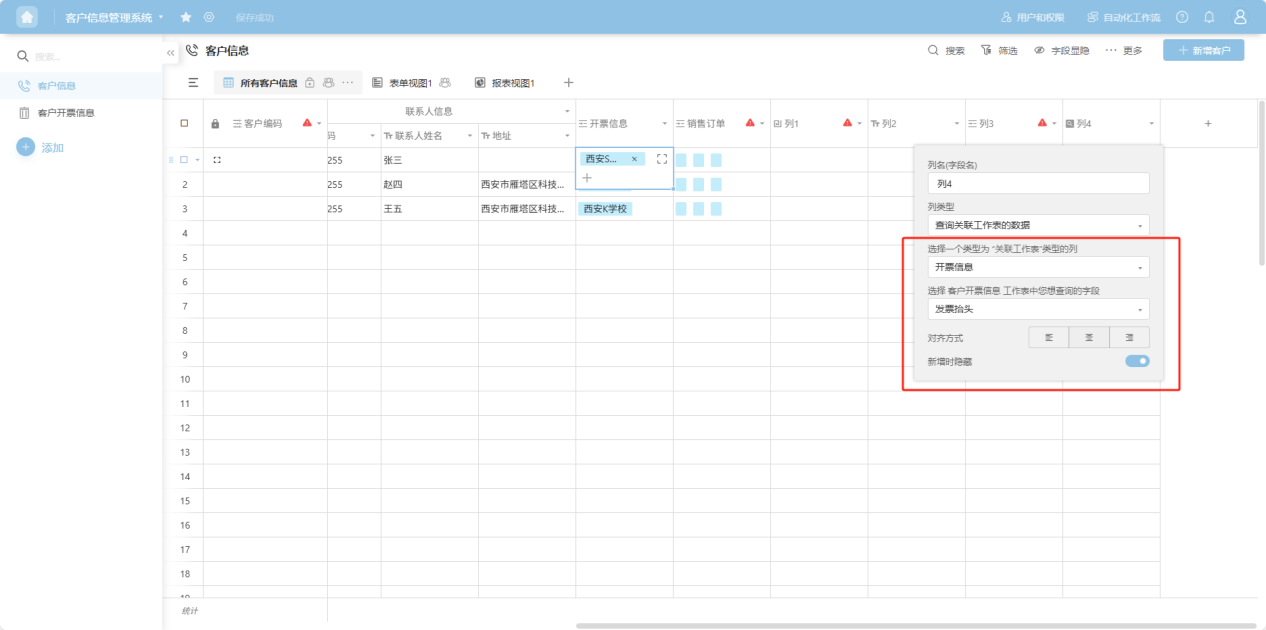
(22) Lookup Data from Linked Worksheet
【When a worksheet already has a field linked to another worksheet, and you need to query other fields from that linked worksheet】
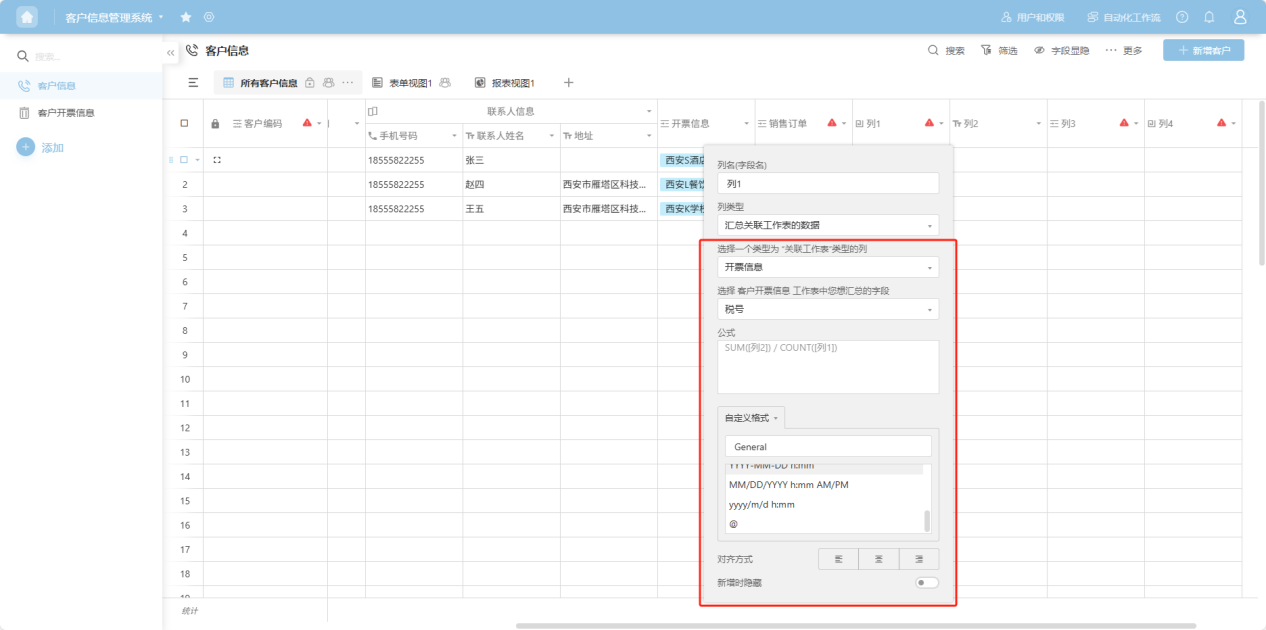
(23) Summarize Data from Linked Worksheet
【When a worksheet already has a field linked to another worksheet, and you need to query other fields from that linked worksheet and summarize the data using various calculation formulas】
1.4 Rename
Step 1: From the app list on the left side of the workbench or the app cards under 'All Apps', enter the app whose worksheet you want to edit. Select the worksheet to edit from the worksheet list on the left.
Step 2: Select the column field you want to edit. Click the "" to the right of the column name, or right-click any cell in that column's data to open the column operation dropdown menu. Select “Rename”.
Step 3: The column name becomes editable. Enter the desired new column name. Double-clicking the column name will also make it editable.
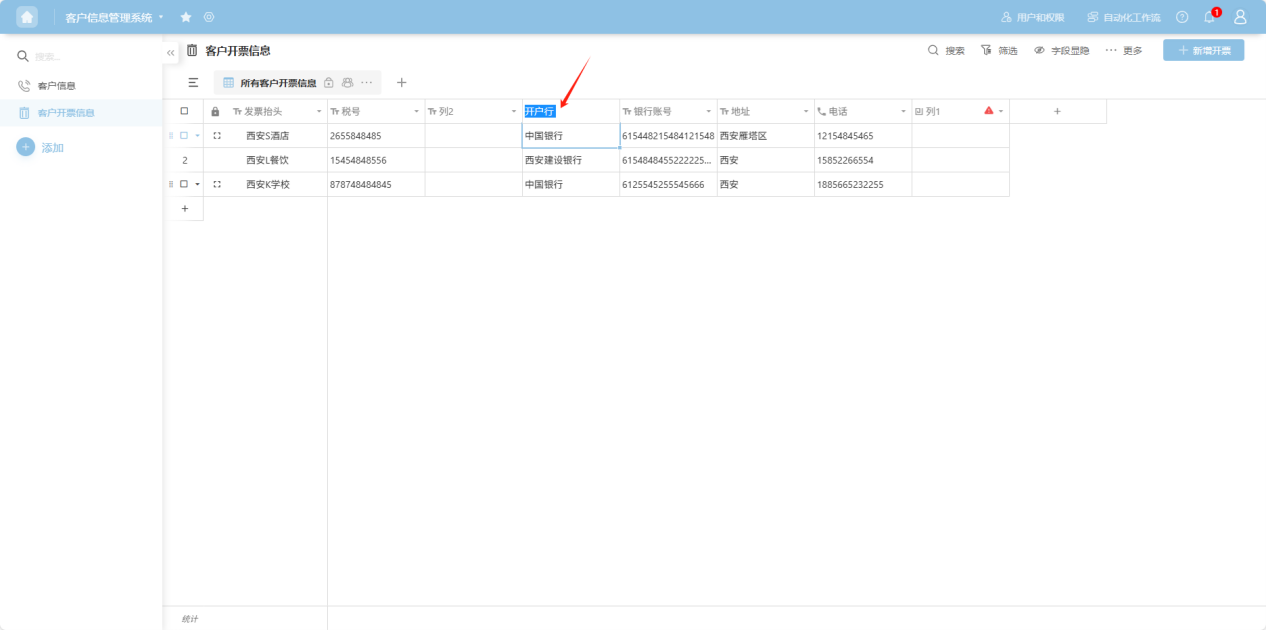
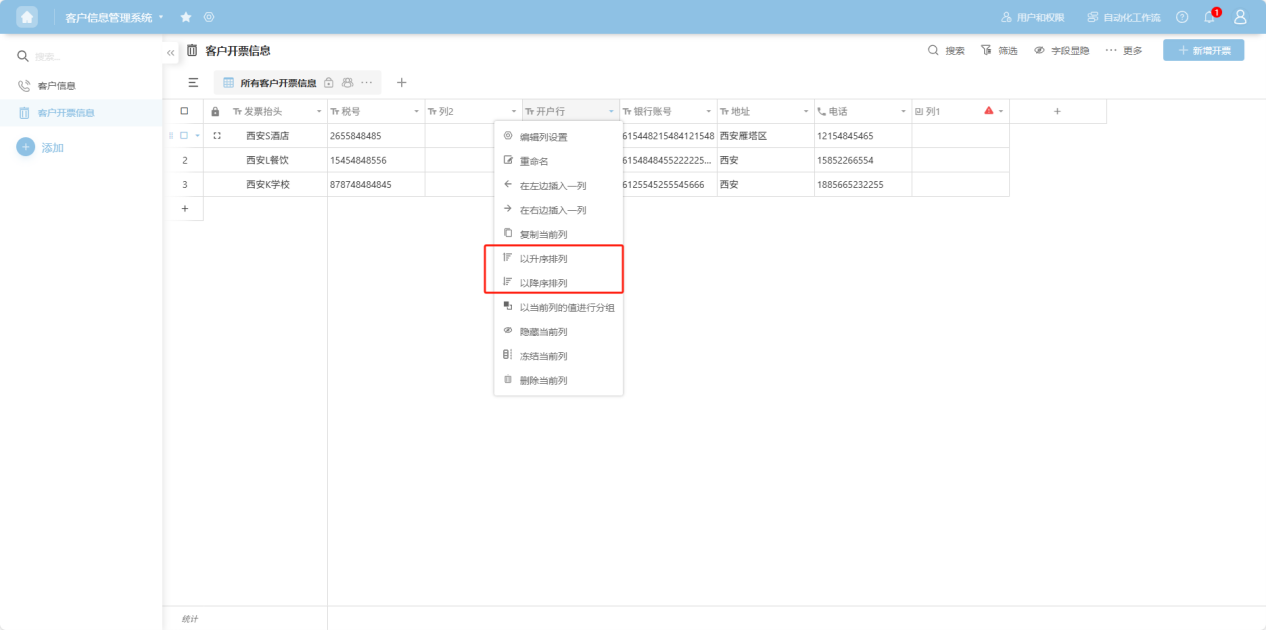
1.5 Sort Ascending/Descending
Step 1: From the app list on the left side of the workbench or the app cards under 'All Apps', enter the app whose worksheet you want to edit. Select the worksheet to edit from the worksheet list on the left.
Step 2: Select the column field you want to edit. Click the "" to the right of the column name, or right-click any cell in that column's data to open the column operation dropdown menu. Select “Sort A-Z” (Ascending) or “Sort Z-A” (Descending) to complete the action.
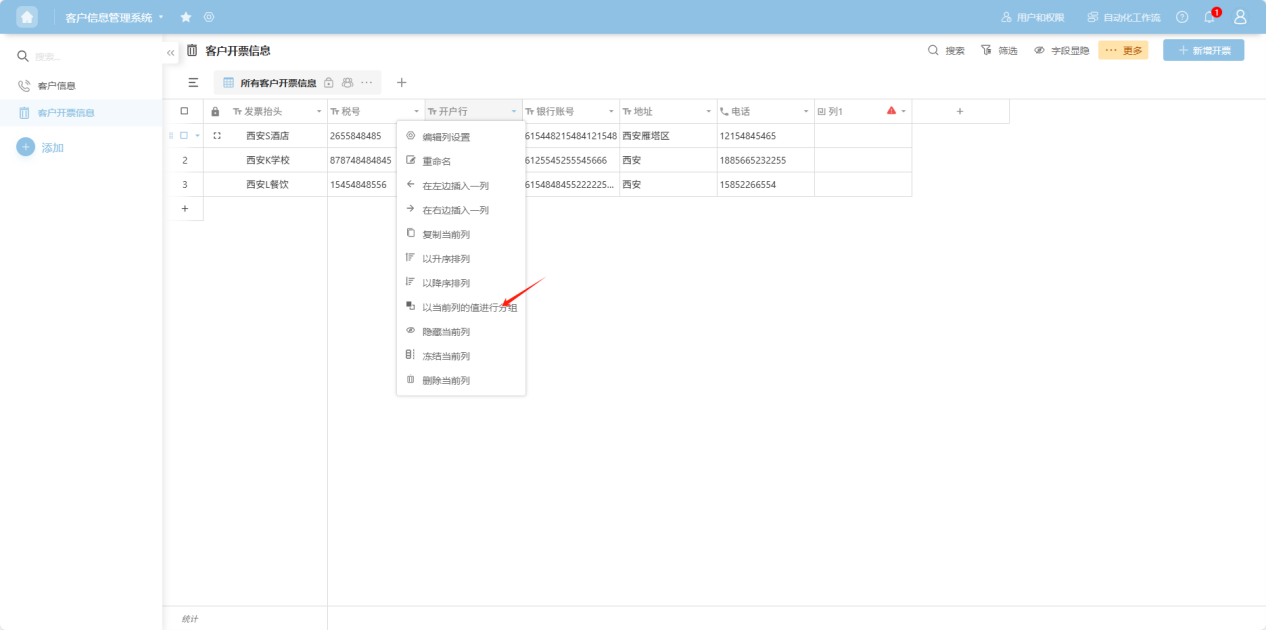
1.6 Group by This Column
Step 1: From the app list on the left side of the workbench or the app cards under 'All Apps', enter the app whose worksheet you want to edit. Select the worksheet to edit from the worksheet list on the left.
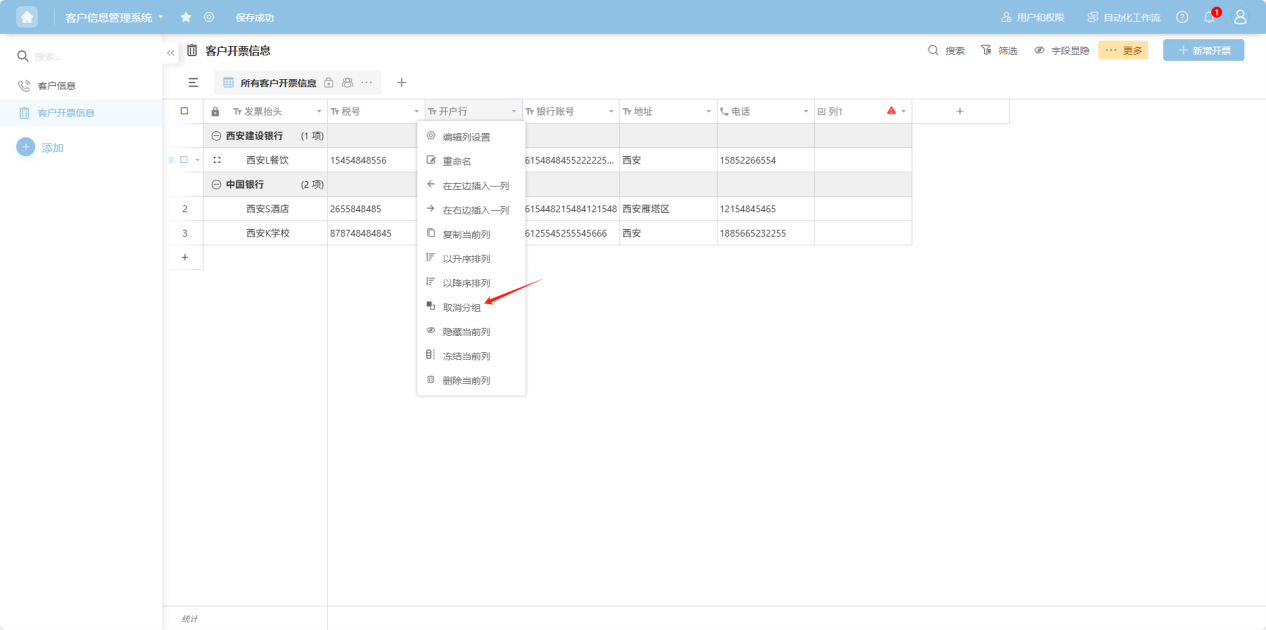
Step 2: Select the column field you want to edit. Click the "" to the right of the column name, or right-click any cell in that column's data to open the column operation dropdown menu. Select “Group by this column” to complete the action.
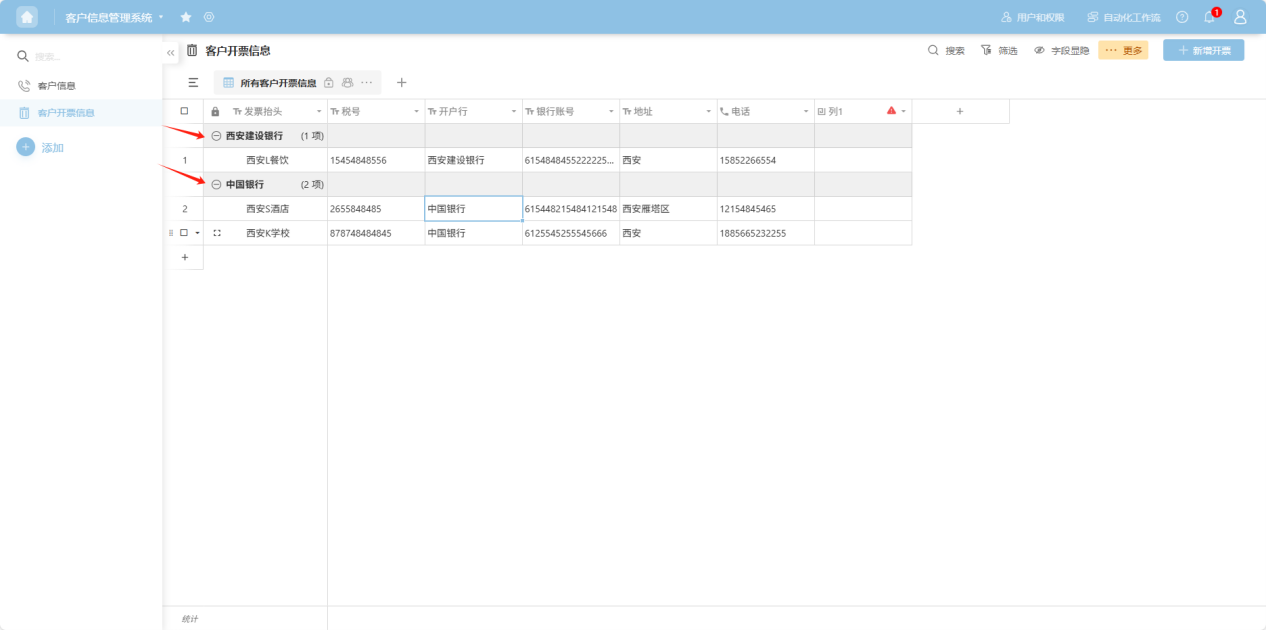
Step 3: To ungroup, select “Ungroup” from the column operation dropdown menu.
1.7 Drag Current Column
Step 1: From the app list on the left side of the workbench or the app cards under 'All Apps', enter the app whose worksheet you want to edit. Select the worksheet to edit from the worksheet list on the left.
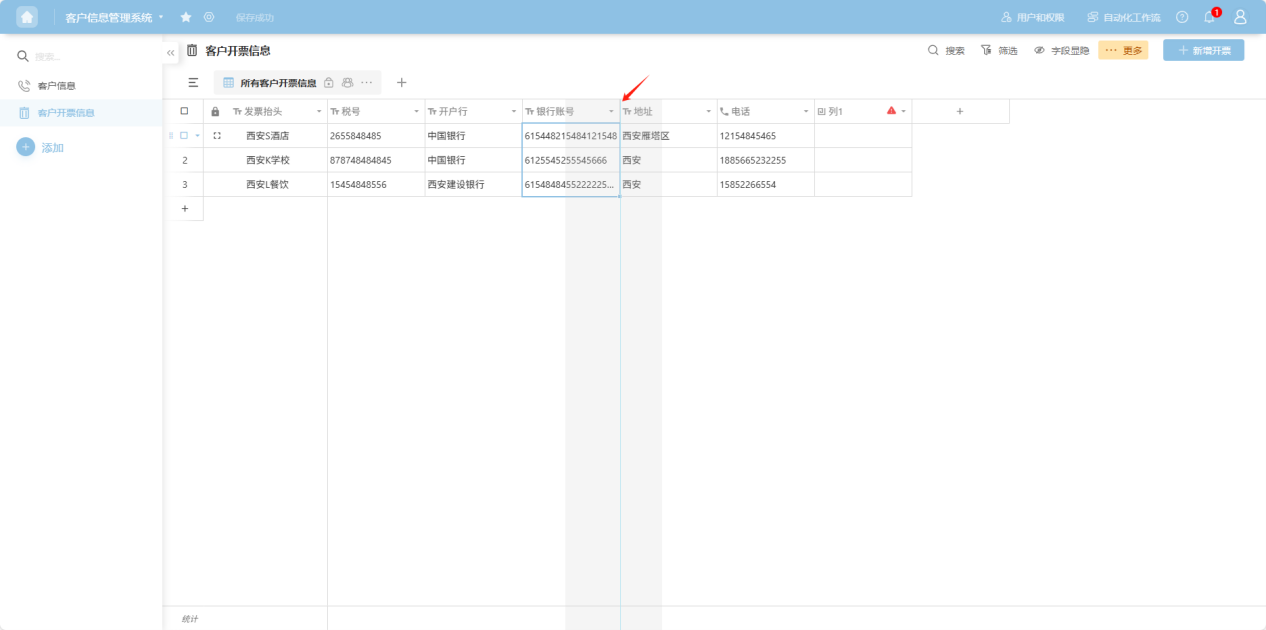
Step 2: Select the column field you want to move. Press and hold the left mouse button, then drag the column to the desired position based on the guide line.
1.8 Copy Current Column
Step 1: From the app list on the left side of the workbench or the app cards under 'All Apps', enter the app whose worksheet you want to edit. Select the worksheet to edit from the worksheet list on the left.
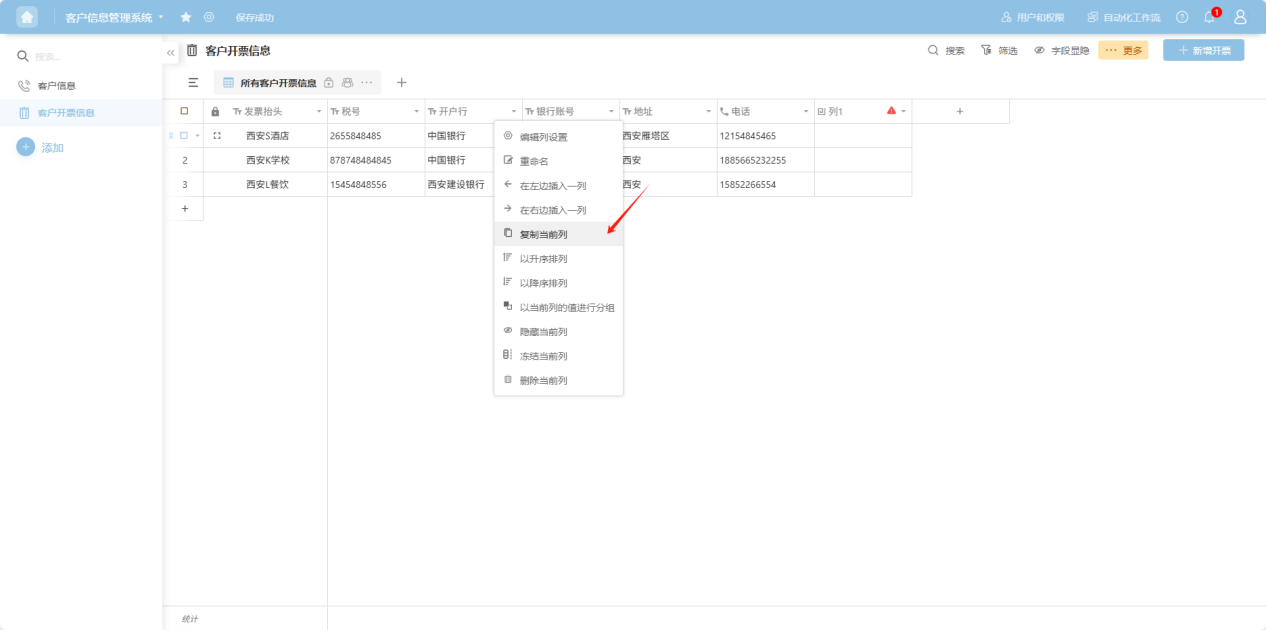
Step 2: Select the column field you want to edit. Click the "" to the right of the column name, or right-click any cell in that column's data to open the column operation dropdown menu. Select “Copy current column”.
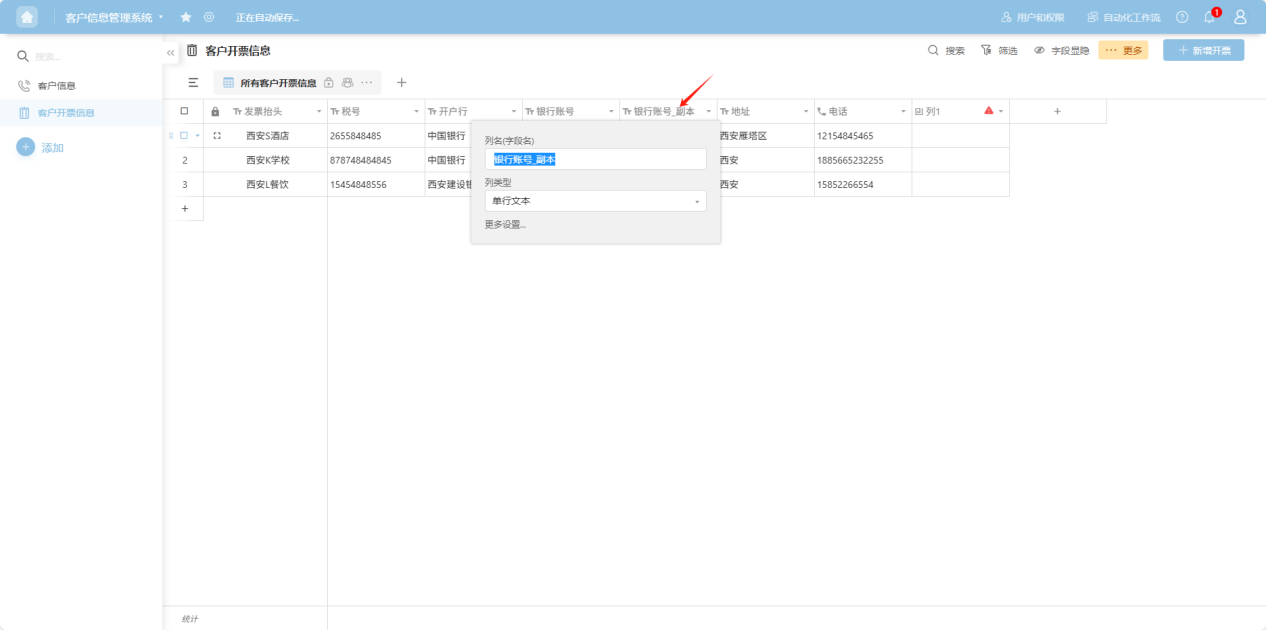
Step 3: The copied column appears as a duplicate to the right of the original column. In the pop-up column edit box, add a column name, select a column type, and configure the corresponding edit items for that column type. For detailed explanations of each column type, refer to the “1.3 Edit Column Settings” section.
1.9 Hide Current Column
Step 1: From the app list on the left side of the workbench or the app cards under 'All Apps', enter the app whose worksheet you want to edit. Select the worksheet to edit from the worksheet list on the left.
Step 2: Select the column field you want to edit. Click the "" to the right of the column name, or right-click any cell in that column's data to open the column operation dropdown menu. Select “Hide current column”. The column will disappear from the list.
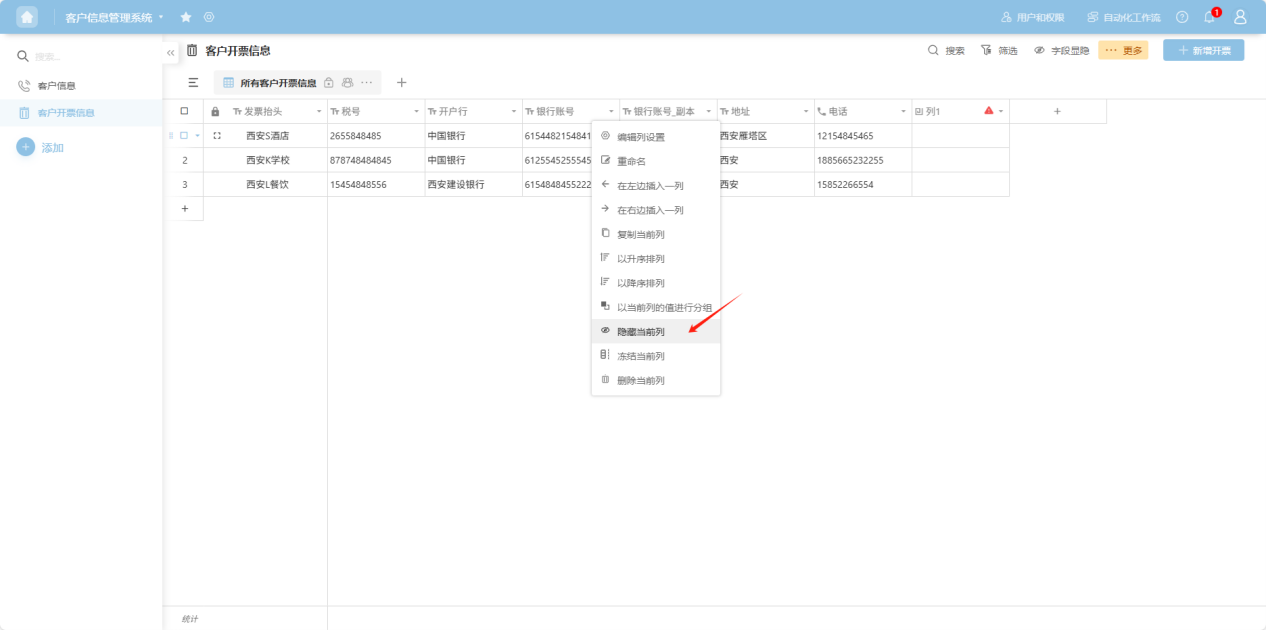
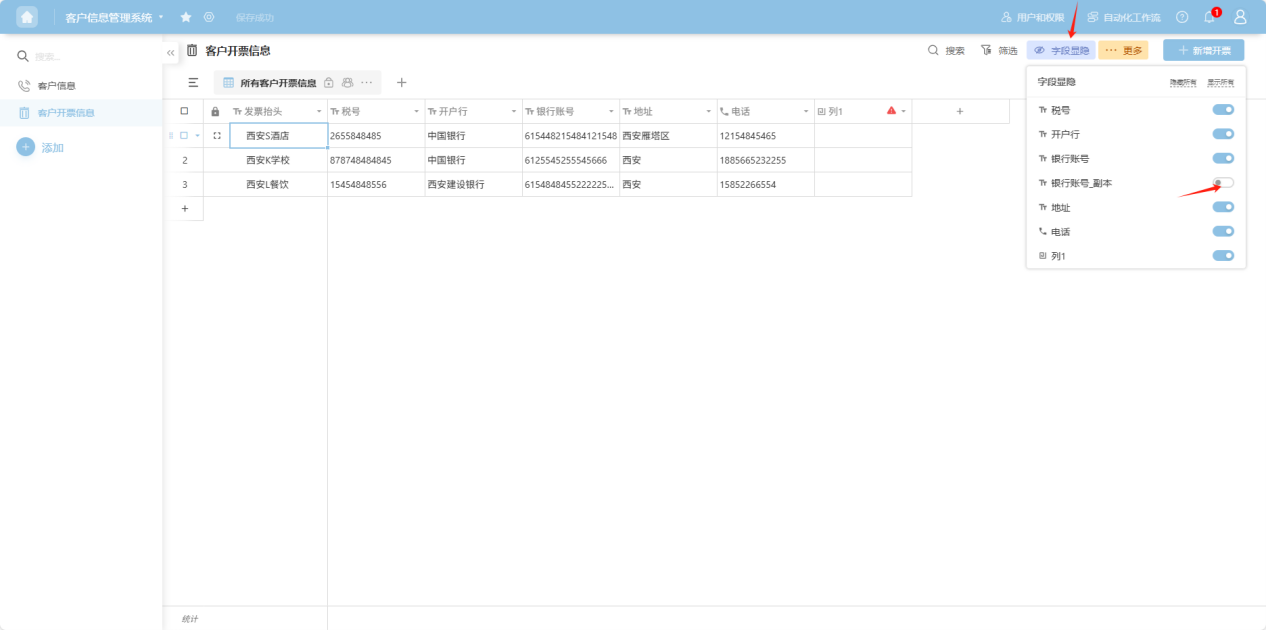
Step 3: Hidden columns can be restored via the "Show/Hide Fields" operation in the upper right corner of the table.
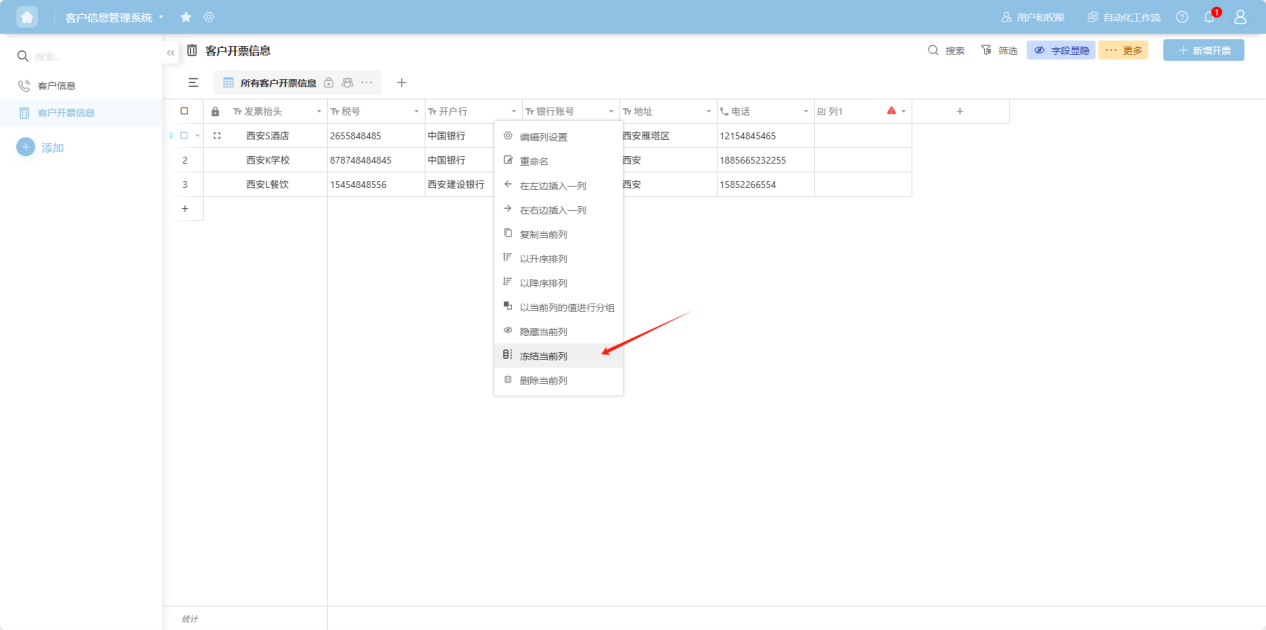
1.10 Freeze Current Column
Step 1: From the app list on the left side of the workbench or the app cards under 'All Apps', enter the app whose worksheet you want to edit. Select the worksheet to edit from the worksheet list on the left.
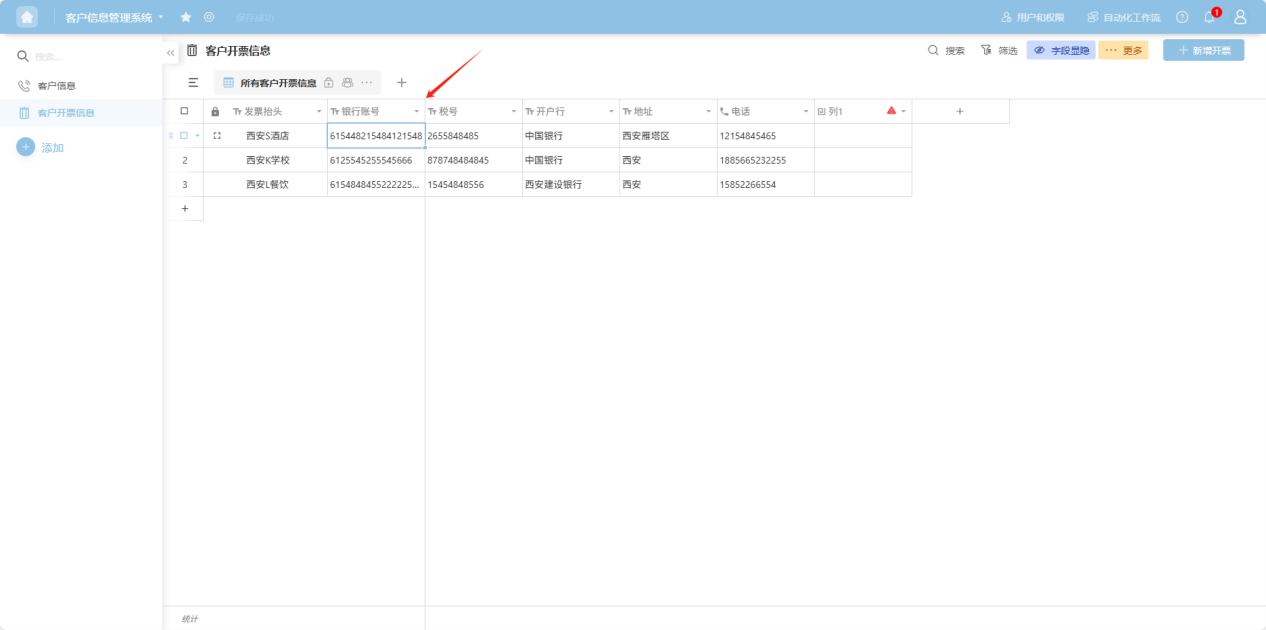
Step 2: Select the column field you want to edit. Click the "" to the right of the column name, or right-click any cell in that column's data to open the column operation dropdown menu. Select “Freeze current column”. The frozen column will be positioned to the left of the freeze line.
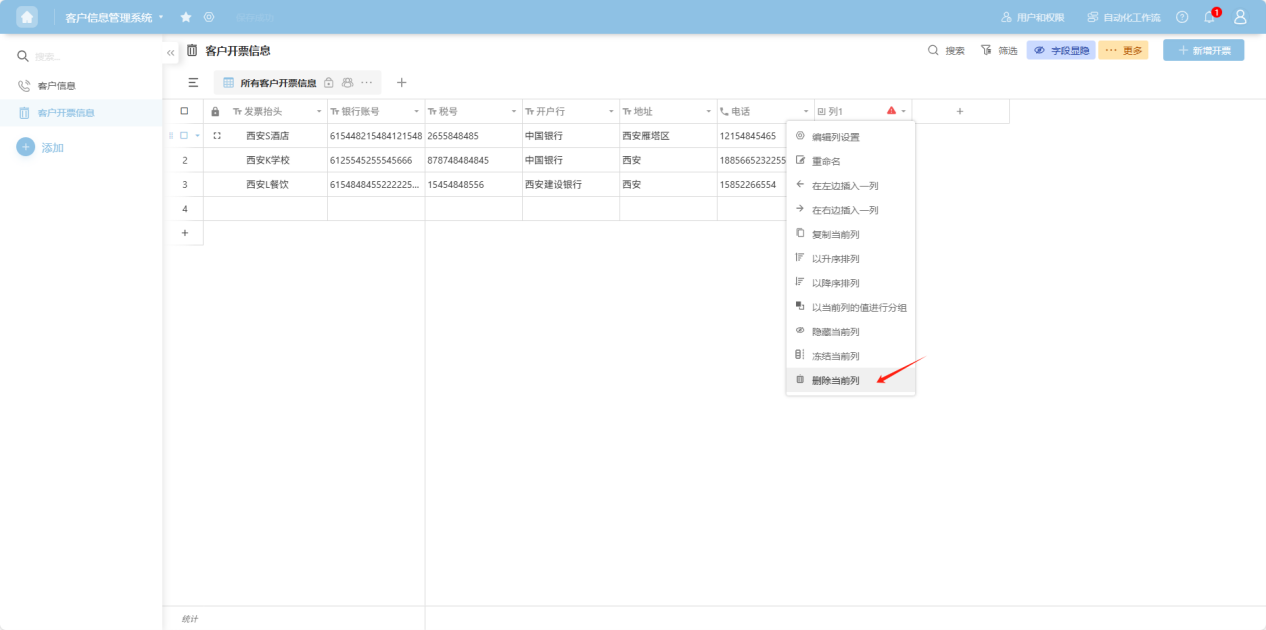
1.11 Delete Current Column
Step 1: From the app list on the left side of the workbench or the app cards under 'All Apps', enter the app whose worksheet you want to edit. Select the worksheet to edit from the worksheet list on the left.
Step 2: Select the column field you want to edit. Click the "" to the right of the column name, or right-click any cell in that column's data to open the column operation dropdown menu. Select “Delete current column”. After confirming the deletion, the column will disappear from the worksheet. This action cannot be undone, so please proceed with caution!
2. Operating on Entire Rows of Data
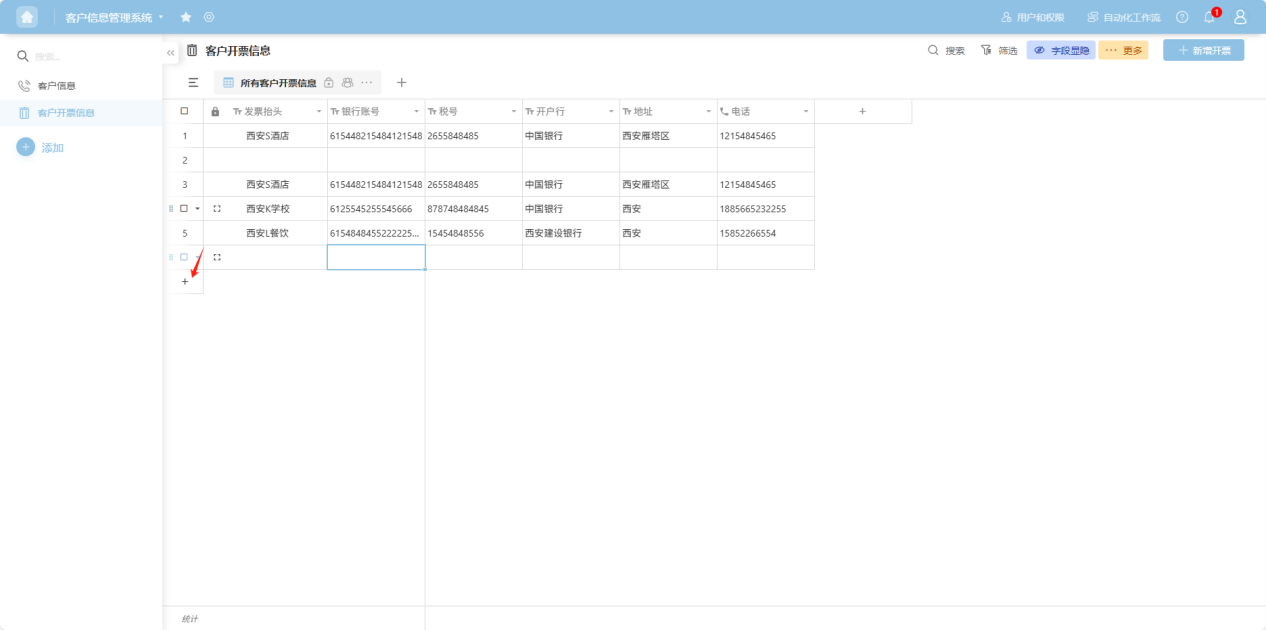
2.1 Insert a Row
Step 1: From the app list on the left side of the workbench or the app cards under 'All Apps', enter the app whose worksheet you want to edit. Select the worksheet to edit from the worksheet list on the left.
Step 2: Click the ”+“ below the last row of data to add a blank row.
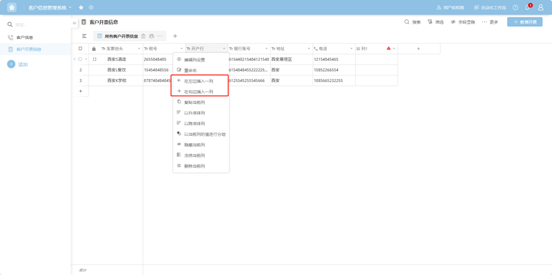
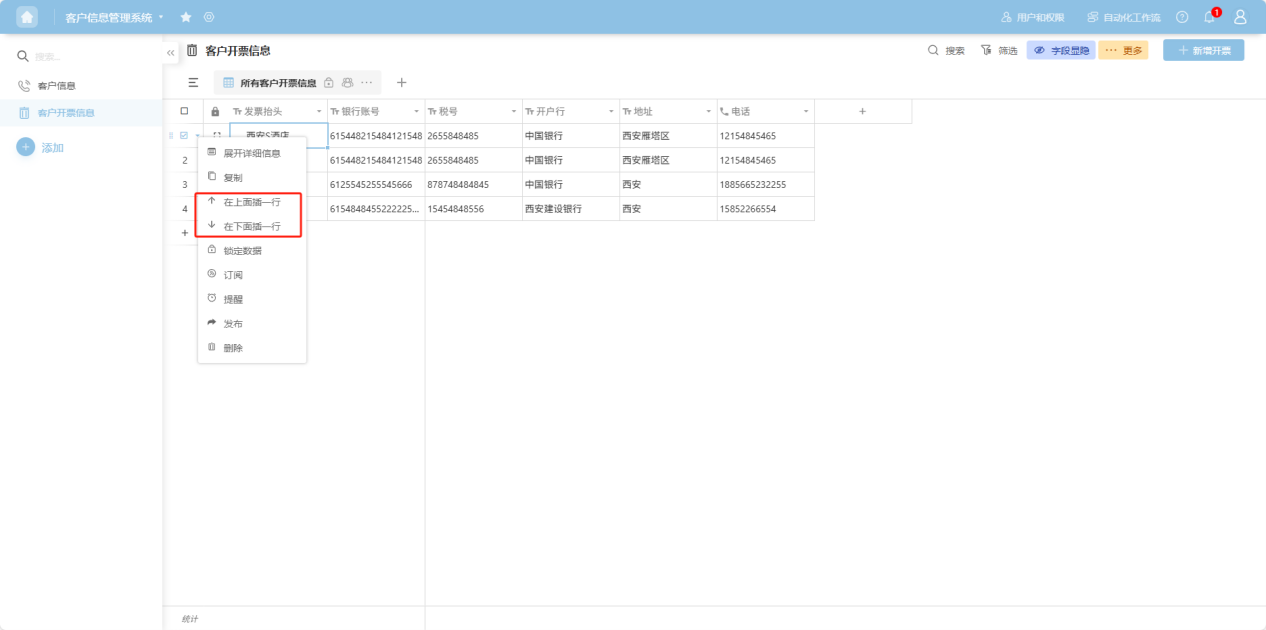
2.2 Insert a Row Above/Below
Step 1: From the app list on the left side of the workbench or the app cards under 'All Apps', enter the app whose worksheet you want to edit. Select the worksheet to edit from the worksheet list on the left.
Step 2: Select the row you want to edit. Click the "" to the left of the row checkbox, or right-click any cell in that row's data to open the row operation dropdown menu. Select “Insert row above/below” to insert the row.
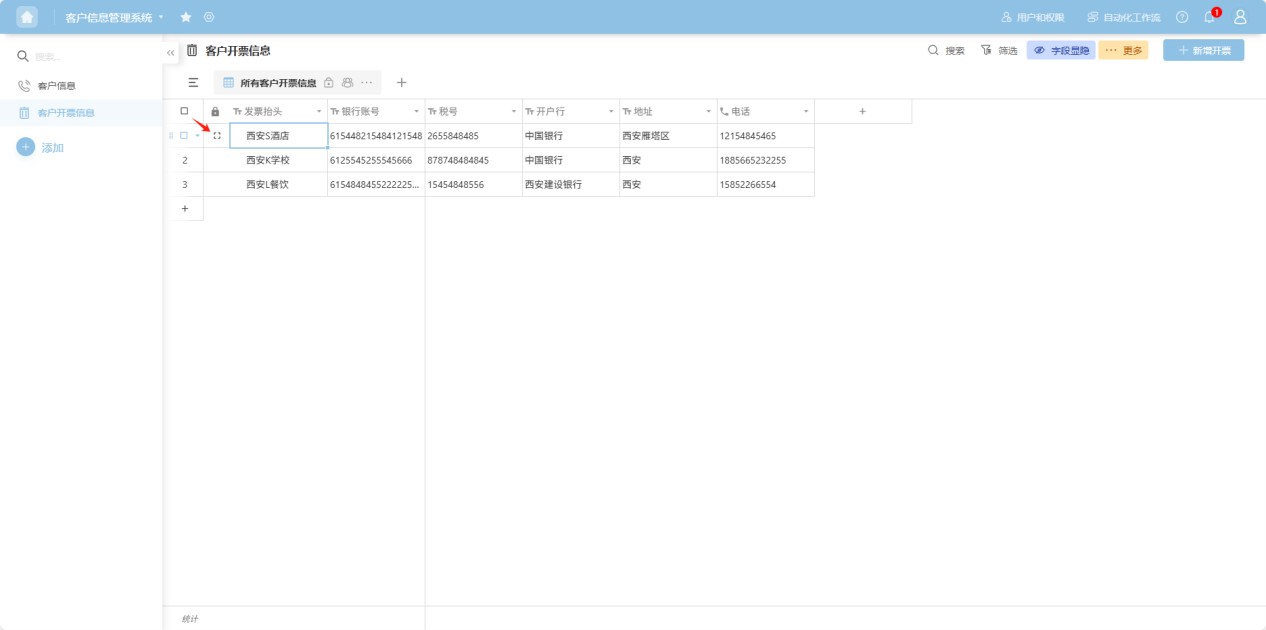
2.3 Expand Details
Step 1: From the app list on the left side of the workbench or the app cards under 'All Apps', enter the app whose worksheet you want to edit. Select the worksheet to edit from the worksheet list on the left.
Step 2: Select the row you want to view.
- Click the "" to the left of the row checkbox, or right-click any cell in that row's data to open the row operation dropdown menu, and select “Expand details”.
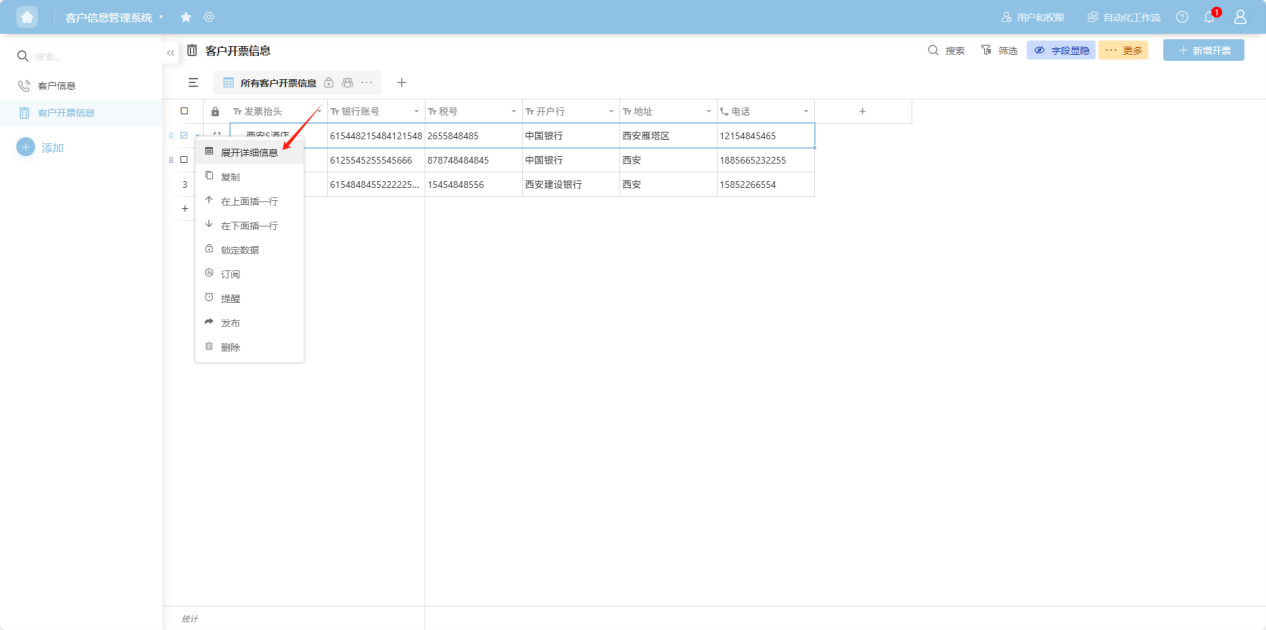
- Click the "
 ” to the right of the row checkbox.
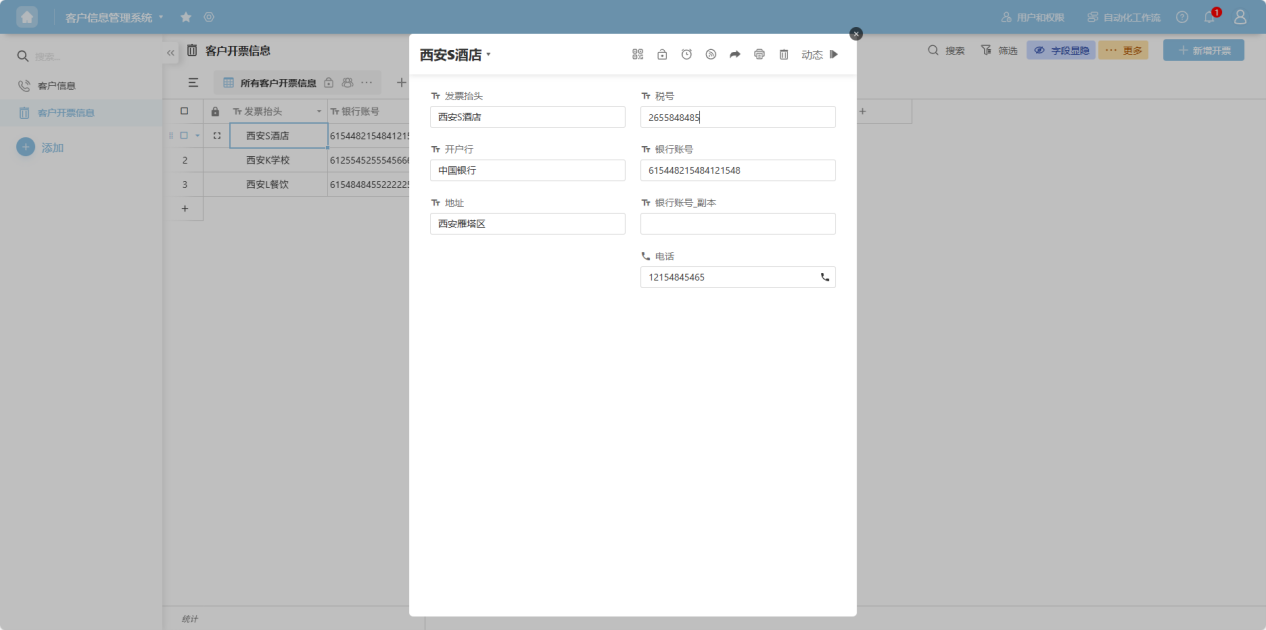
Step 3: The row details view opens. On this page, you can perform operations such as editing, locking, setting reminders, subscribing, publishing, printing, and deleting the row data, each explained in the following sections.
” to the right of the row checkbox.
Step 3: The row details view opens. On this page, you can perform operations such as editing, locking, setting reminders, subscribing, publishing, printing, and deleting the row data, each explained in the following sections.
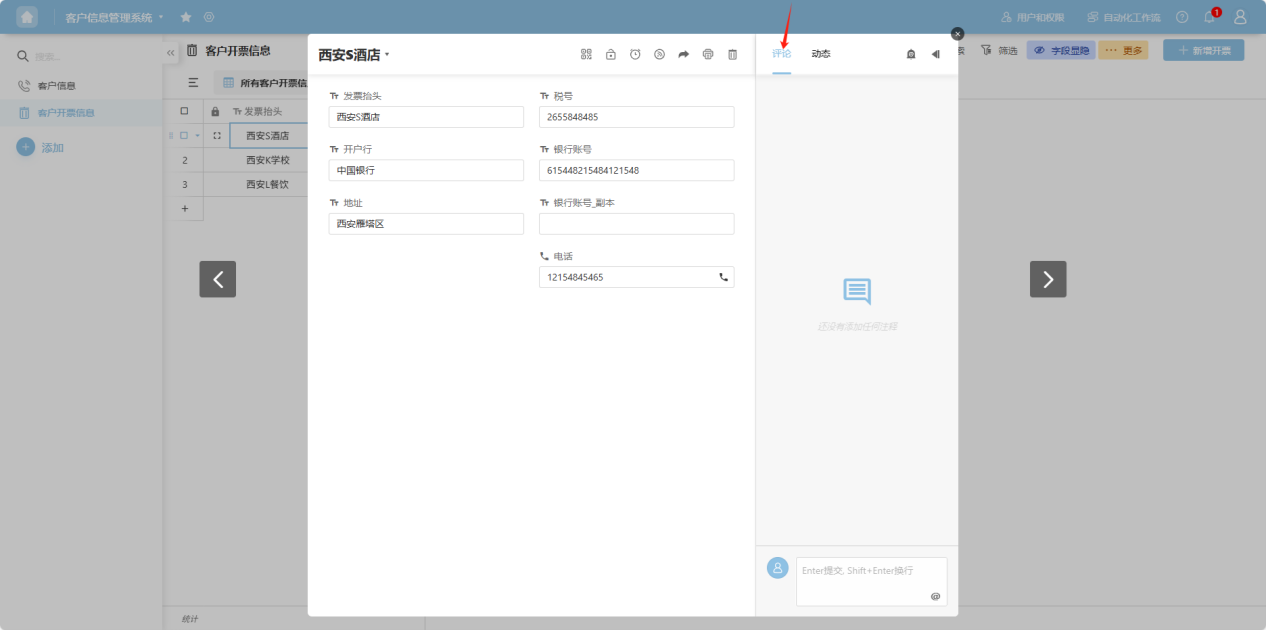
2.4 Comments
Step 1: From the app list on the left side of the workbench or the app cards under 'All Apps', enter the app whose worksheet you want to edit. Select the worksheet to edit from the worksheet list on the left.
Step 2: Select the row you want to edit. Click the "" to the left of the row checkbox, or right-click any cell in that row's data to open the row operation dropdown menu. Select “Expand details” or click the "” to the right of the row checkbox.
Step 3: On the opened details page, select the “Comments” tab to view comments from collaborators on this row of data, enabling instant communication.
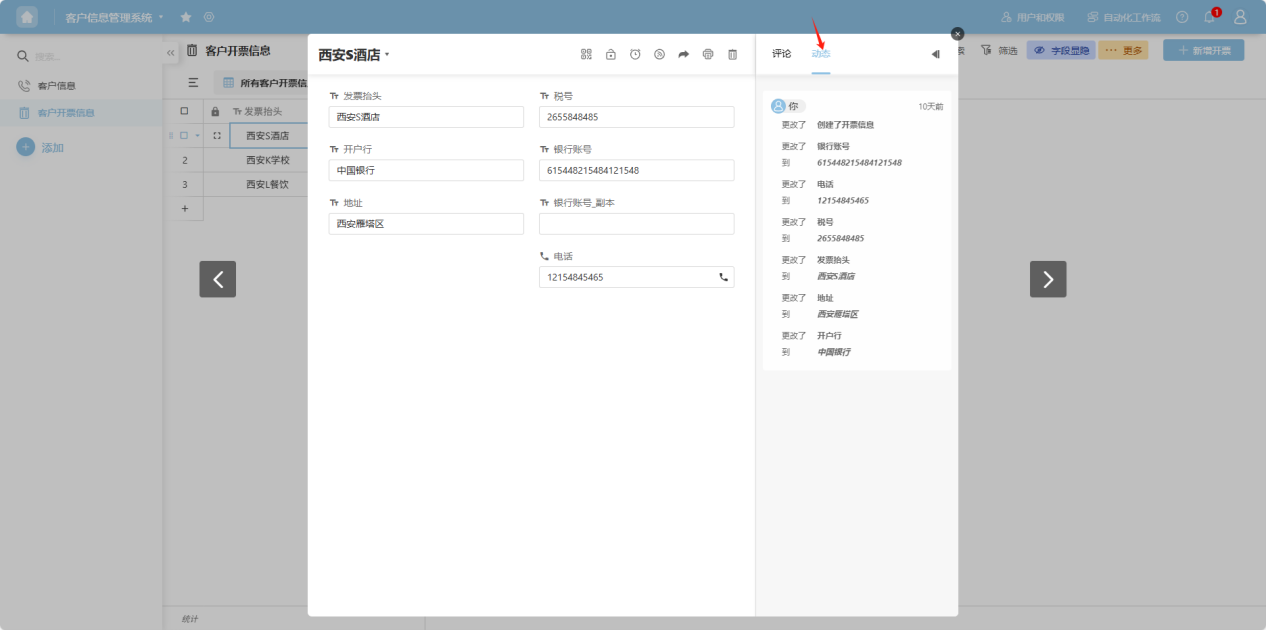
2.5 Activity
Step 1: From the app list on the left side of the workbench or the app cards under 'All Apps', enter the app whose worksheet you want to edit. Select the worksheet to edit from the worksheet list on the left.
Step 2: Select the row you want to view. Click the "" to the left of the row checkbox to open the row operation dropdown menu. Select “Expand details” or click the "” to the right of the row checkbox.
Step 3: On the opened details page, select the “Activity” tab to view the operation history for this row of data.
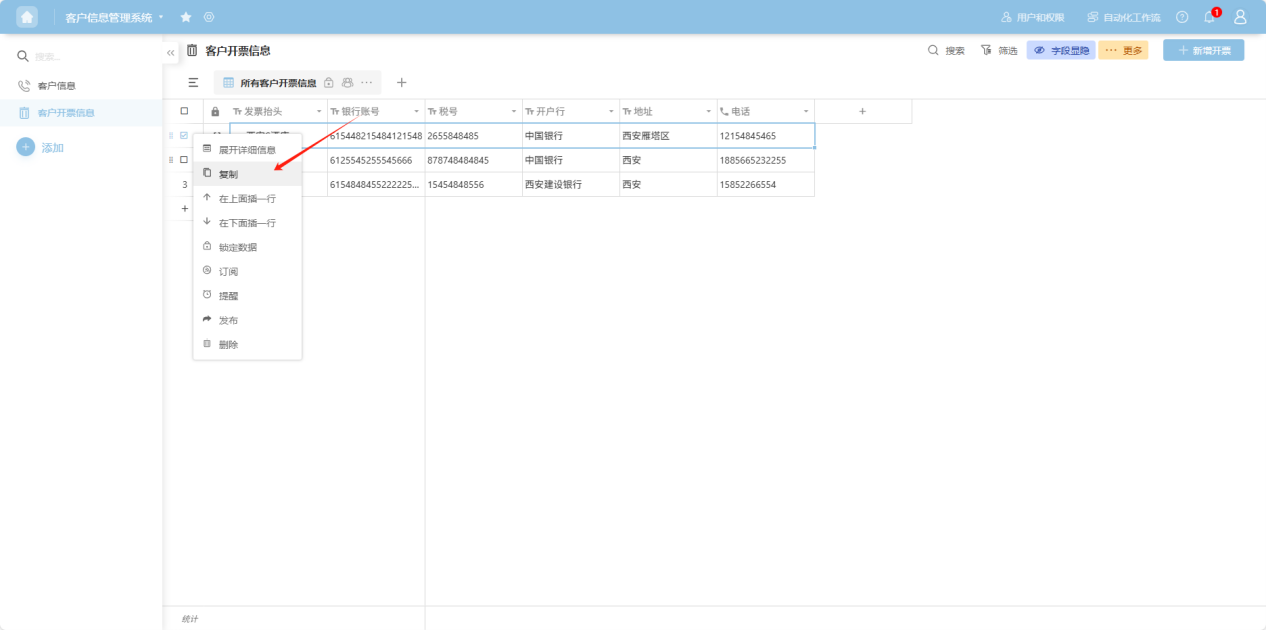
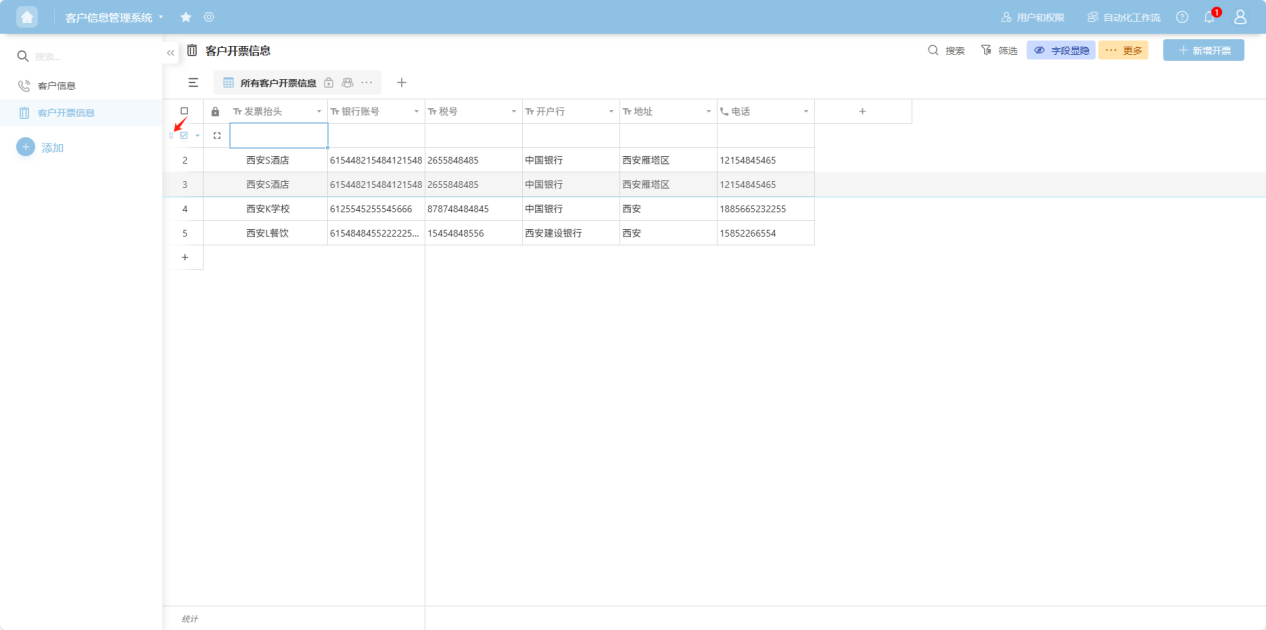
2.6 Copy
Step 1: From the app list on the left side of the workbench or the app cards under 'All Apps', enter the app whose worksheet you want to edit. Select the worksheet to edit from the worksheet list on the left.
Step 2: Select the row you want to edit. Click the “” to the left of the row checkbox, or right-click any cell in that row's data to open the row operation dropdown menu. Select “Copy”.
Step 3: The copied row appears as a duplicate above the original row.
2.7 Drag
Step 1: From the app list on the left side of the workbench or the app cards under 'All Apps', enter the app whose worksheet you want to edit. Select the worksheet to edit from the worksheet list on the left.
Step 2: Select the row you want to move. Click the “ ” drag handle to the left of the row checkbox, press and hold the left mouse button, then drag the row to the desired position based on the guide line.

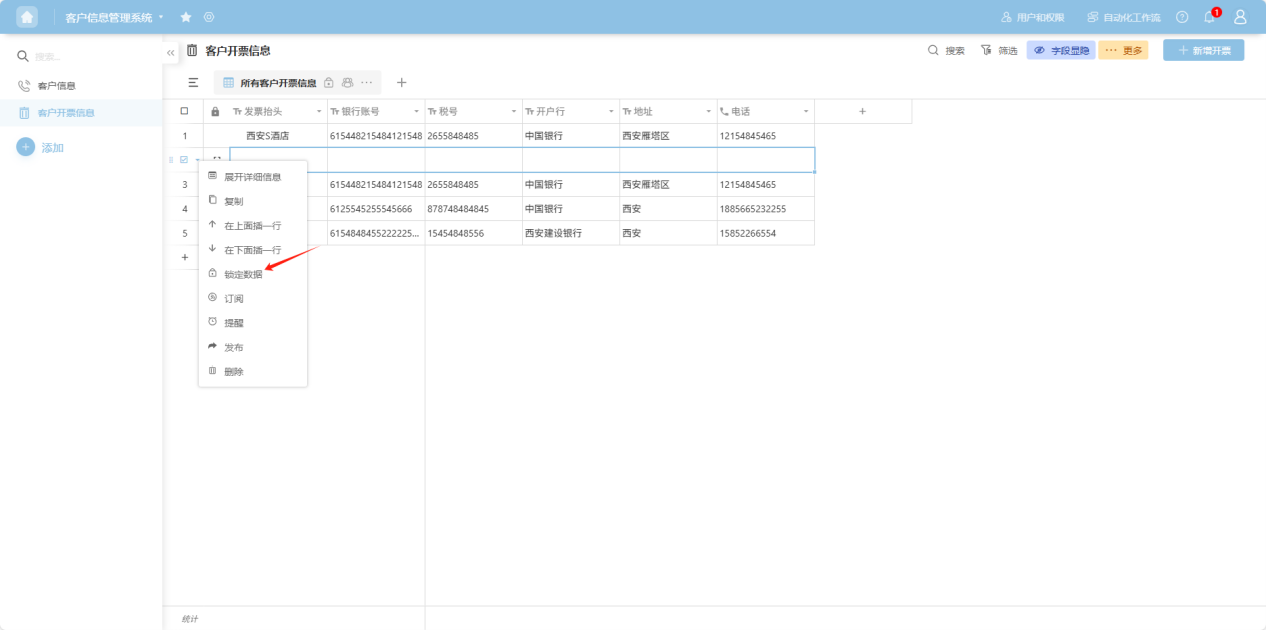
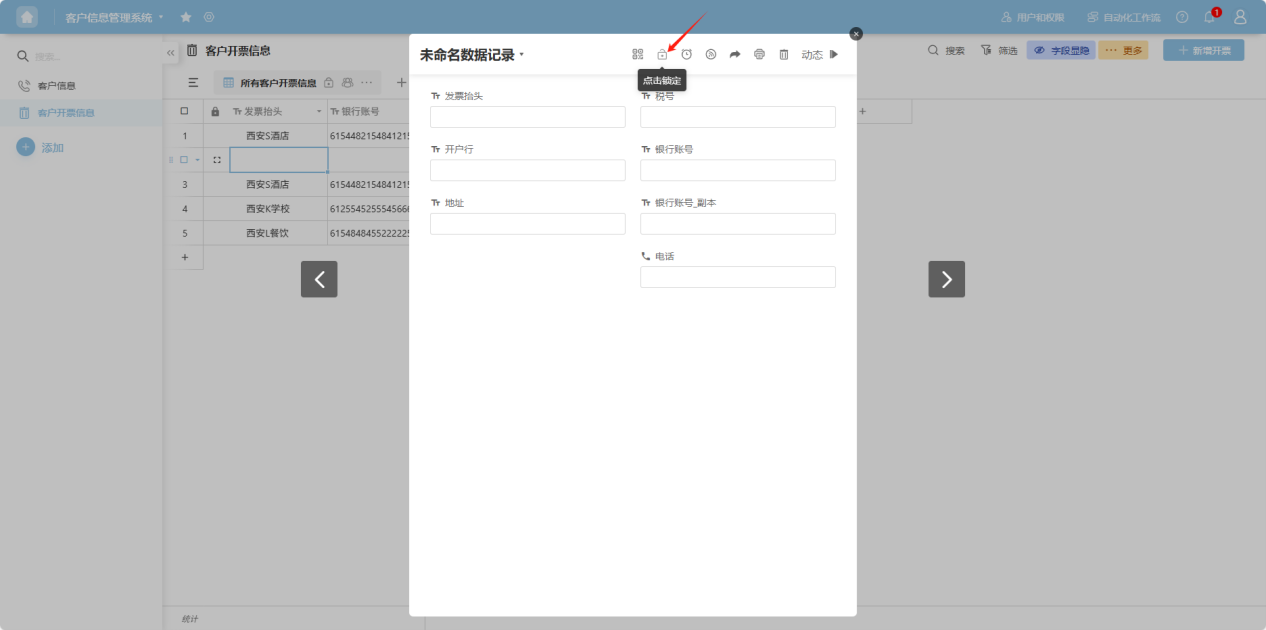
2.8 Lock Data
Step 1: From the app list on the left side of the workbench or the app cards under 'All Apps', enter the app whose worksheet you want to edit. Select the worksheet to edit from the worksheet list on the left.
Step 2: Select the row you want to edit. Click the “” to the left of the row checkbox, or right-click any cell in that row's data to open the row operation dropdown menu. Select “Lock data”. Alternatively, in the “Row Details” view, click the “ ” (Unlock) icon to lock the row (clicking again will unlock it).
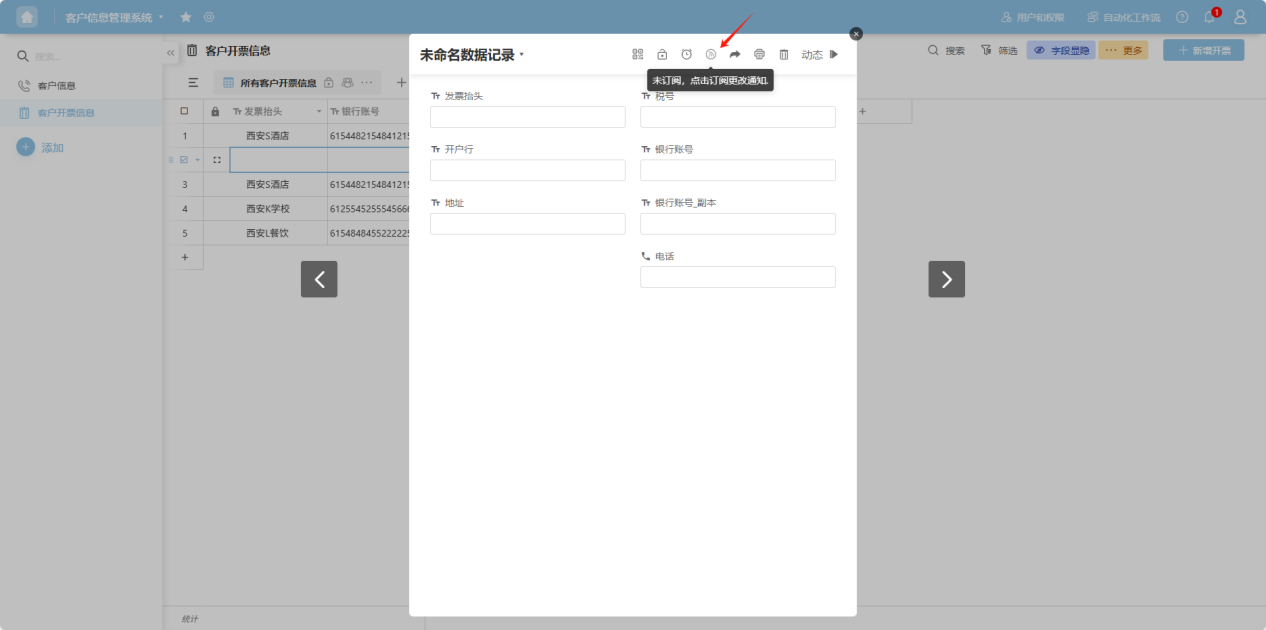
2.9 Subscribe
Step 1: From the app list on the left side of the workbench or the app cards under 'All Apps', enter the app whose worksheet you want to edit. Select the worksheet to edit from the worksheet list on the left.
Step 2: Select the row you want to edit. Click the “” to the left of the row checkbox, or right-click any cell in that row's data to open the row operation dropdown menu. Select “Subscribe”. Alternatively, in the “Row Details” view, click the “ ” (Subscription) icon to subscribe to the row. Notifications will be sent when this row's data changes. Click again to unsubscribe.

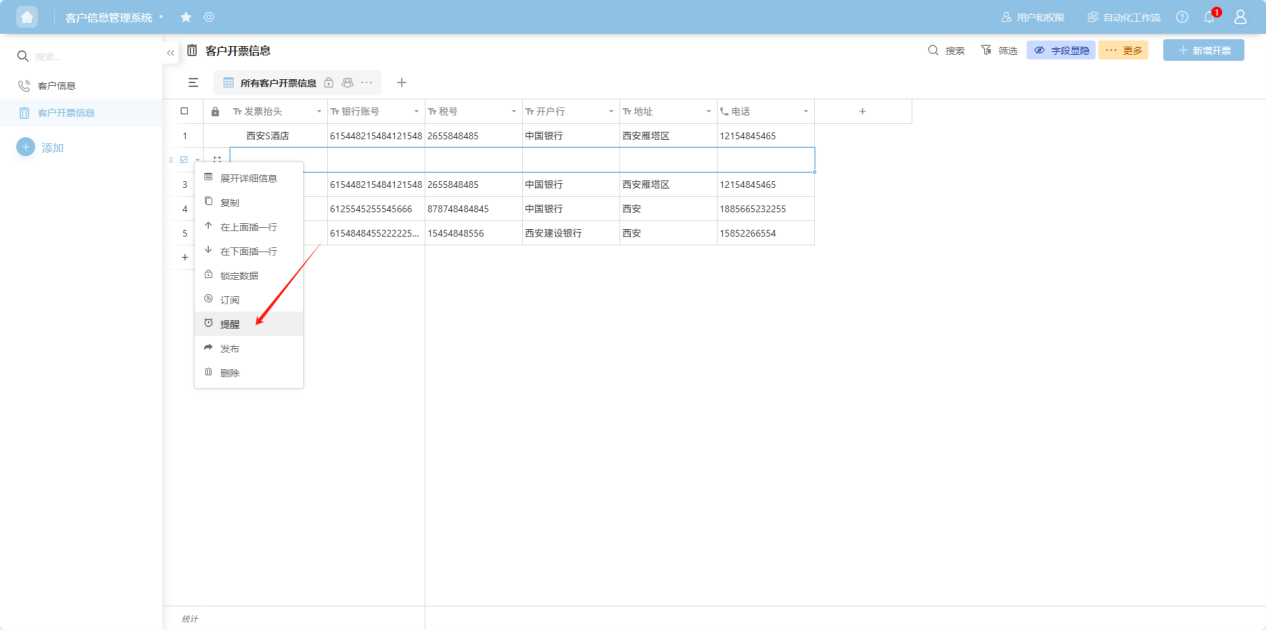
2.10 Reminder
Step 1: From the app list on the left side of the workbench or the app cards under 'All Apps', enter the app whose worksheet you want to edit. Select the worksheet to edit from the worksheet list on the left.
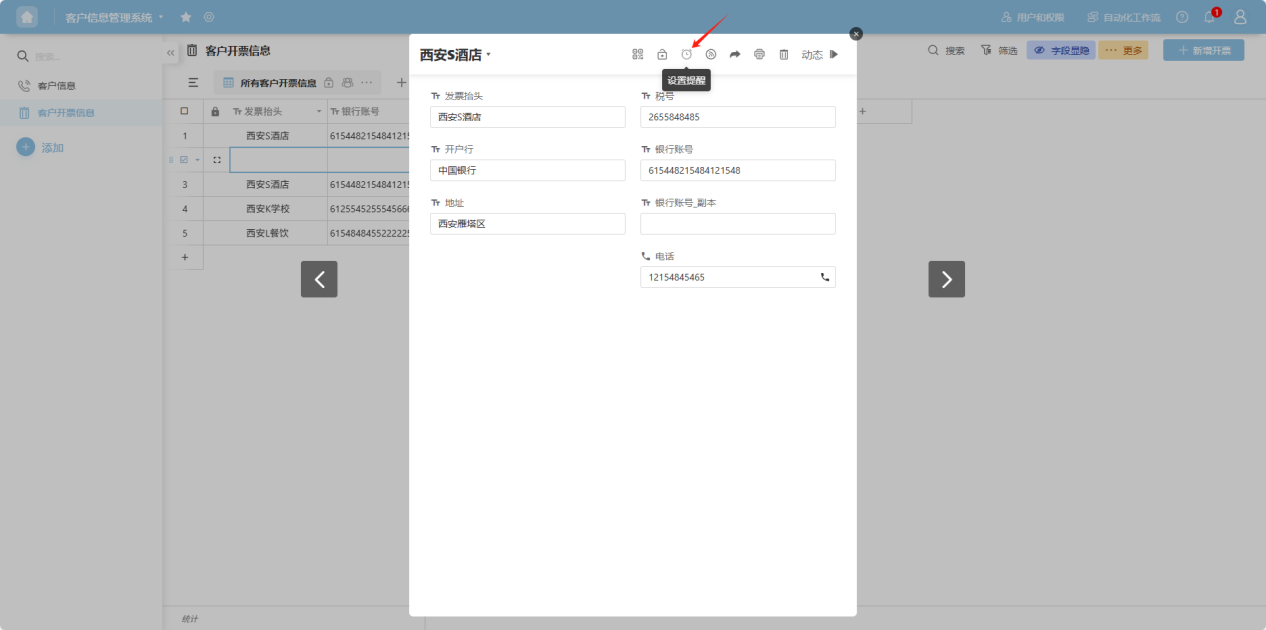
Step 2: Select the row you want to edit. Click the “” to the left of the row checkbox, or right-click any cell in that row's data to open the row operation dropdown menu. Select “Set reminder”. Alternatively, in the “Row Details” view, click the “ ” (Reminder) icon.
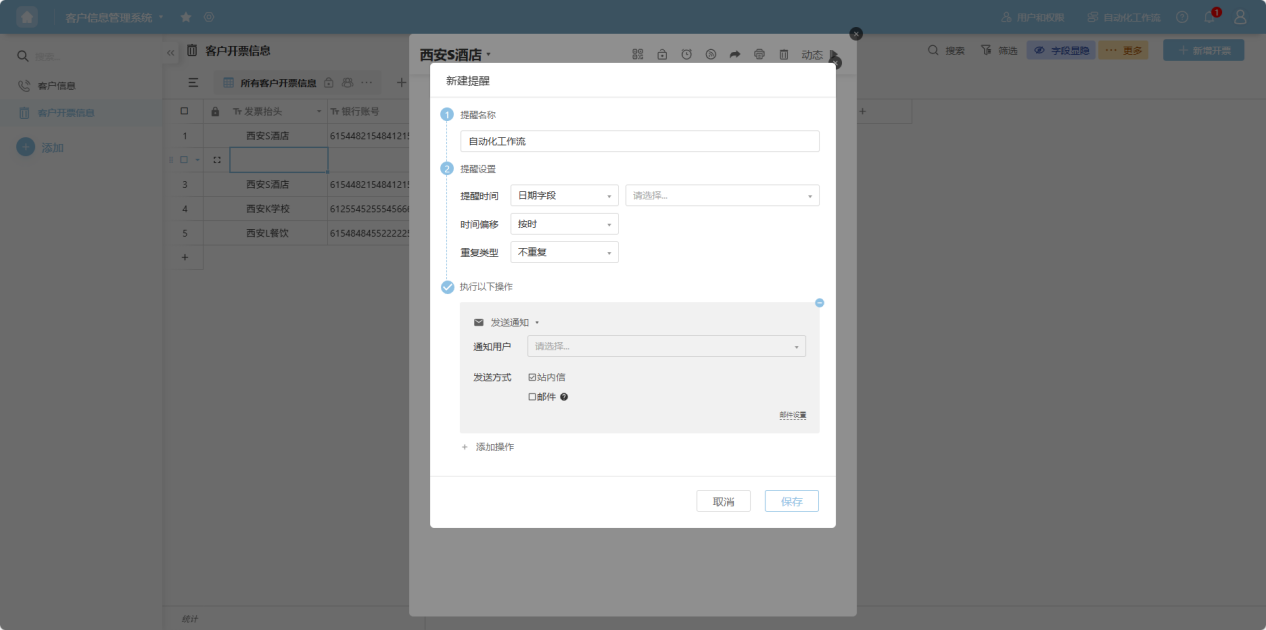
Step 3: In the pop-up window that opens, configure the reminder rules.
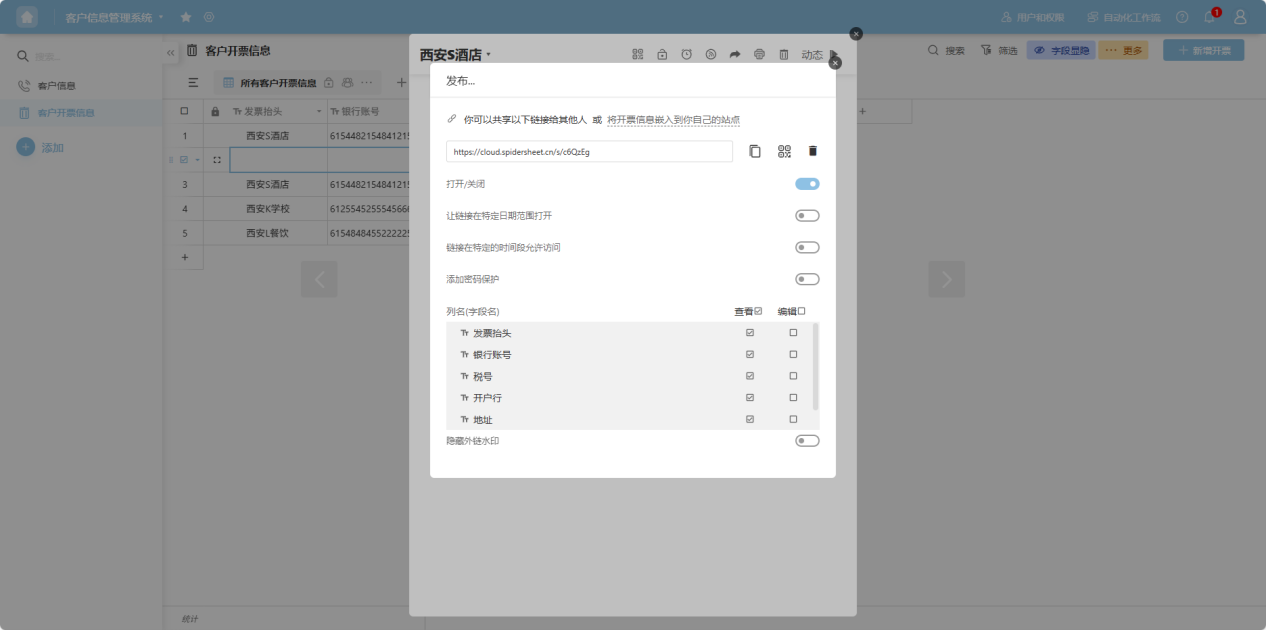
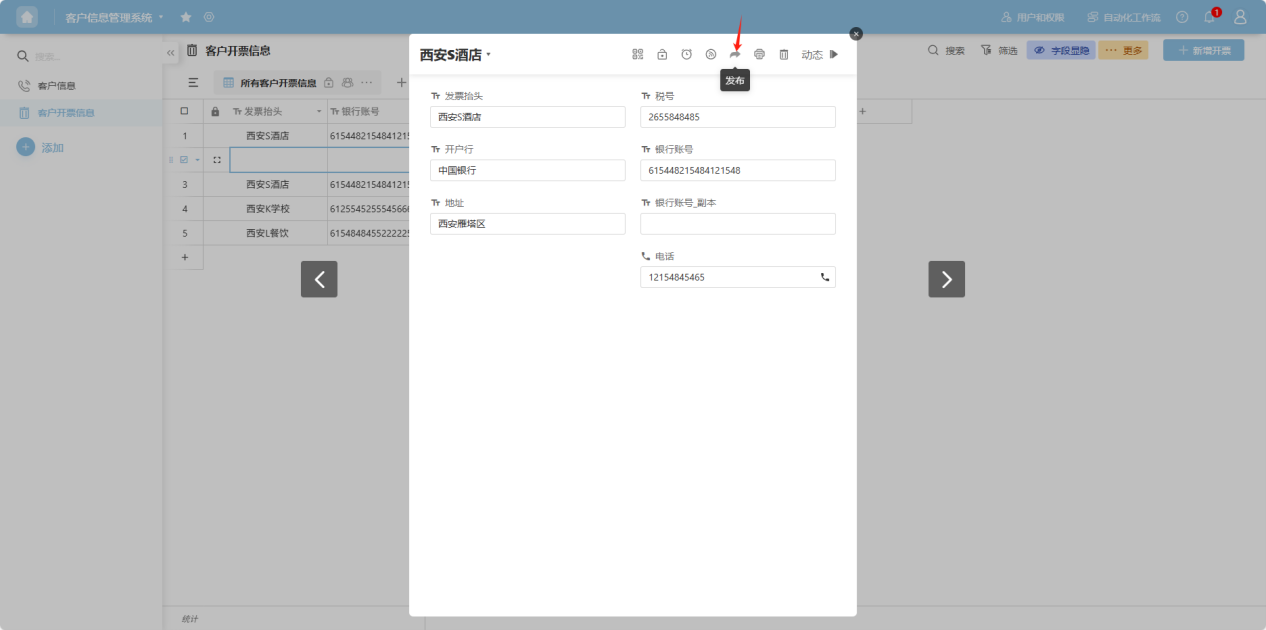
2.11 Publish
Step 1: From the app list on the left side of the workbench or the app cards under 'All Apps', enter the app whose worksheet you want to edit. Select the worksheet to edit from the worksheet list on the left.
Step 2: Select the row you want to edit. Click the “” to the left of the row checkbox, or right-click any cell in that row's data to open the row operation dropdown menu. Select “Publish”. Alternatively, in the “Row Details” view, click the “ ” (Publish) icon.
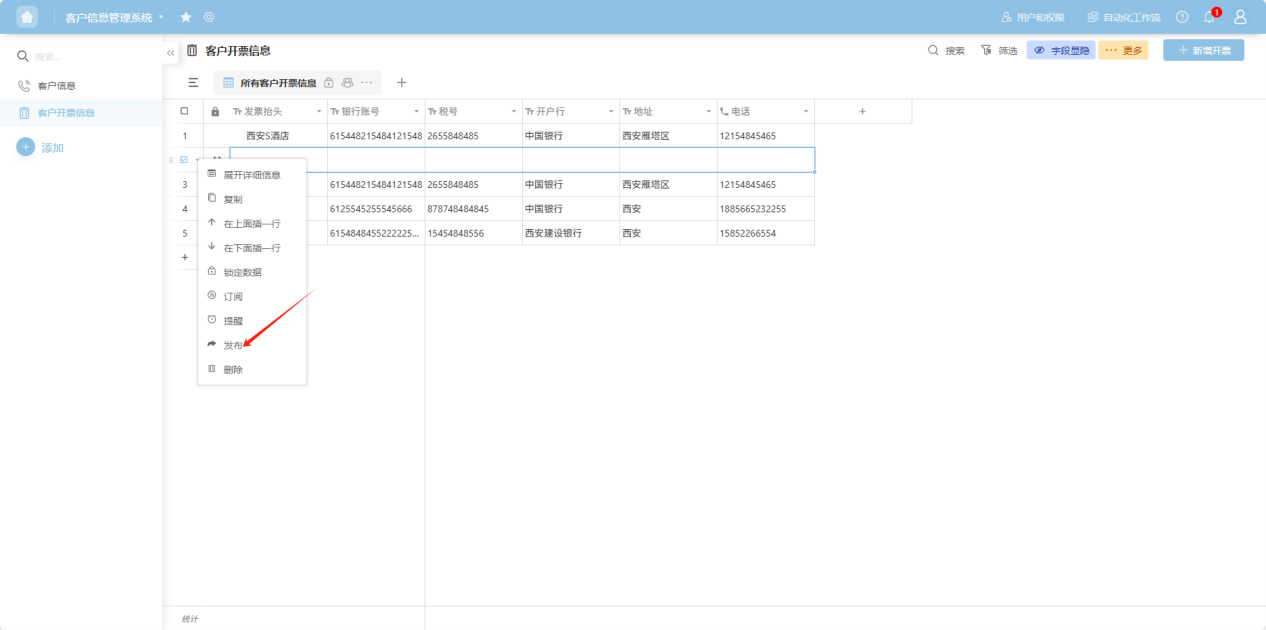
Step 3: In the pop-up window that opens, configure the publishing rules.
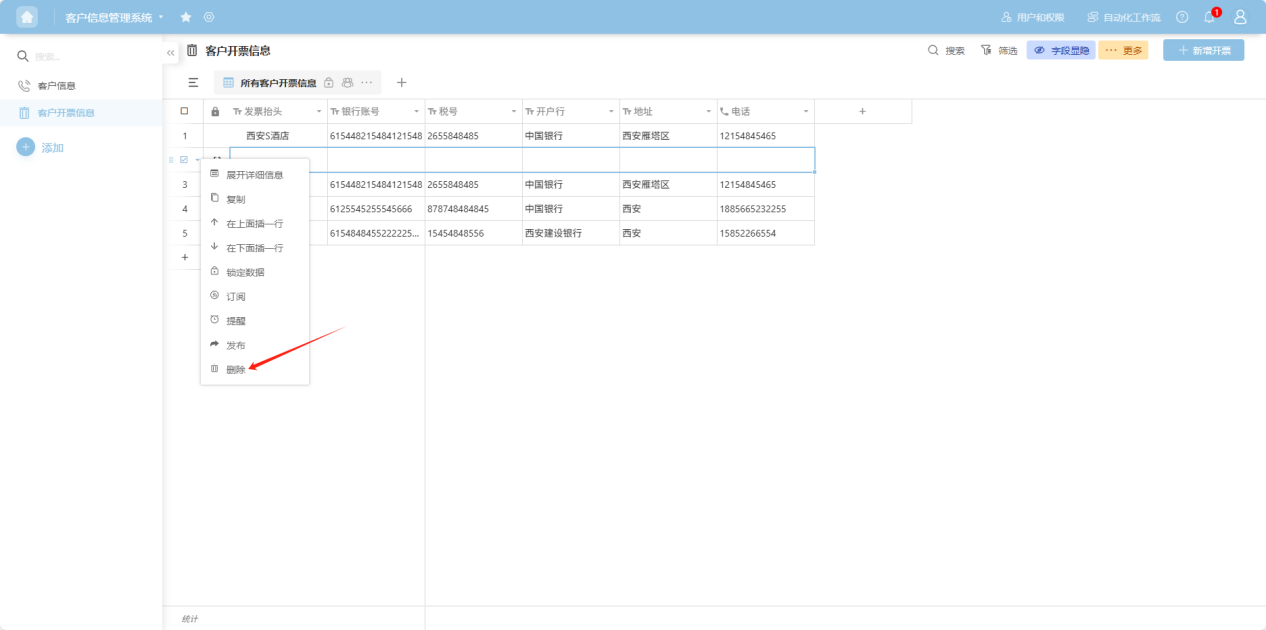
2.12 Delete Row
Step 1: From the app list on the left side of the workbench or the app cards under 'All Apps', enter the app whose worksheet you want to edit. Select the worksheet to edit from the worksheet list on the left.
Step 2: Select the row you want to edit. Click the “” to the left of the row checkbox, or right-click any cell in that row's data to open the row operation dropdown menu. Select “Delete”. Alternatively, in the “Row Details” view, click the “ ” (Delete) icon to delete the row data.